Chocolate Heaven Pie & Tools of the Pie Trade

Friday, October 30, 2009
I'm including this post in Michael's Foodie Friday at Designs by Gollum. Thanks for hosting Michael!


Quick reminder to get entered in for my giveaway...only a few short days left.

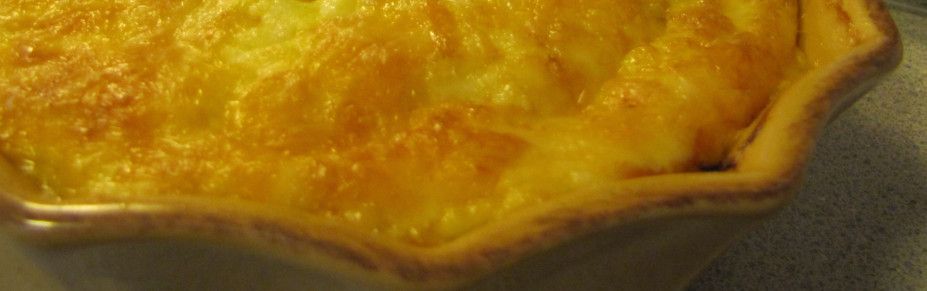
Chocolate pie was a staple in my grandma's holiday baking. Everyone loved her chocolate pie...especially my Uncle Ricky. Grandma didn't keep recipes or even own a cookbook and no one really knows how she made those fabulous pies. Whenever I see a recipe I am always compelled to give it a try. Usually there is no measuring up but this recipe from Farmhand's Favorite Pies is pretty close. The authors note is that the better the chocolate you use, the better your pie will be. I used the Scharffen Berger chocolate that foodie son give me for my birthday last month. The pie lived up to it's name and my memories.


Chocolate Heaven Cream Pie

¼ c Dutch-Processed Cocoa
3 Tbsp cornstarch
2/3 c granulated sugar
2 Tbsp butter
1 Tbsp vanilla extract
4 ounces semi-sweet chocolate, chopped
2 ounces unsweetened chocolate, chopped
¼ tsp salt
3 cups milk
2 eggs

Topping:
1 c heavy whipping cream
1 tsp vanilla extract
2 Tbsp granulated sugar
Chocolate shavings or cocoa powder

1 prebaked pie shell

In a medium-heavy gauge saucepan mix together the cocoa, cornstarch, sugar, salt, and milk. Over medium heat bring mixture to a full boil. Remove from the heat. Add ¼ cup of the hot cocoa mixture to eggs, mix together, and add back into the saucepan. Cook until mixture returns to a boil, stirring constantly. Remove from the heat and add the chopped chocolates, butter, and vanilla. Whisk until smooth. Pour the mixture through a strainer. Pour into the prepared pie shell and cover with plastic wrap to prevent a skin from forming. Refrigerate.

Whip the cream with the sugar and vanilla. Spoon over the cooled chocolate filling. Sprinkle the chocolate shavings or cocoa over the whipped cream.

Makes 1 9-inch pie.

Tools of the Pie Trade


Pastry Blenders – A pastry blender or cutter is a hand powered kitchen tool used to cut hard fats into flour in order to make pastry. I grew up in a home where one was never used. My Mom has this technique of using a large meat fork to affect the same result. My husband’s grandmother showed the joys of using a pastry blender. I also use mine to chop boiled eggs for egg salad, avocado for guacamole, etc. In my opinion it is one of those low tech tools that earns it’s drawer space. Many people have replaced this gadget with the food processor. I’ll have to take their word that the food processor does as good a job. I don’t have one.


Pastry Boards – I remember my Mom having this plastic mat contraption made by Tupperware that you rolled out and then rolled your pastry on. She hated it and that experience really tainted my view of pastry boards. After all, isn’t the floured countertop good enough? I never used a pastry board until a few years ago when my husband bought me one made by Bethany Housewares. I’m not quite sure what possessed him to buy it and I was totally prepared to hate it, but alas, I love it. It really makes rolling pie crust (and lefse) a breeze. I know a lot of people swear by marble pastry boards and they sure would help keep everything cold but I’ve never tried one. I notice that Pampered Chef now has one of the mats (reminiscent of that Tupperware mat of my Mom’s) available. I also have never used one of them either (maybe someone who has will chime in here). In my very limited experience, I really like the cloth covered pastry board that I use but also acknowledge that a well floured countertop is just about as good.


Rolling Pins – What type of rolling pin you use will vary by your personal preference. There are lots to choose from, from ice-filled glass pins to wooden, metal, marble, nonstick, plastic and silicone rolling pins. The good news is: You can have success with any of the above and turn out pastry that everyone will enjoy. The trick is not to use too much flour when you are rolling pastry. If you've used the same type of rolling pin and you struggle most of the time to achieve perfect pastry, a change in type of rolling pin may solve your pastry problems. I've used a wooden pin for eons and could not imagine using anything else. My husband prefers a heavy one and mine is very petite compared to his. One tip for your rolling pin…if it is wooden, don’t let water EVER touch it. Just wipe it clean and try hard to not think about germs.


Tins & Pie Plates – For optimum results (and we all want optimum results), use a glass or a dull-metal pie pan. Avoid shiny metal or disposable aluminum pans, which reflect heat and prevent your crusts from browning well. Dark pans may cause crusts to brown too quickly. Avoid pans with holes in the bottom.


Pastry Shields – Nothing is more frustrating than making an otherwise perfect pie with an overly browned crust. This is really common in long baking custard type pies…like pumpkin. Fortunately, avoiding the over-cooked crust quandary couldn’t be easier. The solution? A simple pie shield. A pie shield is a lightweight reusable aluminum ring fits snugly atop a homemade or frozen crust without sticking to the dough or damaging fluted decoration. It prevents over-browning on the edges and encourages rising in the middle. The result? One picture-perfect pie with a lovely golden crust! Pastry shields are pretty inexpensive and readily available at kitchen specialty shops but a well placed piece of foil will give the same results. Nice to have but not a necessity in my book.


Pie Birds – Pie Birds or Pie Funnels as they are called in England are "steam vents" that have been placed in the center of fruit and meat pies (while cooking) since Victorian Times. Pie Funnels were used in baking pies and prevent the pie from boiling over in the oven by allowing the steam created when the fruit filling or other contents are cooking to escape from inside the pie. They also supported the pastry crust in the center of the pie, so that it did not sag in the middle. They are made from ceramic. Pie birds are very collectable and although I like them and own a few, I tend to not use them much for actual pie making.

Book Review ~ Pie Every Day, The Perfect Pie & Farmhand's Favorite Pies

Wednesday, October 28, 2009


It was my intention to write a review on a book devoted to the subject of pie. I was almost surprised to find that I do not own a book devoted to pies. You’d think with as many shelves of cookbooks I have, there’d be at least one, but there isn’t. How is that possible…I REALLY like pie! So off to my local public library I go. I love the library. They know me. They know what I like. The gal who orders for the section I most often frequent, gives me a shout out and tells me she has the new Ree Drummond (Pioneer Woman) cookbook at home and although she automatically added me to the list for it, it would be a while. I better go ahead and just order it. Then I start my search. Our library only shelves 3 books on the subject of pies. Only one is authored by a familiar name and none strikes my fancy at first glance. I checked all 3 out determined to really like one so I could do a positive review.

The 3 books I read are Pie Every Day, Recipes and Slices of Life by Pat Willard, The Perfect Pie by Susan G. Purdy (she is the author of The Family Baker) and Farmhand’s Favorite Pies by Amy and David Butler.


Pie Every Day, Recipes and Slices of Life by Pat Willard.
I had great expectations for this book. Pie…EVERY DAY…the title is like my fantasy. While there is a lot of prose in the book, it was lacking what I was looking for…recipes for pies. There is a fair number of recipes for savory pies, pasties, empanadas and such but again, not what I was looking for. This book is a pass for me.


The Perfect Pie, More Than 125 All-Time Favorite Pies & Tarts by Susan G. Purdy
This is the author I was familiar with. I have checked out The Family Baker and although did not add it to my collection, did like the book. The Perfect Pie did have more of the elements I was looking for in a pie book…tutorials on ingredients, equipment, and techniques and a fare number of recipes. But, there was something lacking too. Then my 16 year old son hit the nail on the head…it has no pictures. We both decided we wanted pictures of perfect pies to drool over. Not a bad book, especially if you are wanting a good tutorial, but again, a pass for me.


Farmhand’s Favorite Pies by Amy and David Butler
Of the 3 books I checked out, this was the one I had the least expectations for. That said, I really liked this book. The illustrations are gorgeous, vintage looks into pie making, almost like a peek at your grandma’s pies from another era. The recipes are easy to follow and are what I was looking for…cream pies, fruit pies, meringues, southern favorites, etc.

I think that what I learned from reading these 3 books is that pie really is not something to be defined by a book. It is homey in nature, not complex like cake. It was a way for pioneer women to feed their families and preserve their harvests. It is passed down more than taught. I love pie although I am not an owner of a book devoted to the subject!

Another Pie Day

Tuesday, October 27, 2009
Another post devoted to pie today. Since it's Tuesday, I'm linking up at Tasty Tuesday , Tempt Your Tummy Tuesday and Tuesdays at the Table. Thank you Jen, Lisa and Cole for hosting these lovely events each week. Check out ALL the great recipes posted.

Don't forget to get entered in for my giveaway.


Over the years I have had many great *tips* for pie making. My grandmother-in-law swore that adding 1 Tbsp of cider vinegar to your pastry was the ultimate trick. She was on to something there. The vinegar impedes the formation of gluten, thus your crust stays nice and flaky and doesn't get tough. I've used that tip for years but I've got a new trick. This recipe from Cook's Illustrated has the addition of vodka. I was a total skeptic until I tried it. It makes the most flaky crust I've ever made.

Foolproof Pie Dough
(Printable Version)
Cook’s Illustrated 2007
- makes one 9-inch double-crust pie -

The trick to this pie crust is the inclusion of vodka. Eighty-proof vodka, which is 60 percent water and 40 percent alcohol, adds moistness to the dough without aiding in gluten formation since gluten doesn't form in ethanol. Although the recipe includes 8 tablespoons of liquid, the alcohol vaporizes during baking, resulting in a tender crust that only contains 6 1/2 tablespoons of water. Because of the extra liquid, the dough will be moister than most standard pie doughs and will require up to 1/4 cup more flour.

Ingredients
2 1/2 cups (12 1/2 ounces) unbleached all-purpose flour
1 teaspoon table salt
2 tablespoons sugar
12 tablespoons (1 1/2 sticks) cold unsalted butter, cut into 1/4-inch slices
1/2 cup cold vegetable shortening, cut into 4 pieces
1/4 cup cold vodka
1/4 cup cold water

Procedure
Process 1 1/2 cups flour, salt, and sugar in food processor until combined, about 2 one-second pulses. Add butter and shortening and process until homogeneous dough just starts to collect in uneven clumps, about 15 seconds (dough will resemble cottage cheese curds and there should be no uncoated flour). Scrape bowl with rubber spatula and redistribute dough evenly around processor blade. Add remaining cup flour and pulse until mixture is evenly distributed around bowl and mass of dough has been broken up, 4 to 6 quick pulses. Empty mixture into medium bowl.
Sprinkle vodka and water over mixture. With rubber spatula, use folding motion to mix, pressing down on dough until dough is slightly tacky and sticks together. Divide dough into two even balls and flatten each into 4-inch disk. Wrap each in plastic wrap and refrigerate at least 45 minutes or up to 2 days.


Pie, Pie & More Pie

Monday, October 26, 2009
We're entering pie season and I thought I would share this week all about pie...my very favorite dessert!

Today I am sharing a poem & mosaic and a reminder to get your entry in for my fall giveaway..just another week until the BIG drawing! Don't forget to check out the other beautiful mosaics at Mary's Little Red House.


Pumpkin Pie
Is there anything as pleasing,
in this crisp and cozy season,
as a slice of thick and creamy pumpkin pie?
With a crust all flakes and butter,
and a filling like no other,
I dare anyone to try and pass it by.
Cinnamon and nutmeg mingling
with a hint of ginger, tingling
as it punches-up the flavor in each slice.
Russet-orange, mellow, spicy
with whipped-cream to crown it nicely,
I can't help but fill my plate not once but twice.
By Mary Intardonato

Giveaway Time

Friday, October 23, 2009
I've had this giveaway in the works for a while and am now just getting around to getting it posted.

So, this giveaway will include one of my handmade aprons...my favorite pattern...the BIG POCKET HOUSEKEEPING APRON in a cute 1960's vintage fall fabric, plus a braided hot pad, a hand embroidered flour sack towel and 2 Barbara Swell books -- Secrets of the Great Old-Timey Cooks & Old-Time Farmhouse Cooking.


Here is how to enter.......

1. Leave me a comment here (1 entry)
2. Become a follower (2 entries)
3. Display my button on your blog (3 entries)

Hurry and enter today. I'm going to have the drawing on November 2, 2009.

Company's Coming

Thursday, October 22, 2009

Edited to include this post in Michael's Foodie Friday at Designs by Gollum.


Linking into Rhoda's Recipe Party @ Southern Hospitality today. Check out all the wonderful recipes there.

I thought I would share 2 of my favorite company suppers. We love to entertain and I always like serving something showy....but I like to enjoy my company and not be tied to the kitchen the entire time. Both of these recipes are easy, lend themselves to advance prep work and come off like you've gone to a whole lot more trouble than you have. Perfect for company! These dishes has been a favorite of ours for years.

I usually serve with garlic mashed potatoes, a large salad and some sort or bread.


Chicken Saltimbocca
(Printable Version)

4 boneless, skinless chicken cutlets (about 4 ounces each)
Salt and black pepper
8 thin slices prosciutto
8 sage leaves, more for garnish
3/4 cup flour
2 tablespoons butter, divided
1 1/2 tablespoons olive oil
1/2 cup dry white wine (or double chicken broth if you prefer not using wine)
1/2 cup low-sodium chicken broth
1 can artichoke hearts, packed in water, drained
Lemon wedges

Sprinkle each cutlet lightly with salt and pepper. Top with a slice of prosciutto and a sage leaf. Place chicken cutlets between 2 sheets of parchment, waxed paper or plastic wrap. With a mallet or rolling pin, gently pound cutlets to an even 1/4-inch thickness, pounding the prosciutto and sage into the chicken.

Spread the flour on a shallow plate and dip the chicken in it, lightly coating both sides. Heat a tablespoon of butter and the olive oil in a large pan. When the butter begins to foam, add the cutlets to the pan, prosciutto side down. Cook 3 to 4 minutes per side, turning once, until lightly browned and cooked through. Transfer to a platter and cover to keep warm.

Add wine to the hot pan and stir with a wooden spoon to loosen all the brown bits from the bottom of the pan. Let the wine reduce by half, then add the chicken broth and reduce again. Add artichoke hearts and stir in, just until heated. Remove the pan from the heat and swirl in remaining tablespoon of butter. Taste and adjust seasoning with salt and pepper, then pour over the reserved chicken cutlets. Serve immediately with lemon wedges.

I usually serve this with a rice or orzo pilaf, a salad and bread.


Cranberry Balsamic Pork Tenderloin
(Printable Version)

3 tablespoons butter
2 8- to 10-ounce pork tenderloin
1-2 chopped shallots
1 tablespoon chopped fresh rosemary
1 cup canned low-salt chicken broth
2/3 cup canned whole berry cranberry sauce
2 tablespoon balsamic vinegar

Preheat oven to 450°F. Melt 1-1/2 tablespoon butter in heavy large ovenproof skillet over medium-high heat. Sprinkle pork with salt and pepper. Sear pork on all sides, about 2 minutes. Place skillet with pork in oven. Roast pork until thermometer inserted into center registers 155°F, about 10 minutes. Meanwhile, melt remaining 1 1/2 tablespoon butter in heavy medium skillet over medium-high heat. Add shallots and rosemary; sauté until onion softens, about 3 minutes. Add broth, cranberry sauce and vinegar and whisk until cranberry sauce melts, about 2 minutes. Transfer pork to work surface. Scrape any juices from large skillet into cranberry mixture. Boil until sauce has reduced enough to coat spoon thickly, about 6 minutes. Season with salt and pepper. Slice pork and serve with sauce.

City Chicken

Tuesday, October 20, 2009
Sharing today at Tasty Tuesday , Tempt Your Tummy Tuesday and for the first time Tuesdays at the Table. Thank you Jen, Lisa and Cole for hosting these lovely events each week. Check out ALL the great recipes posted.

This is an old-timey favorite at our house. If you don’t know what City Chicken is, here’s a hint: It ain’t chicken...That’s right…City Chicken is actually pork and sometimes even veal and/or beef, but never chicken. A popular dish in Pittsburgh and the surrounding region, this mock-chicken dinner has been handed down for generations over the past century. In the early 1900s, chicken was much more expensive than pork. Immigrants would try to replicate the flavor and look of fried chicken legs using more accessible meats like pork and veal. Today we still eat it because it's delicious!


City Chicken
(Printable Version)

1 lb. pork cut into 1-1/2 inch uniform cubes
1/2 cup flour
1/2 tsp salt
1/2 tsp pepper
6 sprigs fresh thyme, plus more for garnish
4-6 Six- inch wooden skewers
1 garlic clove, halved
1/4 cup olive oil
1 10-oz can low-sodium chicken stock

Preheat oven to 350 F. In a medium bowl, combine flour, salt and pepper and the leaves of four thyme sprigs. Stir until well blended. Roll pork pieces in flour mixture until completely covered, gently shake off excess flour, and remove to a dry plate. Thread the meat onto skewers evenly. You should fit 3 -4 meat cubes on each stick. Rub the bottom of an cast iron pot or pan with the cut side of the clove of garlic. Set garlic aside for another use. Heat 1/4 cup olive oil over medium high heat. When the oil is hot but not smoking, add the pork skewers to the oil and allow to brown until golden and crispy on all four sides, about 4 minutes per side. Add a little more oil to the pan if it all gets soaked up early. Leave the pork in the pan and pour in the chicken stock and drop in two sprigs of thyme. Bring to a simmer and transfer pan to the oven, uncovered. Let simmer for one half hour, turn skewers over and continue cooking for another half hour. Remove pan to stovetop. If the juices are still thin, let simmer on stovetop until reduced to desired consistency. Serve City Chicken with a side of mashed potatoes.


Book Review - The Old-Time Brand-Name Cookbook

Monday, October 19, 2009
I am including this post in Mosaic Monday hosted by Little Red House. Check out the mosaics. Such works of art!

Book Review – The Old-Time Brand-Name Cookbook by Bunny Crumpacker


Before bookcases burdened with the weight of cookbooks in every size, shape and theme, FoodTV, and the plethora of monthly cooking/food magazines, there were manufacturer recipe booklets. Years ago, I was gifted a vintage recipe booklet from a friend. That recipe booklet was published by Hershey. It has wonderful recipes and the cutest graphics. I was hooked. I pick these little booklets up when I run across them at antique shops, garage sales and such. While some of the recipes (or receipts as they are often called) are not current with today’s food tastes (don’t remember the last time I needed to make aspic), many are great recipes. The recipe booklets were all made with flimsy paper covers that really were not meant to stand the test of many decades but they must have been special to the housewives who originally owned them because the ones I own are in remarkable condition.


Recently, I checked out The Old-Time Brand-Name Cookbook by Bunny Crumpacker. A very fun and informative read. This book is basically a compilation of many of these manufacturer recipe booklets and a history of processed foods and how they were introduced to the home cook. The recipes are updated, although I didn’t find many of them too interesting. There is a second book, The Old-Time Name-Brand Dessert Cookbook which I think I may have found more interesting than the first. But alas, our library does not shelf that book. The Old-Time Brand-Name Cookbook was fun, but for me, not one to purchase. Usually, I would sample at least one recipe from a book I’ve checked out and post a recipe from the cookbooks I review. Not this time. Instead, I am sharing a recipe from Aunt Jenny…a character from Spry Shortening fame. This recipe is from Home Baking Made Easy, published by Spry (a shortening manufactured by Lever brothers to be direct competition for Crisco) in 1953…a beautiful example of vintage recipe booklets and one in my collection. I am also including the sweet introduction from that same book.

Dear Friend,

If you don’t happen to be one of those rare women, a “born cook,” you may not realize how really easy it can be to bake. Baking is downright fun when you use the simple proved methods which I have collected in this handy home baking guide. In fact, I can guarantee you perfect results every time when you follow these tested recipes, and use Spry.

You see, Spry’s very special qualities make complicated, old-fashioned baking methods unnecessary. Just try Spry–the mouth-watering results will speak for themselves! And, you know, nothing beats that superb taste of home-baked foods.
Why not bake a pie or a cake today; you’ll be surprised at what an expert cook you really are! In no time at all, your family and friends will be saying, “It’s easy to see, she is a born cook!” Happy Baking!

Aunt Jenny


Rob Roy Cookies

Crisp, spicy oatmeal cookies bursting with nuts and raisins. An old-fashioned golden-brown favorite made by Spry’s modern work-saving “Stamped” Method.
Bake in moderately hot oven (375° F.) 10-15 min. Makes 5 doz. cookies.

1 cup Homogenized Spry (I always use butter)
1 1/2 cups brown sugar, firmly packed
1 teaspoon salt
1/2 teaspoon cinnamon
1/2 teaspoon cloves
1/4 cup sour milk or buttermilk
2 eggs, unbeaten
1 3/4 cups sifted all-purpose flour
3/4 teaspoon soda
1 1/2 cups rolled oats
1 cup nuts, chopped
1 cup seeded raisins, chopped

Combine first 7 ingredients and beat thoroughly. Sift flour and soda together; add to Spry mixture and blend. Add oats, nuts and raisins and mix thoroughly. Measure out level tablespoons of dough on Sprycoated baking sheets about 2″ apart. Flatten cookies by stamping with a flat-bottomed glass covered with damp cloth. Bake as directed. With spatula, remove cookies from sheet immediately to wire racks. Keep them apart until cold. Store in airtight tin.


Seasonal Goodness - Winter Squash

Thursday, October 15, 2009


I am a very big fan of winter squashes. In fact, I’ve never met one I didn’t like. Winter squashes are perfect for stuffing or in soups, pasta dishes, casseroles, risotto, desserts, etc. And they pair so nicely with other tastes…..apples, pears, curry, citrus, peppers, molasses, nuts, and balsamic vinegar to name a few. I really like to include winter squashes in meatless meals.

Winter squash keep very well. Most store well in a cool, dry space for months. And cooked, they freeze beautifully. I *put up* as much squash (and pumpkin) as I can to use year round.

When choosing squash, look for squash that feels heavy for its size and has a hard, deep-colored skin, free from blemishes. To cook, wash the exterior of the squash just before using. The seeds can be scooped out before or after cooking. Roast, bake, steam, boil, or microwave the squash. Because the hard rind makes most squash difficult to peel, it's easier to cook the unpeeled squash, and then scoop out the cooked flesh. Many recipes do require peeling (and cutting) first. Use a vegetable peeler to remove the skin and when cutting hard winter squashes, use a sharp knife and use extreme caution to slice through and then cut into desired pieces. I've even seen a mallet used to help the knife through. I don't keep a mallet in my kitchen although maybe I should. Some folks recommend piercing the skin and microwaving for a few minutes first. I do not use a microwave so am not sure how well this actually works (although it does make sense).

Some of the varieties of winter squash available:

Acorn Squash - Easily found in supermarkets. As its name suggests, this winter squash is shaped like an acorn. It is easy to slice into halves and fill with all sorts of filling options. A small acorn squash weighs from 1 to 3 pounds, and has sweet, slightly fibrous flesh. Its distinct ribs run the length of its hard, blackish-green or golden-yellow skin. In addition to the dark green acorn, there are now golden and multi-colored varieties.

Butternut Squash - Easily found in supermarkets. Beige colored and shaped like a vase. This is a more watery squash and tastes somewhat similar to sweet potatoes. It has a bulbous end and pale, creamy skin, with a choice, fine-textured, deep-orange flesh with a sweet, nutty flavor. Some people say it is like butterscotch. It weighs from 2 to 5 pounds. The oranger the color, the riper, drier, and sweeter the squash.

Buttercup Squash - Buttercup Squash are part of the Turban squash family (hard shells with turban-like shapes) and are a popular variety of winter squash. It has a sweet and creamy orange flesh. This squash is much sweeter than other winter varieties. Buttercup Squash can be baked, mashed, pureed, steamed, simmered, or stuffed and can replace Sweet Potatoes in most recipes. Perfect for pies.

Delicata Squash - Also called Peanut squash and Bohemian squash. This is one of the tastier winter squashes, with creamy pulp that tastes a bit like corn and sweet potatoes. Size may range from 5 to 10 inches in length. The squash can be baked or steamed The thin skin is also edible. The delicata squash is actually an heirloom variety, a fairly recent reentry into the culinary world. It was originally introduced by the Peter Henderson Company of New York City in 1894, and was popular through the 1920s. Then it fell into obscurity for about seventy-five years, possibly because of its thinner, more tender skin, which isn't suited to transportation over thousands of miles and storage over months.

Hubbard Squash - The extra-hard skins make them one of the best keeping winter squashes. These are very large and irregularly shaped, with a skin that is quite "warted" and irregular. They range from big to enormous, have a blue/gray skin, and taper at the ends. Like all winter squash, they have an inedible skin, large, fully developed seeds that must be scooped out, and a dense flesh. Hubbard squash is often sold in pieces because it can grow to such large sizes. The yellow flesh of these tends to be very moist and longer cooking times in the oven are needed. They are generally peeled and boiled, cut up and roasted, or cut small and steamed or sautéed. It's perfect for pies. Hubbard squash, if in good condition initially, can be successfully stored 6 months at 50 to 55 degree F. with 70% relative humidity. Hubbard squash and other dark-green-skinned squashes should not be stored near apples, as the ethylene from apples may cause the skin to turn orange-yellow.

Sweet Dumpling Squash - This small, mildly sweet-tasting squash resembles a miniature pumpkin with its top pushed in. It has sweet and tender orange flesh and is a great size for stuffing and baking as individual servings. Sweet dumplings are tiny but great for roasting and presenting whole.

Turban Squash - Turban Squash has colors that vary from bright orange, to green or white. It has golden-yellow flesh and its taste is reminiscent to hazelnut. Has a bulblike cap swelling from its blossom end, come in bizarre shapes with extravagant coloration that makes them popular as harvest ornamentals. It is popular for centerpieces, and its top can be sliced off so it can be hollowed and filled with soup. A larger variety of the buttercup squash, the turban has a bright orange-red rind. The turban-like swirl on its blossom end is a fanciful variegated orange, red and white. Its flesh and storage ability are comparable to the buttercup squash.

And some of my favorite recipes for winter squashes:


Orange-Glazed Acorn Squash

3 medium acorn squash (about 1 pound each)
Cooking spray
3 Tbsps orange marmalade
1 Tbsp brown sugar
1 Tbsp lime juice
2 tsp soy sauce
1/2 tsp vegetable oil
1/4 tsp sea salt
Dash of ground red pepper

Preheat oven to 375°F. Cut squash crosswise into 3/4-inch-thick slices, discarding seeds and stringy pulp. Arrange the squash slices in a single layer on a large baking sheet coated with cooking spray. Bake squash slices at 375° for 15 minutes. Combine orange marmalade and remaining ingredients. Brush half of marmalade mixture over squash slices. Bake at 375° for 10 minutes. Brush with marmalade mixture; bake an additional 10 minutes. Spoon remaining marmalade mixture over squash.

Crispy Parmesan Butternut Squash Chips

1 medium butternut squash
Vegetable oil, for deep-frying
2 sprigs rosemary
2 sprigs sage
sea salt
1/4 cup grated Parmigiano-Reggiano

Remove the top cylinder portion of the butternut squash and peel with a vegetable peeler. Discard or use the bulb portion for something else. Using a mandoline, finely slice round chips from the peeled cylinder and hold in ice water for 30 minutes to chill. Preheat 2 to 3 inches of oil in a heavy-based pot to 320° F add the fresh herbs and fry until they stop sizzling. Remove from oil and drain on paper towels. Dry chips between paper towels then fry in small batches for 2 to 3 minutes until golden and crispy. Season with salt and sprinkle with fresh grated Parmesan and crumbled herbs.

Roasted Winter Squash

About 3 pounds squash (about 1 large butternut, buttercup or sweet dumpling squash)
Sea salt
Freshly ground black pepper
1/2 cup (1 stick) unsalted butter
2 tablespoons finely chopped fresh sage leaves
2 tablespoons granulated sugar
1/4 cup balsamic vinegar
1/4 cup dark unsulfured molasses

Preheat the oven to 400° F. Peel the squash with a vegetable peeler. Halve lengthwise, discard the seeds, then cut into 1-inch dice. Place in a large bowl and season with salt and pepper. Heat the butter in a medium skillet over medium-high heat. When the butter ceases to foam and has turned a light brown, pull the pan off the heat and immediately add the sage, sugar, vinegar (stand back so as not to get splattered) and molasses. Mix well and let simmer over medium-low heat for 1 to 2 minutes to meld the flavors. Pour the vinegar mixture over the squash and toss well, then transfer to a heavy rimmed baking sheet or baking dish large enough to hold the squash in a single layer. Place in the oven and roast, tossing at least once, until very tender and caramelized, about 45 minutes to 1 hour. Set aside until cool enough to handle but still warm, so the liquids are runny. Working in batches, if necessary, transfer the warm squash and all the cooking liquids to a food processor and process until smooth. Use immediately, refrigerate for up to 5 days, or freeze for up to 2 months. Serving suggestions: Serve the puree on its own as a side dish for roast chicken, turkey, or pork; stir into polenta just before the end of cooking; use as a stuffing for ravioli; make into a soup; or use to flavor pastina. Or omit the sage, season with ground cinnamon and freshly grated nutmeg to taste, and use as a substitute for canned pumpkin in your favorite pumpkin pie recipe. Variation for Smoky Butternut Squash: Cook the prepared squash on a baking sheet in a covered grill with soaked chips to give a slightly smoky taste. Substitute in any of the recipes that call for roasted squash. If cooking kabocha, acorn, or other difficult-to-peel squash, cut in half, scoop out the seeds, and rub the insides and cut edges with the vinegar/molasses mixture. Place on a baking sheet, cut sides up, and roast at 400 degrees F until tender. Scoop out and puree. Yield: about 2 cups puree

Roasted Winter Squash Soup

2 tablespoons extra-virgin olive oil
1/2 cup diced onion
1/4 cup diced celery
1/4 cup diced carrot
1 cinnamon stick
Sea salt
Freshly ground black pepper
About 4 cups chicken stock or canned low-salt chicken broth
1 1/2 cups Roasted Winter Squash recipe
1/2 cup half-and-half

Heat the olive oil in a large saucepan over medium heat until hot. Add the onion, celery, carrot, and cinnamon stick and saute until soft but not brown, about 10 minutes. Season with salt and pepper. Add the chicken stock and the coriander, if using, and bring to a boil. Simmer for several minutes. Stir in the squash until smooth, then simmer gently to let the flavors meld, about 10 minutes. Discard the cinnamon stick. Puree the soup in a blender until smooth. (The soup can be made ahead to this point, cooled, covered, and refrigerated for several days or frozen for about 1 month. It will thicken as it cools and may need thinning with stock or water when reheating.) Return the soup to the pan and reheat gently. Add the half-and-half, if using. Adjust the seasoning with salt and pepper. Keep warm until service.

Winter Squash Risotto

5 cups reduced-sodium chicken broth or homemade stock
2 tablespoons extra-virgin olive oil
3 medium shallots, thinly sliced
3 cups chopped peeled butternut, hubbard, buttercup or turban squash (1/2-inch pieces)
2 cups mushroom caps, thinly sliced
1/2 teaspoon dried thyme
1/2 teaspoon sea salt
1/4 teaspoon freshly ground pepper
1/8 teaspoon crumbled saffron threads (optional)
1 cup arborio rice
1/2 cup dry white wine or dry vermouth
1/2 cup finely grated Parmigiano-Reggiano cheese

Place broth in a medium saucepan; bring to a simmer over medium-high heat. Reduce the heat so the broth remains steaming, but is not simmering. Meanwhile, heat oil in a large saucepan over medium heat. Add shallots; cook, stirring, until fragrant, about 1 minute. Stir in squash and mushrooms; cook, stirring often, until the mushrooms give off their liquid, about 5 minutes. Add thyme, salt, pepper and saffron (if using); cook for 30 seconds. Add rice; stir until translucent, about 1 minute. Add wine (or vermouth) and cook, stirring, until almost absorbed by the rice, about 1 minute. Stir in 1/2 cup of the hot broth; reduce heat to a gentle simmer and cook, stirring constantly, until the liquid has been absorbed. Continue adding the broth 1/2 cup at a time, stirring after each addition until all the liquid has been absorbed, until the rice is tender and creamy, 30 to 40 minutes total. (You may have some broth left.) Remove from the heat and stir in cheese.

I'm linking this to:


Thank you to Michael at Designs by Gollum for hosting Foodie Friday!

Product Review - To Bundt or Not to Bundt

Monday, October 12, 2009


I’m not a serious a sports fan but I do know that we are down to the nitty-gritty in getting the World Series lined up BUT when I say Bundt, I am not talking baseball…I’m talking cake. Growing up, my Mom would make Bundt cake for lots of different occasions…especially picnics and potlucks. It just seemed that was the occasions that most called for the Bundt. The Tunnel of Fudge cake won the Pillsbury Bake Off in 1966. That recipe was a staple in my Mom’s recipe box. My mouth can water just thinking about that moist and delicious chocolate cake. Although the original Bundt was introduced by Nordicware in 1946, the 1960’s and 70’s were the hayday of the Bundt cake and then it fell out of vogue. Even so, Nordicware reports, “If there is a kitchen in the home, more often than not there is a Bundt pan to be found -- in two out of three American households to be exact”. The thing about what’s in fashion and out of fashion cycles around and around. What is old becomes new again and what goes out always comes back. Today’s Bundt’s are not like my Mom’s. They are beautiful, sculptured pieces and the cakes made from them are simply art. They are definitely back!


When we lived in Minnesota, I had the great pleasure of visiting the Nordiware store in downtown Minneapolis. I quickly became hooked and I’d be embarrassed to share just how many of these beautiful pans I own. And they are always introducing new ones. These pans are made to last a lifetime and require little in specialized care. Please visit this link Nordicware too see a short video on the beautiful Bundt. There is now even a National Bundt Day (November 15) to celebrate the Bundt pan. So, as we get into holiday baking season, don’t discount the Bundt. Get out the pan you probably already have or consider investing in a new one. If you are like me and have several, consider making them available for loan to your trusted friends and family members.

I also wanted to add that I have heard people complain about sticking in these pans. I’m posting the instructions from www.Nordicware.com on how to care for and prepare the pans. I’ve never had a sticking issue.

BAKEWARE USE AND CARE INSTRUCTIONS
1. Before initial use and after subsequent uses, hand wash with hot soapy water.

2. Before each use, brush with solid vegetable shortening and dust with flour or spray using Baker's Joy or Pam for Baking spray with flour in it.

3. Mixes and recipes may vary. Fill the pan no more than ¾ full to avoid overflow.

4.Metal utensils, scouring pads and abrasive cleaners should not be used on non-stick surfaces.

A favorite Bundt recipe:


Pumpkin Bundt Cake

Nonstick cooking spray, for pan
4 cups cake flour (not self-rising), plus more for dusting
4 teaspoons baking powder
1 teaspoon baking soda
1 teaspoon salt
1 tablespoon ground ginger
2 teaspoons ground cinnamon
1 teaspoon freshly grated nutmeg
1/2 teaspoon ground cloves
1 cup (2 sticks) unsalted butter, room temperature, plus more for pan
2 1/2 cups packed light-brown sugar
4 large eggs
1 cup buttermilk
1/2 cups canned pumpkin puree
Confectioners' sugar, for dusting
Preheat oven to 350 degrees. Spray a 14-cup Bundt pan with cooking spray. Dust with flour, and tap out excess. Whisk together flour, baking powder, baking soda, salt, ginger, cinnamon, nutmeg, and cloves. Set aside. Beat butter and brown sugar together in the bowl of an electric mixer fitted with the paddle attachment, on medium speed until pale and fluffy, 2 to 3 minutes. Add eggs, one at a time, beating well after each addition and scraping down sides of bowl. Reduce speed to low. Beat in flour mixture in 3 additions, alternating with the buttermilk. Beat until just combined. Add pumpkin puree, and beat until combined. Pour batter into prepared pan. Bake cake until golden and a wooden skewer inserted into the center comes out clean, about 55 minutes. Let cool on a wire rack for 30 minutes. Carefully turn cake onto rack too cool completely. Before serving, dust with confectioners' sugar.

I'm adding this post to Tasty Tuesday and Tempt Your Tummy Tuesday. Thank you Jen & Lisa for hosting these lovely events each week. Check out the great recipes posted.


A Souper Weekend!

Friday, October 9, 2009
This is going to be a souper weekend! Tonight we are having dear friends for supper. On the menu, Beef Barley Soup, a loaf of Blue Cheese Sourdough Bread (from my favorite little artisan bakery) and Apple Tart and Coffee for dessert.

On Saturday we are attending a Soup Feed. I’m bringing a crockpot of Cheesy Wild Rice Soup and some of my homemade rolls.

With the temps dipping into the 20°’s and threats of snow, all this soup is just what is needed.


Beef Barley Soup
(Printable Version)

1 pound boneless beef top round steak, cut into 1/2-inch cubes
1 tablespoon canola oil
3 cans (14-1/2 ounces each) beef broth
2 cups water
1/3 cup medium pearl barley
1 teaspoon salt
1/8 teaspoon pepper
2 cup fresh mushrooms
1 cup chopped carrots
1/2 cup chopped celery
1/4 cup chopped onion
3 tablespoons minced fresh parsley

In a Dutch oven or soup kettle, brown beef in oil; drain. Stir in the broth, water, barley, salt and pepper. Bring to a boil. Reduce heat; cover and simmer for 1 hour. Add the mushrooms, carrots, celery, onion and parsley; cover and simmer for 45 minutes or until meat and vegetables are tender. Stir in peas; heat through. Yield: 9servings.


Apple Tart
(Printable Version)

Crust:
1-1/4 cups all-purpose flour
1/2 cup (1 stick) butter, room temperature
2 tablespoons sour cream

Filling:
About 6 medium apples, peeled, pitted, and sliced
3 large egg yolks
3/4 cup sour cream
3/4 cup sugar
1/4 cup all-purpose flour
1 tsp vanilla

Glaze:
1/2 cup apple jelly
½ tsp ground cinnamon
Whipped cream, if desired

Preheat the oven to 375° F.

Crust: Place the flour, butter, and sour cream in a food processor and pulse to combine. When the dough has formed a ball, pat with lightly floured hands into the bottom and sides of an ungreased 10-inch tart pan with a removable bottom and 1/2-inch sides, or a round au gratin dish. Bake for about 18 minutes, until the crust is set but not browned. Let cool while preparing the filling.

Lower the oven temperature to 350°F.

Filling: Peel and thickly slice the apples. Arrange the apple slices in overlapping circles on top of the crust, until it's completely covered. Overfill the crust, as apples will shrink during cooking. Combine the egg yolks, sour cream, sugar, and flour and beat until smooth. Pour the mixture over the apples. Place the tart pan on a baking sheet and bake for about 1 hour, until the custard sets and is pale golden in color. Cover with an aluminum foil tent if the crust gets too dark. Transfer the tart pan to a wire rack to cool. When cool, remove the side wall of the pan.

Glaze: Combine the jelly and cinnamon. Spread with a pastry brush over the top of the warm tart. Serve the tart warm, at room temperature or chilled.

Thank you to Michael at Designs by Gullum for hosting Foodie Friday!


Bless My Home

Wednesday, October 7, 2009

Bless My Home

Fill my home, dear Lord, I pray
With blessings from above,
But…most of all…I ask that it
Be always filled with love.

May those who step within my door
Find happy hearts inside,
And, Lord, please may my door and heart
Be ever open wide.

May all who gather round my hearth,
Find kindness glowing there,
And may each soul who dwells within,
Love and contentment share.

So, bless my home and bless each one
Who dwells or steps inside,
And may I find beneath my roof
That peace and joy abide.

Carice Williams (published in Ideals Magazine, 1972)

Tempt My Tummy/Tasty Tuesday

Tuesday, October 6, 2009
The October 2009 edition of Martha Stewart Living has a great article in it on cast iron gem pans. I am a huge cast iron fan and am especially fond of gem pans. Mostly, I use them for making cornbread gems in. You can find them in so many fun shapes and the antique ones are just treasures. I just love the pictures featured in the magazine. They really show off what beauties these really are.


Today I thought I’d share yet another recipe from Judith Fertig’s Prairie Home Breads. I baked these in a cast iron gem pan. So yummy! Almost like a cross between a muffin and a cake donut. I have determined to get my gem pans out more often and to use them more for everyday baking projects instead of just when I’m trying to do something special.

Old Fashioned Graham Gems

1 cup milk
1 Tbsp cider vinegar
¾ cup graham or stone-ground whole wheat flour
¾ cup all-purpose flour
½ tsp baking soda
2 large eggs
¼ cup sugar
2 Tbsp unsalted butter, softened

Topping:
2 Tbsp sugar
2 tsp ground cinnamon

Preheat oven to 400°F. Grease 2 cast iron gem pans (use mini-muffin pans if you don’t have a gem pan), set aside. In a small bowl, combine the milk and cider vinegar; set aside to sour for a few minutes. Sift the dry ingredients together and set aside. In a large bowl, whisk the eggs to blend, then whisk in the sugar and butter. Whisk in soured milk. Stir in the dry ingredients, ½ cup at a time, until you have a stiff batter. If you are using a cast iron gem pan, preheat your pan, if not, skip that step, spoon the batter into the prepared gem cups (or muffin cups), filling them 2/3rds full. In a small bowl, combine the topping ingredients. Sprinkle about ¼ tsp on each gem. Bake for 8-10 minutes, or until the gems have risen and pulled away from the sides of the pan. Serve warm.


I found these great tips on the internet. Although she refers to them as Gem Scones, this must be a term used outside of the US. They really have nothing to do with scones.

Baking in a Gem Scone Iron by Pauline Smith

What is a Gem Scone Iron?-
Also referred to as a "Gem Scone Tin" or a "Gem Scone Tray". These are very solid metal baking trays, with hemispherical indents for baking little cakes in. The older ones are made of cast iron. They are heavy! More "modern" ones are made of cast aluminium. They are still quite heavy!

Looking after a gem scone iron-
The first thing to know is, don't drop it on your foot. It will hurt! The second thing to know is that cast iron, although very strong, could be a little brittle, so a really sharp fall could break the iron. How do I know? I managed it! There's not much chance of that though, I think I am just gifted in that area. The third thing to know is, if your iron is made of iron, don't let it rust. After a good wash, get it totally dry (I usually pop it back in the warm oven to bet bone dry before putting away). You could also put a really thin smear of oil on the iron.

Baking with a gem scone iron-
Preheat your oven, and while you make your mix, put the scone iron into the oven. Greased but empty. It will get VERY hot. Just as the mix is ready to go, pull out the scone iron, fill it very quickly, and pop it right back. The iron will be so hot that the base of the scones will be cooked almost immediately. On a good day, your little cakes will be baked in minutes, and will pop out, almost spherical! Oh, and here's a note - "gem" scones are nothing like "scones". "Gem scones" are a little round cake; scones are cut from a rolled out dough.

Thank you to Jen for hosting Tasty Tuesday and Lisa for hosting Tempt Your Tummy Tuesday.


To Market, To Market

Monday, October 5, 2009
To market, to market, to buy a fat pig,
Home again, home again, dancing a jig;
To market, to market, to buy a fat hog;
Home again, home again, jiggety-jog
To market, to market, to buy a plum bun,
Home again, home again, market is done!

Saturday morning we got up and drove to Lincoln, NE (about 90 miles) to visit the Historic Haymarket. My dear friend, Rose and her family sell their beautiful melons and pumpkins there each year. I love Farmer’s Markets and have always wanted to make the trip and see this particular market. It was not a disappointing trip. We saw vendors selling produce of all sorts including some of the most warty, interesting looking pumpkins and gourds, food vendors selling ethnic yummys, crafts people selling knitted items, soaps, painted signs, baked goods, etc. We came home with pumpkins, squashes, a bunch of fresh basil, a loaf of artisan bread and a whole lot of sweet memories. I'll make it a point to visit Haymarket again next year!

And speaking of next year, my daughter and I will be offering our homemade soaps at our local Farmer’s Market starting next spring. Not a market that really compares to the Haymarket but a nice small town gathering. I make it a point to visit most Saturday mornings during the season.


Haymarket History (from www. lincolnhaymarket.com) Why Haymarket?
The ‘Haymarket’ name can be traced to Lincoln’s first decade. In the original plat of Lincoln of 1867, a ‘Market Square’ was designated between ‘O’ and ‘P’ Streets from 9th to 10th. That square was an open-air market for produce and livestock, as well as a camping ground for immigrants and general gathering place. Machines, wagons and animals thronged Market Square, along with land sharks, tin-horn gamblers and the other denizens of a pioneer town.


When the federal government decided to erect a post office and courthouse in Lincoln in 1874, the city and state donated the original ‘Market Square’ and moved its functions two blocks north, creating ‘Haymarket Square’ bounded by 9th and 10th, ‘Q’ and ‘R’ Streets. Scales were provided for weighing hay, cattle and produce. Haymarket Square continued ‘to provide space for the teams and wagons of country fold, a mart for hay and a camping ground’ well into the 1880s. It became the location for the first City Hall from 1886 until 1906. Today it serves a version of its original function as a city-owned parking lot.


The Haymarket name survives in the historic warehouse district immediately west of the old Haymarket Square. The Lincoln City Council designated the eight block Haymarket Landmark District in 1982, giving it recognition and protection as a major element of Lincoln’s heritage. The National Park Service subsequently certified Haymarket as the equivalent of a district listed on the National Register of Historic Places, with the protection and privileges of that status. In 1985 Haymarket was selected as a demonstration project by the National Main Street Center. Haymarket is the first urban warehouse district to undertake that highly successful economic revitalization program of the National Trust for Historic Preservation.


While we were in downtown Lincoln we dicided to visit Licorice International. Oh, was that fun!


Licorice in every size, shape and flavor you could ever dream of from all over the world. We came home with a Black Licorice Bridge Mix and an Australian Licorice that was wonderful. We also sampled some others that were just as good. A very fun side trip.