Showing posts with label Cast Iron Cooking. Show all posts

Gooseberry's Patch's 101 Easy EVERYDAY Recipes & A Giveaway!!

Monday, May 30, 2011

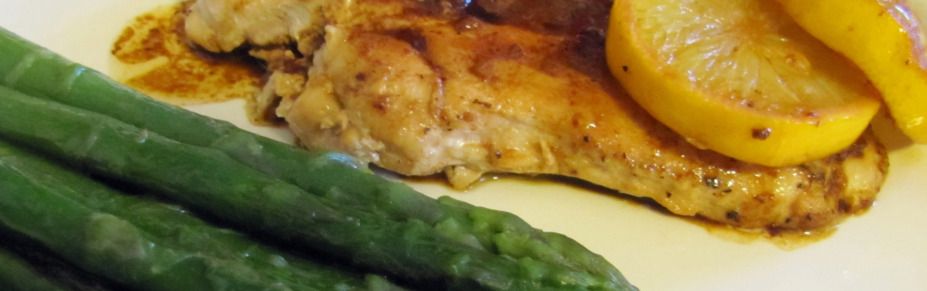
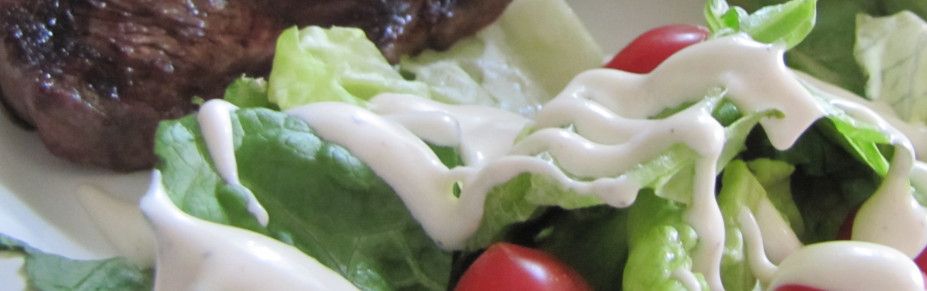
I recently got my reviewer's copy of the soon-to-be released (June 1st) Gooseberry Patch cookbook 101 Easy Everyday Recipes -- this is another in the 101 Photo Series Cookbooks. I have fallen in love with these photo series books. I didn't think I would because I just adore the combbound, illustrated books we've come to know and have collected for years from Gooseberry Patch. Other titles in this series include 101 Homestyle Favorites, 101 Slow-Cooker Recipes, 101 Easy Entertaining Recipes, 101 Cupcake, Cookie & Brownie Recipes, 101 Autumn Recipes and 101 Christmas Recipes. This latest one is a gem! We all need help from time to time getting a meal on the table on weeknights -- this book is chocked full of solutions to the daily dilemma -- WHAT'S FOR DINNER?!!


I have made 3 different recipes from this book and will be sharing them all with you this week. The first one up is from the chapter, No-Fuss Desserts. I took these to a Memorial Day get together and brought home an empty plate....and I wrote the recipe out for 3 different people. This is so simple and yet so very, very yummy! I will be making this recipe again!!


Quick & Easy Nutty Cheese Bars

18-1/2 oz pkg golden butter cake mix
1-1/2 c chopped pecans or walnuts, divided
3/4 c butter, melted
2 8-oz pkgs. Cream cheese, softened
1 c brown sugar, packed

On a bowl, combine dry cake mix, 3/4 cup pecans and melted butter; stir until well blended. Press mixture into the bottom of a greased 13”x9” baking pan. Combine cream cheese and brown sugar in a separate bowl. Stir until well mixed. Spread evenly over crust. Sprinkle with remaining pecans. Bake at 350 degrees for 25 to 30 minutes, until edges are golden and cheese topping is set. Cool completely in pan on wire rack. Cut into bars. Refrigerate leftovers. Makes 2 dozen.

Now for the important stuff -- you can enter in to win a FREE copy of this book before it is released (June 1st release) AND 2 hand-embroidered Faithfulness Farm Dish Towels. For 3 chances to win -- 1. Leave A Comment on this post. 2. Follow Faithfulness Farm (or tell me you already do). 3. Friend Faithfulness Farm on Facebook. And watch for posts this week which will include bonus entry information. The winner will be announced on Monday June 6th.

GBP Quick & Easy Autumn Review 4 of 6

Thursday, April 7, 2011


Day 4 ~ Mains

It was difficult picking from all the wonderful recipes for mains in this book BUT I knew I wanted to use my Grandma's cast iron skillet and include the recipe in my Cast Iron Cooking segment -- Skillet Chicken & Mushrooms submitted by Tina Wright of Atlanta, GA fit that bill perfectly. This recipe was perfect to make for a quick and easy weeknight supper -- I have to admit to a modification in the original recipe -- instead of using Tarragon, I used Thyme. I just don't usually care for the flavor of Tarragon. This was very yummy and I will be making it again!


Skillet Chicken & Mushrooms

1-1/2lbs boneless, skinless chicken breasts
Salt and pepper to taste
3 T. butter, divided
1 yellow onion, chopped
1 lbs sliced mushrooms
½ c Madeira wine or chicken broth
1 T. Worcestershire sauce
1 T. fresh tarragon, chopped

Sprinkle chicken generously with salt and pepper. In a large skillet over medium-high heat, melt 2 Tbsp butter. Cook chicken until golden on both sides, about 8 minutes. Transfer chicken to a plate. Melt remaining butter in skillet over medium heat. Add onion; sauté just until softened, about 3 minutes. Add mushrooms; sauté until juices are released, about 5 minutes. Stir in wine or broth and Worcestershire sauce. Return chicken and any juices from the plate to the pan. Spoon mushroom mixture over chicken. Reduce heat to medium-low; cover and cook until chicken juices run clear, about 20 minutes. Stir in tarragon and additional salt and pepper, as desired. Serves 4.

Follow and enter in for a chance at a copy of Gooseberry Patch's soon-to-be released book Quick & Easy Autumn and a Faithfulness Farm Apron by leaving a comment on this post -- there will be a total of 6 chances to win -- one each day this week. Leave a comment on each review post to enter. The winner will be announced on April 15!

Cast Iron Cooking ~ GBP's Slow Cookers, Casseroles & Skillets & A Product Review

Tuesday, February 1, 2011

Last year Gooseberry Patch published Slow Cookers, Casseroles & Skillets. With *SKILLETS* in the title, it got my full attention but for whatever reason, I didn't run out and buy it. I always meant to, but simply hadn't got around to it. Fast forward to this week and the blizzard of the century. I ran to our local Allen's Superstore in Hastings, NE and purchased this book. While everyone was standing in line with bread, milk and eggs (what they gonna make, French Toast, lol), I was in line with a new cookbook to read, review and cook from!


This book is EVERYTHING I've come to expect from Gooseberry Patch. Lots of wonderful recipes and commentary contributed by readers.....ALL the fabulous cooks from around the country. Since I am all about skillet and cast iron cooking, I mainly concentrated on the *Speedy Skillets* segment of the book. Speedy Skillets is divided into 3 catagories -- Just 5 Ingredients!, Easy Family Meals & One-Dish Dinners (actually ALL 3 segments are divided into these same 3 catagories...very clever). I asked my daughter to choose a recipe for us to try. She picked Easy Chicken Fettucine. The name is spot-on -- this is a very easy recipe. No fussy ingredients and received thumbs-up all around.


I am looking forward to diving into the other 2 segments of this book BUT I do not plan to wait until the next blizzard of the century. Thank you Gooseberry Patch for another GREAT book.

***Time SAVING Tip*** Whenever I cook boneless, skinless chicken (breasts or thighs), I cook twice the amount the recipe calls for. I refrigerate or freeze the excess and use for bullet-fast meals or as additions to salads and such. Always comes in super handy and takes no more time or effort that just cooking what the recipe calls for.

Easy Chicken Fettucine
(Printable Version)

8-oz pkg cream cheese, cubed
3/4 c grated Parmesan cheese
1/2 c butter, sliced
1 lb boneless, skinless chicken breasts, cubed
1 Tbsp oil
12-oz. pkg fettucine pasta, cooked (I used Dreamfield's Low Carb Linguine since they don't have fettucine)

Combine cheeses, butter and milk in a saucepan. Stir over medium heat until cheese melt and mixture is smooth; keep warm.


In a large, deep skillet over medium-high heat, cook chicken in oil until juices run clear, drain.

Add cooked pasta to skillet and top with cheese sauce; toss to mix well. Serves 6.
YUMM-O!!

I have shared before that I follow a low carb diet to control my weight. Basically, over the last year, I've made eating lower carb my lifestyle. That said, I was pretty sure I had kissed pasta goodbye FOREVER....then I discovered Dreamfields. I can eat pasta again....and it is wonderful. I find the price is in line with the major brands and our little town grocery carries it so I am supposing you can buy it anywhere, but if not, they do sell it on the website. If you are watching carbs and even if you are not, I highly recommend this product.


Sharing at Tempt My Tummy Tuesday, Full Plate Thursday, Foodie Friday and Potluck Sunday.

Cast Iron Cooking ~ Skillet Salt-Roasted Potatoes

Monday, January 17, 2011

I love interesting cooking techniques. Salt-roasting is certainly interesting. We've salt-roasted salmon and salt-roasted beef tenderloin. Both are wonderful. I've even salt-baked potatoes before, but when I recently saw the recipe for Skillet Salt-Roasted Potatoes, I knew I was in. My family loves potatoes so they were in too. The original recipe called for fennel seeds in the salt but I skipped that since fennel seed isn't a favorite. To add some extra flavor, we drizzled with rosemary infused olive oil instead of regular olive oil but regular olive oil or even butter would be wonderful.


Skillet Salt-Roasted Potatoes
(Printable Version)

2 lbs red and/or yellow small new potatoes
2 cups kosher salt
1 Tbsp olive oil

Scrub potatoes; set aside. Pour salt into the bottom of a 12-inch cast iron skillet, spreading evenly.


Heat over medium heat for about 5 minutes or until hot. Add potatoes to hot skillet, pressing potatoes into salt slightly.


Cover skillet. Turn heat to low. Cook 40-45 minutes or until tender when tested with a fork. Remove skillet from heat. Let stand, covered for 5 minutes. Remove potatoes from skillet with tongs and brush excess salt from potatoes (reserve salt mixture). Transer to serving platter and drizzle with olive oil. Cover with foil and allow to stand 5 minutes. Makes 4 to 6 servings.


When cooled, the salt can be store in a zippered bag for the next time you want to salt-roast potaotes...I am thinking that will be SOON around here.

Sharing at Tempt My Tummy Tuesday, Full Plate Thursday and Potluck Sunday at Mommy's Kitchen.

Cast Iron Cooking ~ Skillet Poppy Seed Chicken

Sunday, January 2, 2011

After a break from my Cast Iron Cooking segment, I've dusted the trusty skillets and am back with a bunch of new and reworked recipes! First in the line up is Skillet Poppy Seed Chicken......this one skillet recipe certainly isn't your mother's Poppy Seed Chicken recipe. No cream-of-something soup and no crackers in this delicious remake. My family asks for this comfort food often. I usually serve with some sort of noodle or pasta and green beans w/almonds.


Skillet Poppy Seed Chicken
(Printable Version)

1 Tbsp olive oil
3-4 boneless, skinless chicken breasts
salt and pepper to taste
2 Tbsp butter
1 small shallot, minced
1/2 pound fresh mushrooms, sliced
3 Tbsp flour
1/2 c dry white wine (you can omit and just add more broth)
1-1/2 cups chicken broth (or you can use homemade stock)
1 cup (8 ounces) sour cream
1 jar (2 ounces) diced pimientos, drained
Topping:
1/2 cup butter, melted
1-1/2 cups Panko crumbs
2 teaspoons poppy seeds

Heat olive oil in a large cast iron skillet over medium high heat.

Season chicken breasts with garlic powder, salt and pepper. Cook in olive oil until well browned on each side and cook through.

Remove to a plate and cover.

To skillet add shallots and wine (or 1/2 cup chicken broth) and scrape up all the brown bits that are stuck on the skillet bottom and cook until shallots are softened.

Add butter and mushrooms. Saute mushrooms until tender.

Add flour and stir around to make a roux. Pour in broth and stir until thickened. Add sour cream and pimientos.

Slice and stir in chicken and any juices from the plate. Remove from heat.

In a small bowl, combine the topping ingredients. Sprinkle over the chicken. Place skillet into oven and bake at 350° for 20-25 minutes or until heated through and topping is browned.

Yield: 6 servings.


Cast Iron Cooking & A Review

Monday, November 8, 2010

Last week I got the most wonderful news....I was the winner of a giveaway over at Mari's Once Upon A Plate. If you don't know Mari, you have to visit her blog...very inpirational!!

So what did I win? Barefoot Contessa's *How Easy Is That*.


I enjoy Ina's style very much and knew this would be a book I would use and enjoy. The Brown truck brought it last Thursday and I poured over each and every page. There are lots of recipes I know I'll be trying but there was a standout that simply screamed TRY ME!! You see, we're a cheese family. Never met a cheese we didn't like and when we travel, we search out local cheeses to bring home to try. When I saw Baked Fontina on page on page 91, I was thrilled....AND it calls for a cast iron skillet!!


Baked Fontina
(Printable Version)
1-1/2lbs Italian Fontina (rind removed) and 1-inch diced
1/4 cup good oil olive
6 garlic cloves
1 Tbsp minced fresh thyme leaves
1 tsp minced fresh rosemary leaves
1 tsp kosher salt
1 tsp freshly ground black pepper
1 crust French baguette

Preheat the boiler and position the oven rack 5 inches from the heat.

Distribute the cubes of Fontina evenly in a 12-inch cast iron pan.


Drizzle on the olive oil. Combine the garlic, thyme. and rosemary and sprinkle it over the cheese and olive oil. Sprinkle with the salt and pepper


and place the pan under the broiler for 6 minutes, until the cheese is melted and bubbling and starts to brown.


How easy is that!!

We loved this appetizer and I even found a way to keep it lower carb...I ate it with lightly blanched cauliflower and broccoli. I'll be making this again as we get into the holiday entertaining season. I love this cookbook and am already pondering which recipe to try next!


Posting to Lisa's Tempt My Tummy Tuesday hosted this week At The Well and Michael Lee's Foodie Friday!

Cast Iron Cooking ~ Pumpkin Doughnut Muffins

Monday, November 1, 2010

Last week I received my November 2010 issue of Everyday Food. I've shared before that our family tradition is to make (and eat) muffins for Sunday morning breakfast. It simply wouldn't be Sunday without muffins (well, occasionally I do get away with making scones or a coffeecake). When I flipped thru the magazine, I knew I would be making the Pumpkin Doughnut Muffins featured on page 112.

Years ago, my sweet family purchased for my birthday a lovely Griswold cast iron muffin pan. They knew I'd love it. Not just love it, but use it...OFTEN. It gets a workout most every Sunday morning. If you've never baked in cast iron, I have to share that it is simply the best....much better than other muffin tins.


A very nice sized muffin cup. Small, but not a mini-muffin. There is also only 11 cups...not a dozen or even a baker's dozen.


Pumpkin Doughnut Muffins
(Printable Version)
10 Tbsp butter, room temperature
3 c all-pupose flour
2-1/2 tsp baking powder
1/4 tsp baking soda
1 tsp salt
1/2 tsp nutmeg
1/4 tsp allspice
1/3 c buttermilk
1-1/4 c pure pumpkin puree
3/4 c light brown sugar
2 large eggs

sugar coating:
3/4 c granulated sugar
1-1/2 tsp cinnamon
1/4 c butter, melted

Preheat oven to 350°F. Butter and flour 12 standard muffin cups. Make batter: In medium bowl, whisk together flour, baking powder, baking soda, salt, nutmeg, and allspice. In a small bowl, whisk together buttermilk and pumkin puree. In a large mixing bowl, using an electric mixer, beat butter and brown sugar until light and fluffy. Beat in eggs, one at a time, scraping down bowl as needed. With mixer on low, add flour mixture in three additions, alternating with two additions pumpkin mixture; and beat to combine.

Spoon 1/3 cup batter into each muffin cup and bake until a toothpick inserted into center of muffin comes out clean, about 30 minutes. Meanwhile, in a medium bowl, combine granulated sugar and cinnamon. Let muffins cool 10 minutes in pan on wire rack. Working with one at a time, remove muffins from pan, brush all over with melted butter, then toss to coat in sugar mixture. Let muffins cool completely on a wire rack. Makes 12 muffins.


Sunday's breakfast was these WONDERFUL muffins and some lovely Orange-Spiced Tea. I bought some while visiting the Mennonite store in Wisconsin back in September. So yummy but I quickly went thru the small bag I brought home. I have made some of my own and it is just about as good as the one I bought. I plan to use some of this for holiday gift giving. It will make great hostess gifts.

The tea was the perfect compliment to the muffins. Oh, and the muffins have a dense texture very similar to an old-fashioned cake donut....I understand the name!


Orange Spiced Tea
(Printable Version)

3 large navel oranges
1 (8 oz.) pkg. loose black tea leaves
1-2 stick cinnamon sticks
2 tsp. whole cloves

Remove thin bright colored rind from each orange with sharp knife (no white); cut into thin strips. Spread out on cookie sheet. Heat in very slow oven, 250°F for 10 minutes or just until rind is dry. Toss loose tea with orange rind. Break up cinnamon stick and whole cloves and add to tea mixture. Place in a jar and allow to sit for a couple of weeks for flavor development.


Posting to:
Kristin's THIS WEEK'S CRAVINGS - Pumpkin Party
Lisa's Tempt My Tummy Tuesday
Lady Kathrine's Tea Time Tuesday
Michael Lee's Foodie Friday

Granny's Skillet & Skillet Cornbread

Monday, October 25, 2010

My dear Grandmother would have celebrated her 92nd birthday this last week -- if she was still with us. She went home to be with the Lord almost 18 years ago. I will always miss her very much! Grandpa joined her the following year and when their home was cleared out and readied to sell, I was able to take a couple things. One was my Grandma's rocker and the other was her old cast iron skillet. I treasure both, but most especially the skillet. I use it several times a week and each time I grip it's handle, I know I am griping where her hands griped uncountable times. That gives me comfort.


One of Grandma's favorites was always cornbread and buttermilk. I found myself wanting to bake some in her skillet over the weekend...so I did. Not a better cast iron dish than cornbread. And perfect with soup for a soul satisfying supper!


Skillet Cornbread
(Printable Version)

1 cup all-purpose flour
1 cup white or yellow cornmeal
1 tablespoon sugar
2 teaspoons baking powder
1 teaspoon baking soda
1/4 teaspoon salt
1 cup buttermilk
1/3 cup butter, melted
2 eggs, beaten
1 tablespoon butter

Heat oven to 400°F. Combine flour, cornmeal, sugar, baking powder, baking soda and salt in medium bowl. Stir in buttermilk, 1/3 cup melted butter and eggs just until mixture is moistened. Melt 1 tablespoon butter in heavy cast iron or oven-proof 10-inch skillet (2 to 4 minutes). Immediately pour batter into pan. Bake for 15 to 20 minutes or until toothpick inserted in center comes out clean. Serve warm.

Sharing at Lisa's Tempt My Tummy Tuesday, Michael Lee's Foodie Friday AND Laurie's Favorite Things! BIG thanks to these lovely gals who graciously host these events each week!

Cast Iron Cooking ~ Going Dutch!

Friday, October 8, 2010

Going Dutch!!

Dutch ovens, that is!


There was a time that no kitchen was without a cast iron Dutch Oven. They really were the workhorse of the kitchen, performing duties stove-top as well as in the oven and even outdoors (or hearth) on the fire. But our mothers and grandmothers pretty much set these icons aside as too heavy or old fashioned and instead went with more *modern* choices.

Well, the Dutch Oven is back and back in a BIG way! High-end brands like Le Creuset have helped bring the DO back. Stylish and brightly colored, they have gotten the attention of the modern cook. Celebrity chefs, like Martha, Paula, Rachel and Mario all lend their names to their own versions of these wonderful pots. The downside is most of these pots are expensive and although probably worth every penny, out of range for many of us.

Luckily, there are some lower cost (not lower quality by any means) options. My favorite DO is one I picked up about 20 years ago at a garage sale. It is a vintage cast iron, black, dome lidded DO. No bright colors but oh, what a wonderful job it does cooking. And my favorite manufacturer of cast iron, Lodge Manufacturing also has a line of enameled (as well as non-enameled) DO’s at a remarkable price when you consider the amount the high-end makers are asking. If a Le Creuset pot is just what you are wanting and there is nothing else that will do, shop TJ Maxx, Marshall’s, HomeGoods, etc., for a DO that is priced more reasonably.

We are moving into the time of year that my DO gets a workout. I love the smell of slow cooking goodness coming from the oven. I've had a request for youngest son's favorite this weekend...POT ROAST! YUM!!

Dutch Oven Roast
(Printable Version)

(8) pound chuck roast, 2-to 3- inches thick, bone in if available
2-3 Tbsp vegetable oil
1/2 cup Burgundy wine
2 cups warm water
3 cups sliced yellow onions
2 cloves garlic, chopped
1 teaspoon salt
2 tablespoons coarsely ground pepper
1 cup mushrooms, sliced
6 carrots, cut into large chunks
6 medium sized red skinned potatoes, cut in half
3 tablespoons cornstarch
1/2 cup water

Preheat oven temperature to 350 F. Heat vegetable oil in 16-inch dutch oven. Salt and pepper roast on both sides. Sear both sides in hot oil. Pour warm water and Burgundy wine over roast; add garlic, onions, carrots, potatoes and sliced mushrooms. Cover and cook about 2 ½ hours. Pour cooking liquid into a large measuring cup. Skim away fat. If necessary, add a little water or red wine to make 4 cups liquid and return to the cooking pan. Stir in the cornstarch dissolved in ½ cup water. Bring to a boil, reduce heat and simmer for 3 minutes. Return roast to cooking pan and arrange vegetables around the roast. Cover and allow to rest 15 minutes before serving.


So even though that picture is of a big, ugly (not in the eye of this beholder) pot, it is one of my FAVORITE things and I am sharing at Laurie's A Few Of My Favorite Things! Thanks for hosting Laurie!

Adding this post to Lisa's Tempt My Tummy Tuesday hosted this week At The Well.

Cast Iron Cooking ~ Coffee Braised Beef Short Ribs

Friday, October 1, 2010

One reason I changed the name of this regular feature from Skillet Suppers to Cast Iron Cooking is because of my LOVE of Dutch oven cooking. Once the weather starts cooling down, I am thinking of braised meats and using my Dutch oven. Among my favorites is always beef short ribs.


Coffee Braised Beef Short Ribs
(Printable Version)

3 pounds beef short ribs
Salt and freshly ground black pepper
2 tablespoons olive oil
1-1/2 cups strong brewed coffee
2 Tbsp Balsamic vinegar
1 large yellow onion, chopped
3 cloves garlic, chopped
2 teaspoons hot or mild chili powder
1 teaspoon dried oregano

Season the short ribs with salt and pepper, to taste. Warm 1 Tbsp of the oil in a large cast iron dutch oven over high heat. Add the ribs and brown until golden, turning them once, about 8 minutes. Transfer the ribs to a plate. Add remaining Tbsp of oil and heat. When heated, add onion and garlic and sauté until softened. Pour the coffee and balsamic vinegar into the dutch oven. Cook over high heat, scraping up the brown bits on the bottom. Add the ribs, the chili powder and oregano. Cover. Transfer to 350°F oven for 1-1/2 hours. Ribs will be falling off the bone tender when done.

Sharing at Michael's Foodie Friday and Lisa's Tempt My Tummy Tuesday!