Fine Cooking & Braised Short Ribs

Friday, January 29, 2010


Braised Short Ribs

This week I ran into Hy-Vee on my way out of town and then home for the day. I only needed to pick up a prescription and since I’m working my way through my freezer and pantry inventories, a small amount of produce. It was after 5 and HyVee was busy and the line at the checkout counter was long. I decided to entertain myself with a new (to me) magazine, Fine Cooking. I flipped open and turned directly to the article on page 36 – Braised Short Ribs. Both last week and this, my dear friend Yvonne at StoneGable has mentioned Braised Short Ribs on her blog. I love Braised Short Ribs. I wanted them last week but resisted because I have none in my freezer……I really had planned to resist buying them this week too. All resistance flew out the door right there in the checkout line. I left my place and headed straight for the meat counter where I picked out a family sized package of short ribs.

I want to state that I am not sure what rock I have been hiding under but I love Fine Cooking Magazine. I am not really sure why I’ve never noticed this magazine before now but am happy to have found it and wasted no time sending in my subscription card. Their website is very extensive with a large variety of recipes. If you are not a magazine addict like me, you could be very satisfied with just the webpage experience.

Now back to Braised Short Ribs. Fine Cooking magazine has this Create Your Own Recipe feature (I’ve linked to it). You make a few choices (Braising liquids, Flavorings, Aromatics, Deglazing liquids, Finishes, Garnishes) and the site builds YOUR recipe. How cool is that?

Create Your Own Recipe - Braised Short Ribs

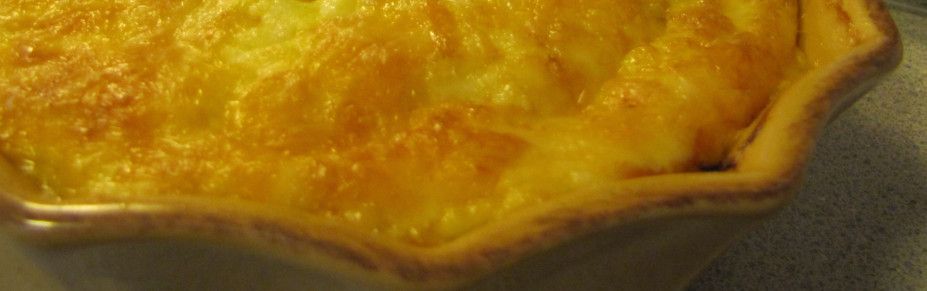
So here is the recipe I created (based on the choices I made). I served with a creamy, cheesy polenta and roasted cauliflower. A very, very yummy supper!

Braised Short Ribs
(Printable Version)

4-1/2 to 5 lb. English-style beef short ribs (8 to 12 ribs)
3 Tbs. vegetable oil
Kosher salt
ground black pepper
2/3 cup medium-diced onions
2/3 cup medium-diced carrots
2/3 cup medium-diced celery
1 Tbs. finely chopped garlic
1 Tbs. chopped fresh thyme
2 whole dried bay leaves
1/2 cup dry red wine
1-1/2 cup diluted lower-salt beef broth (mix equal parts broth and water)
1-1/2 cup dry red wine
1 to 2 tsp. balsamic vinegar
1 to 2 Tbs. chopped fresh parsley

Position a rack in the center of the oven and heat the oven to 325°F. In an 8-quart Dutch oven, heat 2 Tbs. of the oil over medium heat. Season the ribs with 2 tsp. salt and 1 tsp. pepper. Add half of the ribs to the pot (or as many as will fit without overlap), and cook, turning with tongs, until nicely browned on all sides, 3 to 4 minutes per side. Transfer the ribs to a platter and repeat with the remaining ribs. Pour off all but a thin layer of fat from the pan.
Add the remaining 1 Tbs. oil, onions, carrots, and celery to the pan. Season with 1/2 tsp. salt. Cook, stirring and scraping up any browned bits on the bottom of the pan, until the aromatics are soft and lightly browned, 6 to 8 minutes. Add garlic, thyme, and bay leaves, and cook, stirring, until well distributed and fragrant, about 1 minute.

Pour the 1/2 cup red wine into the pot and cook, stirring to scrape up any browned bits on the bottom of the pot, until the liquid is reduced to about 2 Tbs., about 1 minute.

Transfer all the ribs (and any juices that have accumulated) back into the pot. Pour the beef broth and red wine and 1 cup water over the ribs and using tongs, arrange the ribs as evenly as possible and no more than two layers deep.
Bring the liquid to a simmer, cover, and put the pot in the oven. Cook, turning the ribs with tongs about every 40 minutes, until they are fork tender, about 2-3/4 hours. (The meat may fall off most of the bones about midway through cooking; this does not mean that the ribs are fully tender.)

Transfer the ribs to a serving platter or dish. Let the sauce and solids sit in the pot for a few minutes to cool and with a shallow spoon, skim off as much of the fat as possible from the surface. Season the sauce to taste with salt and pepper, and add the vinegar.

Serve the ribs with the sauce spooned over, sprinkled with chopped parsley. Serves 6.

Hooking up with Michael's Foodie Friday at Designs by Gollum! I look forward to this foodie event all week!


Book Review - The Kitchen Linens Book

Wednesday, January 27, 2010
I am sharing for the first time at Vintage Thingies Thursday. I found this a couple weeks ago and promised I'd be back to post.


The Kitchen Linens Book
Using, Sharing, and Cherishing the Fabric of Our Daily Lives by EllynAnne Geisel

I posted earlier this week on my love of vintage linens……especially kitchen linens. I have found a kindred spirit in EllynAnne Geisel. I reviewed The Apron Book a few months back and loved it…as much as I loved the first book, if I could only own one (thankfully, I own both, lol), I’d choose The Kitchen Linens Book.

I have many memories tied to the kitchen. My Mom and my grandmothers were all great cooks. Early in my childhood, I was drawn into their magical world. I couldn’t wait to take part in the magic they created. I would tie on an apron, drag a chair over to the counter and beg to peel carrots or measure ingredients. Thank the Lord for a patient mother who eagerly accepted my help (I tried hard to be that same Mom for my kids). Attached to those great memories are the fun and whimsical kitchen linens and dishes (we’ll talk dishes another day) from the 1940’s, 50’s and 60’s. As I’ve said previously, I just loved that the dishtowels had a task assigned to each day of the week. Of course, as a child, I didn’t know that stemmed from an old English Rhyme…I just knew I loved the orderliness of it all.


Wash on Monday,
Iron on Tuesday,
Bake on Wednesday,
Brew on Thursday,
Churn on Friday,
Mend on Saturday,
Go to meeting on Sunday.

Now that I’ve created a home for my family, I collect vintage linens for enjoyment but also embroider *vintage look* towels for use. Years back I ran into a treasure trove….a box full of vintage patterns at a farm sale. Old Aunt Martha and Vogart patterns……Scotty Dogs, Roosters, Baskets of Fruits, Dutch Girls, Animated Kitchen Gadgets, etc., I’ve made them all…at least once. Some have been given as gifts, others sold and most have been the towels of my own kitchen. One of the things about The Kitchen Linens Book that got my attention is that it includes a Butterick Transfer Pattern for “Vintage Kitchen Towel Motif”. I was very excited about that pattern. I carefully cut out the motif I wanted to embroider onto a towel to feature with this review and was very disappointed that it did not transfer well. Below is the towel, but it is obvious to me that the pattern really wasn’t intended for use....much less repeat use like those old ones were.


Disappointing. That said, I still love the book and will enjoy thumbing through it many times and reading of others with sweet memories like my own. If you are not so into vintage kitchen linens, look for this book at your public library and just see if it evokes memories for you. Maybe you’ll be a convert!


I thought I’d share some great information from the book (page 11).

How to Apply a Transfer

1. Set dry iron to “Linen” setting (350 degrees). Allow iron to reach proper temperature or transfer may not work.

2. Place protective cloth over ironing board to keep excess ink from staining ironing board cover.

3. Place fabric on iron board, right side up, over the protective cloth.

4. Place transfer face down on fabric.

5. Place a clean sheet of paper directly over the transfer so that the entire inked surface is covered.

6. Press firmly and evenly in slow, circular motion for 30 seconds, no longer. BE CAREFUL TO HOLD TRANSFER IN ONE PLACE TO AVOID SMEARING.

7. Allow to cool for at least one minute before removing paper.
Are you looking for hot-iron transfers of vintage designs, check out some of these online sources:

www.sewingpalette.com
www.colonialpatterns.com
http://www.yesterdayscharm.com (my favorite)
www.patternbee.com
http://mytransfers.blogspot.com


Muffin Madness

Tuesday, January 26, 2010

I am not really clear when we started the tradition of making muffins for breakfast every Sunday morning. I know my kids were small. With the exception of an occasional coffeecake or batch of scones, muffins are Sunday morning breakfast. Perfect paired with a pot of coffee, some juice and/or fruit as we get ready to head out for church. I thought I’d share some of our favorite muffins as well as some of the things we’ve learned about baking muffins.


Picking & Preparing your tin

I've read the claim that muffins brown best if baked in shiny metal muffin tins. That may be true but I’ve never had a browning issue baking muffins in either my old cast iron muffin tin or my not-so-shiny, vintage Bake King tins. Tins should be greased rather heavily on the bottom for easy removal of muffins. Greasing the sides very lightly, or not at all, allows the batter to cling to the tins in rising, thus increasing volume. Fill your muffin tins 2/3 full of batter unless your recipe states otherwise. Your muffins will rise about the pan surface. Use an ice cream scoop to fill the cups in the muffin pan. This will measure your batter equally for each muffin. To keep muffins from burning around the edges, leave one muffin cup empty; fill 2/3 with cold water before baking. Generally cupcake papers are for just that……cupcakes. I will use them if I am taking muffins somewhere to share but for the most part, I belong to the camp that says a muffins has no paper.

Measuring

If the ingredient proportions aren’t correct, your muffins will fail. If there is too much liquid, muffins may sink in the middle or too much fat can make them coarsely textured. Use dry measure cups for flour and other dry ingredients and liquid measures for milk and other liquids. Be sure to use measuring spoons for small amounts of wet or dry ingredients instead of *eyeballing*.

Mixing

Mixing is very important in muffin making. A good muffin is *made* in the mixing. Combine the dry and liquid ingredients separately. The egg should be beaten enough to combine well with the liquid, then all liquids mixed thoroughly together. Under-blending of liquid ingredients produces a muffin with thicker cell walls and a less tender texture.

The liquid mixture is stirred with the combined dry ingredients only until the flour is moistened. It is essential to keep mixing to a minimum, no more than 25 to 30 strokes. Your mixing technique should be gentle. The batter should be lumpy not smooth. Over-mixing might result in peaked tops, a tough muffin and “tunnels.” A rubber spatula or wooden spoon is the perfect tool for gently mixing muffins.


Baking

Preheat the oven before starting to mix the ingredients. Muffins are usually baked on a high setting for a short period of time Check your recipe for the proper temperature setting and the required time. When baking time is up, insert a toothpick into the center of the muffin. If the toothpick comes out clean, they are done. If not, continue baking in 2 to 3 minute increments, checking each time with the toothpick until it comes out clean.


Cooling

When muffins are done, remove them at once from the muffin tins so they don’t steam and soften. If they must stand in muffin tins, tip each one slightly in its cup so steam can evaporate.


Storing

Leftovers may be stored at room temperature, in a resealable plastic bag or an airtight container to retain moisture. Reheat and use within a day or so. Nut and fruit muffins are at their best if made the day before using. They should be cooled completely, wrapped tightly, and kept at room temperature. To freeze muffins, wrap in foil, heavy-duty plastic wrap or freezer-wrap and press all the air from package; freeze for up to 3 months (to thaw, let stand, wrapped, at room temperature for about 1½ hours).


Some of My Favorite Muffin Recipes:

Apple Cinnamon Muffins
(Printable Version)

1-1/2 c all-purpose flour
¾ c sugar
1-1/2 tsp baking powder
1 tsp ground cinnamon
½ c milk
1/3 c butter, melted
1 egg, slightly beaten
1 c finely chopped apple

Heat oven to 375°F. Combine, flour, sugar, baking powder and cinnamon in medium bowl. Add all remaining ingredients. Stir just until flour is moistened.
Spoon batter into greased 12-cup muffin pan. Bake for 18 to 23 minutes or until lightly browned. Let stand 5 minutes; remove from pan.

Nutmeg Streusel Muffins
(Printable Version)

Topping:
1-1/3 c all-purpose flour
1 c firmly packed brown sugar
½ c cold butter
Muffin Ingredients:
2/3 c all-purpose flour
2/3 c buttermilk
1 egg
1-1/2 tsp baking powder
1-1/2 tsp ground nutmeg
½ tsp baking soda
½ tsp salt

Heat oven to 400°F. Combine 1 1/3 cups flour and brown sugar in large bowl; cut in butter with pastry blender or fork until mixture resembles coarse crumbs. Reserve 1/2 cup for streusel topping. Add all muffin ingredients to remaining streusel mixture in same bowl; stir just until moistened. Spoon batter into greased or paper-lined 12-cup muffin pan. Sprinkle with reserved streusel topping. Bake for 18 to 22 minutes or until lightly browned. Let stand 5 minutes; remove from pan.

Mini Poppy Seed Muffins
(Printable Version)

1-1/3 c all-purpose flour
2 Tbsp poppy seeds
½ tsp baking powder
¼ tsp baking soda
1/8 tsp salt
¾ c sugar
2/3 c butter, softened
2 eggs
1 tsp vanilla
¼ tsp lemon extract
1/3 c lemon yogurt

Heat oven to 350°F. Place paper baking cups into mini muffin cup pans. Combine flour, poppy seed, baking powder, baking soda and salt in medium bowl. Set aside. Combine sugar and butter in large bowl. Beat at medium speed, scraping bowl often, until creamy. Add 1 egg at a time, beating well after each addition. Add vanilla and lemon extract; mix well. Reduce speed to low; alternately add flour mixture and yogurt, beating after each addition, just until moistened. Spoon batter into prepared mini muffin cups. Bake for 15 to 18 minutes or until set and very lightly browned.

Prize Winning Blueberry Muffins
(Printable Version)

½ c sugar
¼ c butter, softened
1 c sour cream
2 Tbsp lemon juice
1 tsp grated lemon zest
1 egg
1-1/2 c all-purpose flour
1 tsp baking soda
1 c fresh or frozen (unthawed) blueberries
1 Tbsp sugar
½ tsp grated lemon zest

Heat oven to 375°F. Grease muffin pan cups or place paper baking cups into muffin pan cups; set aside. Combine 1/2 cup sugar and butter in large bowl. Beat at medium speed, scraping bowl often, until creamy. Add sour cream, lemon juice, 1 teaspoon lemon zest and egg. Continue beating, scraping bowl often, until well mixed. Combine flour and baking soda in medium bowl. Stir flour mixture into sour cream mixture by hand just until moistened. Gently stir in blueberries. Spoon into prepared muffin pan cups. Combine 1 tablespoon sugar and 1/2 teaspoon lemon zest in small bowl. Sprinkle about 1/4 teaspoon mixture on top of each muffin. Bake for 20 to 25 minutes or until lightly browned. Cool 5 minutes; remove from pan.

Oatmeal Pecan Muffins
(Printable Version)

1-1/3 c uncooked quick-cooking oats
1-1/4 c all-purpose flour
½ c sugar
1 Tbsp baking powder
½ tsp salt
1/3 c cold butter
1 c half & half
1 egg, slightly beaten
½ c chopped pecans

Heat oven to 400°F. Combine oats, flour, sugar, baking powder and salt in large bowl; cut in butter with pastry blender or fork until mixture resembles coarse crumbs. Stir in fat free half & half and egg just until moistened. Gently stir in pecans. Spoon batter evenly into 12 paper-lined or greased muffin cups. Bake for 17 to 20 minutes or until golden brown. Cool 5 minutes; remove from pan.

Sweet Cherry Muffins
(Printable Version)

1/2 c butter, at room temperature
1 c sugar
2 large eggs
1 tsp vanilla
2 tsp baking powder
1/4 tsp salt
2-1/2 c chopped sweet cherries (frozen)
2 c all-purpose flour
1 c vanilla yogurt
1 tsp nutmeg
Topping:
1/4 c brown sugar
1 c sliced almonds
1/4 - 1/2 tsp nutmeg

Heat oven to 375°F. Grease 12 muffin cups, including area between cups. In a medium sized bowl, beat butter until creamy. Beat in sugar until pale and fluffy. Beat in eggs, one at a time. Add the vanilla, baking powder and salt. Then add the cherries. Mix in half the flour, alternating with the yogurt, until completely mixed. In a small bowl mix together topping ingredients. Scoop batter into muffin tins, filling half way. Sprinkle on topping mixture. Bake for 25-30 minutes or until golden brown.

Thanks to Jen, Lisa & Cole from Tempt Your Tummy Tuesday, Tasty Tuesday, and Tuesdays at the Table.


Caring For & Storing Vintage Linens

Monday, January 25, 2010

I am sharing today at Mary's Little Red House for Mosaic Monday. Thanks for hosting, Mary!


I love old linens and always have. I love ALL old linens…quilts, pillow cases, hankies, dish towels, tableclothes…all of them, but I am especially fond of kitchen linens. I remember when I was a little girl and it was my turn to dry the dishes, I always bypassed the lively colored Vera dish towels in my Mom’s kitchen (in the day before Vera was vintage) and dug to the back of the drawer for the hand embroidered flour sack towels made by my Great-Grandma, Lily Caudill Inman. Even then, those whimsical designs would make me smile and I always had to use the correctly labeled day-of-the-week towel.

Using old linens, whether embroidered, embellished with crochet or simple and tailored, creates an atmosphere of nostalgia and warmth in your home. If you are like me and hold on to linens as family keepsakes and rescue them as you happen upon them in antique stores, flea markets and garage sales, you end up with many more lovely examples than you can display at one time. Old linens do require careful cleaning and storage.

Where do you start when you acquire an old tablecloth or set of embroidered dish towels, believe it or not, you start with your vacuum. Vacuuming textiles can be a very beneficial and safe way to remove dust and dirt that can damage and cut fibers, according to the Nebraska Cooperative Extension Office. Use low suction, with vents open. For items too fragile to take direct suction, placing a clean piece of tulle over the cloth will help to protect it during vacuuming. If linens are soiled, it's important to clean them before storing them away for future use. Proper cleaning will keep insects from being attracted to food and grease as well as improving the appearance of the item in most cases. Keep in mind that cleaning should only be done if it will not affect the color, shape and strength of the fabric. Using water on cotton and linen removes acid build-ups and actually makes them more flexible. The extension office also recommends checking fabrics for colorfastness by using a few drops of water in an out-of-the-way place. After the liquid soaks in, blot with white cloth or tissue to see if any color is present. Try it with detergent solutions too before immersing linens and don't forget to check each different color in a multi-colored item. Some conservators recommend using distilled water to reduce the likelihood of depositing lime and iron in your vintage fabrics which can cause deterioration and discoloration over time. When we lived with a well full of iron, I was in total agreement with this recommendation. Now, our water isn’t so hard and the minerals are not such a concern. When you’ve determined the fabric is colorfast, use a mild soap like Fels-Naptha to clean your linens. Never use an automatic washing machine and dryer. If you have discolorations and/or stains, try a lemon juice and salt mixture for removing stains. Another thing you can try is drying the items in the sun to help to bleach out any yellowing. Be careful with this technique. Many conservators believe this is too harsh for fragile fabrics. I tend to chose a day when the sun is dappled by a few clouds and keep out only until dry. Do not drape over the clothes line. Dry cleaning is not recommended for fragile textiles because of friction and abrasion agitation causes as well as the damaging effect of excessive heat and the harsh chemicals involved. If you do chose to dry clean, request fresh or filtered solvent and ask them not to steam or press the linens. Dry your linens flat to avoid mishaping. Linens should be pressed carefully and quickly with a hot iron and starched sparingly.

When storing most linens, avoid folding them. If you are short on storage space, roll your linens as an alternative to folding. Folding stresses fabrics. If you must fold, use acid-free tissues or muslin to ease the stress points. Refolding often to distribute wear will also help to minimize damage. Storing linens flat is ideal. Wrapping or layering in acid-free tissue or muslin will also protect your linens. This is especially important if you store your linens in cardboard, paper, metal or wooden boxes which can deteriorate textiles with direct contact. Unsealed wood (read cedar chests) can stain and damage textiles requiring expensive treatments by professional conservators to reverse. Plastic totes should also be avoided since they do not allow air circulation and could trap moisture inside resulting in mildew....the enemey of textiles. Another issue with plastic totes is that they create static electricity which can draw in damaging dust.

Seems like a lot of fussy steps but with tender care, your keepsake linens can live happily in your home for years and years to come. Now that you know how to care for and store your linens, use them and enjoy them! They will bring a smile to your face!

A Pizza Primer

Thursday, January 21, 2010
Homemade pizza has been a staple in our home for almost as long as I can remember. It seems as though at some point the job of making pizza gets taken over by one of our teenagers. Currently, 17 year old son is our pizza chef. He does a stellar job! Our favorite pizza dough has also changed with pizza chefs. We were very sold on Wolfgang Puck’s dough recipe for many years and while it does make a great pizza, we currently favor the dough printed in The King Arthur Flour 200th Anniversary Cookbook. This primer is directly from that book. I’ve noted where our technique differs from theirs. One thing we are totally sold on is using cast iron for baking our pizzas...either a cast iron pizza pan or large skillets for deep dish pizzas.

This recipe makes 3 thin, or 2 thick 12-inch shells. It also states that one pizza will serve 1 hungry adolescent or 2 people with average appetites. We usually make the 2 thick and have plenty for the 4 of us (including 2 teens) and there are leftovers for the next day.


A trusty cast iron pizza pan!

Traditional Pizza Dough

1-3/4 cups warm water
1 tbsp sugar
1 packet or tablespoon active dry yeast
6 cups King Arthur Unbleached All-Purpose Flour (I use KA when I have it, otherwise, what I have on hand and usually I add some home milled ww flour to the mix)
¼ cup olive oil
1 Tbsp salt

Preparing the Dough:

Pour the water into a mixing bowl and dissolve in it the sugar and the yeast. When the yeast is active, add your first cup of flour, then the oil and salt. Add another 4-1/2 cups of flour, mixing with a large spoon until the dough comes away from the sides of the bowl and holds together.

Kneading:

Sprinkle the last ½ cup of flour onto your kneading surface. Turn out the dough and knead until it begins to feel as if it really belongs together, adding only enough flour to keep it form sticking to the board or you. Let it rest while you clean and grease your bowl. Continue kneading the relaxed dough until it feels smooth and springy.

Rising:

You have three options here.

▪Full Rise: Form the dough into a nice ball, place it in the grease bowl, turning it so the top is lightly greased also. Cover it and put it where it will be warm and cozy (no drafts). Let this rise until it is doubled (when you can poke your finger in it and the dough doesn’t spring back at you).

▪Slow Rise: If you want to make up your dough ahead of time (a slow rising dough has the best flavor), make it up, with about half the yeast, the morning of your gathering. Cover it with greased plastic wrap and put it in the refrigerator. It will rise happily all day. About 15 minutes after you take it out, it will be ready to roll out and decorate.

▪No-Rise: If this is a spur-of-the moment party, just give your dough a 5- to 10-minute rest. It won’t have quite the flavor of be as light as a fully risen dough, but it will still be “better than bought”.


Pizza dough all rolled out and docked and ready for prebaking

Preparing the Toppings:

These toppings are only possibilities. They’ll all make great pizza but if you think of something that’s not here, add it to the list. You’ll want to have them ready before you shape your dough.

▪pizza, spaghetti or marinara sauce for a red pizza
▪pesto for a green pizza
▪a blend of cheese for a white pizza
▪oregano, basil, red pepper flakes
▪sliced or chopped onions, scallions, chives, peppers, mushrooms, olives, minced garlic
▪broccoli tops or asparagus tips, raw or steamed to the “tender but crunchy” stage
▪sliced or diced ham, pepperoni, salami, prosciutto, smoked turkey
▪anchovies, sardines, smoked oysters or clams or other fish
▪cooked and crumbled hamburger or sausage (hot or sweet)
▪capers, sun-dried tomatoes in olive oil, artichoke hearts, pineapple chunks (great with ham)
▪lots of grated cheese: mozzarella, Monterey Jack, Cheddar, provolone


Doesn't this look delicious?!

Shaping the Dough:

After the dough has risen (if you have time to let it), punch it down, turn it out onto a floured board and knead out any stray bubbles. Cut it into the number of pieces you need depending on whether you’re a thick- or thin-crust devotee.

Flatten each piece with your hand and, with a rolling pin you’ve dusted with flour, roll out each piece like pie dough, from the center to the outside. If you don’t have a rolling pin, use a wine bottle or pat and stretch it out right on the pan with your hands. If the dough isn’t being cooperative, let it rest for 2 or 3 minutes to relax the gluten.

If you like a softer crust, lightly wipe your pan with olive or vegetable oil. If you like a dryer, crunchier crust, sprinkle it with cornmeal. If you don’t have a pizza pan, a pie plate, cake pan, roasting pan or baking sheet with a lip will do just fine. Pizzas don’t have to be round. (Note: we always use either a cast iron pizza pan or cast iron skillets for deep-dish style).

When the dough is about the size you want, slide it onto the prepared pan. Bruch it lightly with olive oil to keep the topping from soaking in and making it soggy. You can eliminate this step if you want to avoid using any more fat.


Chef Jared's specialty...sausage, pepperoni, olives & extra cheese on a crispy crust!

Preheating Your Oven:

Again you have some choices, depending on how quickly you want pizza on the table.

▪Before: For added crispness, you can prebake your crust at 475°F for 10 to 12 minutes before you decorate it. If it puffs up while baking, just press the air out of it before adding toppings (I always use a docker before baking and never have a problem with puff-ups). This method works well but adds an extra step to the pizza-making process (this is the method we use…after prebaking is also the perfect time to freeze for future pizza parties).

▪Now: IF you don’t want to wait, preheat your oven to 475°F before you start to decorating your dough. Bake your pizza right after you’ve decorated it. It won’t be as light but, again, it will still be “better than bought”.

▪Later: For the lightest, crunchiest crust, this is the best choice. Let your pizza rise for 15 to 30 minutes after you’ve decorated it. Preheat your oven to 475°F for at least 15 minutes before you bake.

Decorating the Dough:

Spread the pizza crust (baked or unbaked) with sauce, commercial or homemade. Add some additional herbs, etc., if you want.

Some people feel the grated cheese should go on before the toppings. Some feel it should cook down through the toppings. You can put it wherever you feel it will look and/or taste best.

Scatter on, or artistically arrange, any combination of toppings you desire. This is when creative juices really begin to flow and you can see how differently people like to express themselves.

Baking the Pizza:

The best way to bake pizza is on a pizza stone or quarry tiles set on the lowest rack of your oven or on the oven bottom itself (I’m in disagreement here but am including this for those who are stone fans….cast iron really makes the best crust and yes, I have tried stones). This makes the crust crisp and brown. If you don’t have either of these, place the pizza on the lowest rack of your oven to bake. Check it after 5 to 10 minutes of baking and lower the temperature to 450°F if it is browning too quickly.

If you’ve prebaked the shell, your pizza will only need 5 to 10 minutes. If not, bake it for 15 to 20 minutes, depending on thickness, or until the crust is golden brown.

After taking your masterpiece out of the oven, let it cool to solidify the cheese a bit. This also makes cutting easier and sometimes prevents burned tongues.


Never lasts long!!

Editing to post to Michael Lee's Foodie Friday at Designs by Gollum. Thanks for hosting Michael!


Skillet Suppers~A Trio of Recipes!

Tuesday, January 19, 2010


The cast iron skillet is really such a versitle tool. The kitchen work horse. I know my grandmother wouldn't have known how to run her kitchen without hers and I feel the same way about mine. They are perfect for both stovetop and oven use. I use mine for baking cornbread and pineapple-upside down cakes in as well as the best deep-dish pizza. In my everyday cooking routine I make many SKILLET types of meals. Paired with salad, fruit or bread, they are a meal in themselves. These recipes are economical to make, call for basic pantry ingredients and are so very easy to prepare (no need to buy a box). I thought I'd share a few of those recipes with you today. I'll be posting these to my favorite Tuesday Foodie spots. Thanks to Jen, Lisa & Cole from Tempt Your Tummy Tuesday, Tasty Tuesday, and Tuesdays at the Table. Be sure to visit these great blogs and see all the great recipes posted.


Skillet Pasta Italiano

1 c uncooked dried rotini pasta
1 pound lean ground beef
½ c chopped green bell pepper
1 medium onion, chopped
1 (14.5-ounce) can stewed tomatoes
1 (8-ounce) can tomato sauce
1 (4-ounce) can mushrooms stems and pieces, drained
1 tsp dried basil leaves
1 tsp dried oregano leaves
½ tsp garlic salt
1-1/2 c shredded cheddar cheese

Cook rotini according to package directions. Drain. Meanwhile, combine ground beef, green pepper and onion in 10-inch skillet. Cook over medium heat, stirring occasionally, until ground beef is browned (5 to 8 minutes). Drain off fat. Stir in cooked rotini and all remaining ingredients except cheese. Cover; cook over low heat, stirring occasionally, until heated through (8 to 10 minutes). Stir in 1 cup cheese until melted (2 to 3 minutes). Sprinkle with remaining cheese.


Skillet Chicken & Potato Dinner

3 Tbsp butter
6 new red potatoes, cut into quarters
1 medium onion, cut into 6 wedges
1 tsp finally chopped garlic
6-bonesless, skinless chicken breast halves
1 10-ounce package frozen whole green beans
Salt
Pepper
Chopped fresh parsley

Melt butter in 10-inch skillet until sizzling; add potatoes, onion and garlic. Cook over medium-high heat, stirring occasionally, until potatoes are browned (12 to 14 minutes). Remove from skillet. Keep warm. Place chicken in same skillet. Cook over medium-high heat, turning once, until lightly browned and no longer pink (10 to 12 minutes). Remove chicken from skillet. Keep warm. Place potato mixture and green beans in same skillet. Cover; continue cooking, stirring occasionally, until beans are crisply tender (6 to 9 minutes). Return chicken to skillet. Continue cooking, stirring occasionally, until heated through (1 to 3 minutes). Season with salt and pepper, if desired. Sprinkle with parsley, if desired.


Veggie Skillet

2 cups uncooked, dried bowtie pasta
2 Tbsp butter
1 tsp minced garlic
2 medium zucchini, cut into ½-inch pieces
1 medium red onion, cut into thin wedges
1 Tbsp chopped fresh basil
2 cups cheddar cheese, cubed into ½-inch cubes

Cook pasta according to package directions. Drain. Meanwhile, melt butter in 10-inch skillet until sizzling; stir in garlic. Stir in all remaining ingredients except cheese. Cook over medium heat, stirring occasionally, until vegetables are crisply tender (4 to 6 minutes). Stir in pasta. Continue cooking, stirring occasionally, until heated through (2 to 3 minutes). Stir in cheese. Salt and pepper to taste.

* Substitute 1 teaspoon dried basil leaves.


Cast Iron Cookware/Bakeware

Monday, January 18, 2010


I love my cast iron cookware and bakeware. It is just the best! So much beauty in those old black pots & pans. My favorite pieces are the ones that were my dear grandmother’s (at least 70 years old). What stories they could tell....so well seasoned and used with lots of love to cook many, many meals. And talk about being economical, not only are these timeless wonders not a large investment to begin with, they are something you will use and then pass along. No new set a pots and pans every few years.

When I publicly make my declaration of love for my cast iron, I am usually met with horror stories of how someone has a skillet that they just hate for some reason or another. In my experience, that is due to simply not knowing how to properly season before using or they don’t know the simple steps involved in caring for cast iron. I thought I’d share what I have found to be the best way to do both.

Seasoning Cast Iron:

Well-seasoned cast iron is the original "non-stick" cookware. Properly seasoned cast iron will last a life-time (or several).

Heat the oven to 250-300°F. Coat your cast iron piece with solid shortening, lard or bacon grease. Avoid using a liquid vegetable oil for seasoning purposes because it may leave a sticky surface and the pan will not be properly seasoned. Place in the oven. In 15 minutes, remove the pan & pour out any excess grease. Wipe well with paper toweling and then place the pan back in the oven for about 1-1/2 to 2 hours. Repeating this process several times is recommended to create a stronger "seasoning" bond. The first time you use your newly seasoned cast iron piece, it is recommended to use it to cook something high in fat, such as bacon or hamburger to add to the seasoning.

If the pan was not seasoned properly or a portion of the seasoning wears off and food sticks to the surface or there is rust, then it should be properly cleaned and re-seasoned.

Remove any food residue by cleaning the pan thoroughly with hot water and a scouring pad. Dry the pan thoroghly. Season as if the pan was new.

Caring for Cast Iron Cookware

Now that you’ve worked to achieve that non-stick surface to your cast iron, you want to take special care to not damage that when cleaning.

Clean the cookware while it is still hot by rinsing with hot water and scraping up any bits that are stuck. A plastic scraper works well (I have one from Pampered Chef). Do not use a scouring pad or soap (detergent) as they will break down the pan's seasoning. It should go without saying, but I’ll say it anyway, never place your cast ironware in a dishwasher. I always dry my pieces on the stove top with a medium-high flame until dry and then allowed to cool to room temp before storing away. Never store food in cast iron. High acid food are hard on your seasoning, so be sure to wipe down with some solid vegetable shortening after cooking something high in acid. Store your cast iron cookware with the lids off, especially in humid weather, because if covered, moisture can build up and cause rust. Should rust appear, the pan should be seasoned again.

Most if all, use and enjoy your cast iron. This week I’ll be sharing some of my favorite pieces and how I use them.

Sharing at Mary's Little Red House for Mosaic Monday. Thanks for hosting, Mary.

Everyday Baking Mix

Tuesday, January 12, 2010

Generally, as a rule, I am not a mix person. I've just found that making from scratch really doesn't take THAT much more time and effort than does scratch baking. That said, a couple years ago, I discovered a recipe for Everyday Baking Mix in Martha Stewart's Everyday Food (Issue 51, April 2008). It caught my eye as did the recipes that followed using the mix. I was intrigued and decided to give it (and the Fig Clafouti) a whirl. I actually thought that Martha was going to regularly add to the recipes that could be made with the mix. Well, never again has a recipe featuring the mix appeared and although only 3 recipes used the mix, they are good enough that I try to keep this on hand in my pantry.

Everyday Baking Mix
(Printable Version)

Makes 9 cups
6 cups all-purpose flour, spooned and leveled
3 cups sugar
2 tablespoons baking powder
1 tablespoon salt
In a large bowl, whisk together flour, sugar, baking powder, and salt. Store in an airtight container at room temperature up to 3 months. Whisk before using.


Fig Clafouti
(Printable Version)

2 Tbsp unsalted butter, melted, plus more for baking dish
8 ounces dried mission figs, stems removed, coarsely chopped
1-1/4 c Everyday Baking Mix, spooned and leveled
3 large eggs
1 c half-and-half
Confectioners’ sugar, for dusting

Preheat oven to 350°F. Butter a 9-inch pie or a shallow 1-quart baking dish. In a small bowl, toss figs with ¼ cup baking mix and set aside. In a large bowl, whisk together eggs, half-and-half, butter and remaining cup baking mix. Add fig mixture; stir just to combine. Transfer to prepared baking dish. Place on rimmed baking sheet. Bake until center of clafouti is set, 35-40 minutes. Let cool to warm. Dust with confectioners’ sugar before serving.


Variations are endless with this recipe. Some of our favorites are the additon of mini-chocolate chips & dried cherries, walnuts & dried cranberries, butterscotch chips & pecans and the list could go on....

Chewy Oatmeal Blondies
(Printable Version)

1/2 cup (1 stick) unsalted butter, room temperature, plus more for pan
1/2 cup packed light-brown sugar
1 large egg
1-1/2 cups Everyday Baking Mix, spooned and leveled
1 cup old-fashioned rolled oats (not quick-cooking)

Preheat oven to 350°F. Brush an 8-inch square baking pan with butter. Line bottom and two sides with a strip of parchment paper, leaving a 2-inch overhang on both sides. Butter paper, and set pan aside.
Using an electric mixer, beat butter and sugar until light and fluffy. Add egg, and beat until combined. With mixer on low, gradually add Baking Mix; mix just until combined. Mix in 3/4 cup oats. Pour batter into prepared pan.
Using an offset metal spatula or table knife, smooth batter evenly. Sprinkle with remaining oats, pressing gently to adhere. Bake until a toothpick inserted in center comes out with only a few moist crumbs attached, 30 to 35 minutes. Let cool in pan 30minutes. Using overhang, transfer blondie (still on paper) to a wire rack to cool completely. Place on a cutting board (peel off paper); using a serrated knife, cut into 16 squares. Store blondies in an airtight container at room temperature for up to 2 days, or freeze for up to 2 months.

Jam Sandwich Cookies
(Printable Version)

Makes 18
4 cups Everyday Baking Mix, spooned and leveled
1 cup (2 sticks) cold unsalted butter, cut into pieces
1/2 cup whole milk
3/4 cup seedless jam or jelly

Preheat oven to 350°F. Line two baking sheets with parchment paper. In a food processor, pulse baking mix and butter until mixture resembles coarse meal. Add milk; pulse until a dough forms. Drop dough by heaping tablespoons onto sheets, 4 inches apart. (You will fit about 9 cookies to a sheet; bake in two batches to make a total of 36 cookies.) Bake until cookies begin to turn golden but center is still pale, 12 to 14 minutes, rotating sheets halfway through. Transfer to a wire rack to cool completely. Spread flat side of half the cookies with 2 teaspoons jam each; sandwich with remaining cookies.

Sharing today at my favorite Tuesday Foodie spots. Thanks to Jen, Lisa & Cole from Tempt Your Tummy Tuesday, Tasty Tuesday, and Tuesdays at the Table. Be sure to visit these great blogs and see all the great recipes posted.


Chipotle-Glazed Roast Chicken w/Sweet Potatoes

Friday, January 8, 2010
I tried a new recipe that I found in Fitness Magazine. I am not usually a fan of Fitness Magazine and I am not really sure how a subscription started showing up at my mailbox monthly, but this last issue was chocked full of great looking recipes. This was easy to fix and very, very yummy and best of all used some of the bone-in chicken breasts that were in my freezer. Served with a simple spinach salad and whole wheat rolls. I'll make this again!


Chipotle-Glazed Roast Chicken with Sweet Potatoes

4 sweet potatoes (10 ounces each), peeled and cut into 1-inch pieces
2 1/2 tablespoons olive oil
4 chipotle chilies in adobo sauce, minced
2 garlic cloves, minced
2 tablespoons honey
2 teaspoons cider vinegar
1 1/4 teaspoons salt, plus additional to taste
1 teaspoon cumin
1/2 teaspoon cinnamon
6 boneless, skinless chicken breasts (2 pounds), rinsed and patted dry (I used bone-in chicken breasts but removed the skin)
Chopped cilantro, for garnish (optional)

Preheat the oven to 400°F. In a medium bowl, toss the sweet potatoes in the olive oil and scatter on the bottom of a roasting pan. Roast for 15 minutes. In a small bowl, mix together the chilies, garlic, honey, vinegar, salt, cumin, and cinnamon to make a paste. Rub the paste evenly over each breast. Place the chicken breasts on top of the sweet potatoes and roast until the chicken is just cooked through, about 25 to 30 minutes. Serve garnished with cilantro if desired.

Nutrition facts per serving: 407 calories, 38g protein, 45g carbohydrate, 8g fat (1.3g saturated), 6g fiber

Posting to Michael's Foodie Friday at Designs by Gollum. Thanks for hosting Michael!


Chicken-Orzo Soup & Cheddar Pan Biscuits

Tuesday, January 5, 2010
Warming, comfort food on the menu here. I cooked off a whole chicken to use for various dishes this week...this soup included. This is a Cooking Light recipe and is perfect for getting back on track. The whole chicken came from my vast supply of frozen food that I am working my way through this month in Yvonne from StoneGable's Eating from the Freezer/Pantry Challenge.

I'm sharing today at my favorite Tuesday recipe events, Tasty Tuesday, Tempt Your Tummy Tuesday and Tuesdays at the Table. Thank you Jen, Lisa and Cole for hosting these lovely events each week. Check out ALL the great recipes posted.


Chicken-Orzo Soup
(Printable Version)

1 (32-ounce) container fat-free, less-sodium chicken broth, divided
1/2 cup uncooked orzo
2 tsp olive oil
2/3 cup coarsely chopped carrot
1/2 cup coarsely chopped celery
1/2 cup chopped onion
3/4 pound skinless, boneless chicken breasts, cut into 1/2-inch cubes
1-1/4 cups water
3 fresh parsley sprigs
1 fresh thyme sprig
4 cups fresh baby spinach
1 Tbsp fresh lemon juice
1/4 tsp salt
1/8 tsp black pepper

Bring 1 3/4 cups broth to a boil in a medium saucepan. Add orzo; cook 10 minutes or until done. Drain. While orzo cooks, heat a large saucepan over medium heat. Add oil to pan; swirl to coat. Add carrot, celery, onion, and chicken (I just added my precooked chicken at this point); cook 3 minutes, stirring constantly. Stir in remaining 2 1/4 cups broth, 1 1/4 cups water, parsley, and thyme; bring to a boil. Reduce heat; cover and simmer 10 minutes or until vegetables are tender. Discard herb sprigs. Add orzo, spinach, juice, salt, and pepper; simmer 1 minute.


Cheddar Pan Biscuits
(Printable Version)

1/3 c butter
2-1/4 c flour
½ c shredded cheddar cheese
1 Tbsp baking powder
1 Tbsp sugar
1 tsp dried basil leaves
½ tsp salt
1 c milk

Heat oven to 400°F. Melt butter in 8-inch square baking pan in oven (3 to 5 minutes). Meanwhile, combine all remaining ingredients except milk in medium bowl. Stir in milk just until moistened. Turn dough onto lightly floured surface; knead until smooth (1 minute). Pat or roll dough into 12x6-inch rectangle. Cut into 12 (1-inch) strips. Dip each strip into melted butter in pan; fold each strip in half. Place folded strips in 2 rows in same pan. Bake for 23 to 28 minutes or until lightly browned. Serve warm.


Snow, AGAIN!!

Monday, January 4, 2010
It has snowed here in Nebraska....A LOT! And the trust Farmer's Almanic says there is more on it's way.


North Central U.S. Weather
January 2010
4th-7th. Milder, then snowy from Rockies east. 8th-11th. Fair, then stormy. Heavy snows across Plains, up to 20" possible. 12th-15th. Fair, cold. 16th-19th. Light snow across Plains, windy. 20th-23rd. Becoming stormy, milder. 24th-27th. Stormy. Snow Southern Plains. 28th-31st. Fair, then showers.
February 2010
1st-3rd. Light snow Colorado, Plains. 4th-7th. Major storm brings heavy snow from Montana east. Accumulations of 8"-16". 8th-11th. Clearing, colder. 12th-15th. Fair, then flurries Plains. 16th-19th. Stormy over the Rockies. 20th-23rd. Snowstorm for Plains heaviest in Kansas. 24th-28th. Becoming unsettled Rockies. Fair, cold Plains.
March 2010
1st-3rd. Fair, cold.


Since there isn't a thing I can do about the weather, I'm trying to remember that being house bound can a good thing. I'm being more deliberate about trips out and combining trips when possible and working at home when I can.


So while sticking close to home, I'm thinking about warm drinks and pots of soup and fresh from the oven loaves of bread to make the winter days less dreary. Stay warm!