


Showing posts with label Thriftiness. Show all posts
Showing posts with label Thriftiness. Show all posts
Hemming & Hawing
Monday, August 27, 2012
Hemming and hawing means to speak hesitantly or inarticulately, with numerous pauses and interjections. Although I rarely hem and haw -- I most certainly HEM!

Fiscal Fasting ~ 2/2012
Wednesday, February 22, 2012

I don't officially start fasting until Saturday but I have another post going up then so I figured I'd post this a little early -- I have no plans to spend any money between now and then with the exception of filling my gas tank. Oh, and speaking of THAT, I noticed gas has creeped up to $3.49 a gallon here with lots of hoopla about it continuing to rise. How much are you paying for gas? Does it make you think twice about unnecessary trips?
Round 2 of Fiscal Fasting for me for 2012. Last month, I was able to abstain from spending for the full 7 days. YAY!! A few things have changed in my budget since then. I purchased a car -- although I put down a good-sized down payment, I financed a portion too. That means a car payment (it still scares to write those words, lol). Debt -- I really hate it - That makes my modest budget even more modest. In this case, it was the right decision but it still makes me want to get it paid off asap.
Back to my fast, NO spending for the next 7 days. I know that a lot of you, like me, are experienced thrifty's but it is amazing to me to talk with folks and find that *not spending* isn't even on their radar. A friend of mine and I discussed this a few days ago. She talked about giving up clothing shopping for lent. I am not sure if that is indeed what she did but I know that is a big deal for this friend.
I thought I would share when weighing the merits of a potential purchase, some of the things I consider……
Do I need it to live? - This puts food, clothing (to some degree) and the such at the top of the list.
Do I already own something that will meet the same need? - This prevents me from getting take-out food when I have food at home, or buying a new pair of shoes when I already have many pairs.
Will it solve or prevent a real problem? - I don't need toothpaste to live, but it prevents cavities and bad breath so I'm going to buy it. I may think that boredom requires a new DVD, but that's not a real problem so it doesn't pass the test.
Will it provide SOME kind of value? - Sometimes things aren't necessary but we want them anyway. For example, I bought a new laptop last year. It provides me opportunity to blog, keep in contact with friends and family and a great amount of entertainment. So even though I don't need a laptop to live and it doesn't necessarily solve a real problem, I still decided it was worth buying.
Can I afford this item without going into debt? - If I have to go into debt for something I must have to live, I can deal with that (though I'd rather not go into debt - my new car fits into this category). But if it's not a need and I've still decided to buy it, I have to make sure I can do it without pulling out a credit card.
Will someone be angry if I buy this? - Will I have to hide it or hide the receipt? Now that I'm divorced, I don't have a spouse that I have to answer to and even when I was married, I was never one of those wives (although I’ve had friends like this) who pull the tags off new clothes and sneak them into the closet (Hint: This is a sign that you shouldn't have bought said clothes).
Could my money be better spent elsewhere? - Can I really justify buying a pair of shoes if I know my car needs an oil change?
Is the "something else" really important? - Am I spending money that needs to go toward bills? If so, not buying is the wise choice. If the money is just earmarked for a competing *want*, I'll have to make a choice between the 2 *wants*.
Do I still want the item after all this? - If I get through this list of questions and I haven't given up, I'm probably buying whatever the want is. Going through this is my mind though saves me from a lot of impulse buying. Some stores REALLY seem to fuel impulse buying – WAL-MART is one (at least for me). I don’t know if it is something in the air or music or what, but it always seemed I’d go in for a few necessities and come out with a cart FULL – I am very cautious of using my list when I shop in there – if it isn’t on my list, it has to pass the test.
Fiscal Fasting ~ 1/2012
Thursday, February 2, 2012
Thank you for all the great tips on saving money. Well, here I am at Day #6 (I started on Saturday - that is the day my work week officially starts) of my first week of Fiscal Fasting for 2012. I have stayed true to my goals -- NO SPENDING. Well, no money has gone out. I did a little online car shopping and started that process. I am going to be finally retiring my 1998 Honda Odyssey (with 270,000 miles). It has served me well and been a very frugal investment. I have to admit that the entire prospect of car shopping has caused me some stress but I have tried to turn the stress into opportunities for prayer.
Anyway, I usually allow myself lunch *out* with the girls at work once a week (they mostly eat out daily). NOT this week...and I think I am going to rethink that altogether. Lunch out is expensive and lunch brought from home is both more healthy and makes better fiscal sense. I have avoided all retail establishments -- boy, just going into some stores fuels spending and feelings of covetousness. I've worked on projects at home that I have already purchased materials for (you know, UFO's-- unfinished objects, lol) and visited the library. I also went with my daughter to Zumba class at the Y as a way of getting out and being entertained (I pay for my Y membership annually). I will need to visit the grocery store on Sunday -- but only for what I need. I've done a good job of using up some of what I had on hand.
February is a shorter month so I'll only a 3 week break from fasting before my next fast begins. Have you fasted? How did you do? If a week seems too much, maybe a NO-Spend Day is a better idea for starting out.
"Use it up, wear it out, make it do or do without!"
Saturday, January 28, 2012

This saying from the Great Depression and then WWII shows the way to frugality. I have subscribed to its principles for a long time. When it was first coined and in this economy, it just makes good sense.
I come from a family of thrifty folks...I have always been thrifty and shunned debt. Good thing. As a single woman living on a modest income, it is more important than ever for me to be thrifty. Over the holidays, and then with the planning of daughter's baby shower and the arrival of grandson, it just has seemed that my checking account has been bleeding outta control. I knew once these events were behind me it was time to get back on the frugal bandwagon -- then I saw Jeff Yeager, The Ultimate Cheapskate and was very intrigued by what he calls a Frugal Fast. Jeff says, "one way to rein in out-of-control spending is to observe a "fiscal fast" for one week. The idea is to try to spend no money for seven days, to see which expenses you can and cannot live without". This is perfect for me and my plan is to *Fiscal Fast* the last week of the month every month of 2012.
Some of Jeff's suggestions are:
Grocery-Shop in Your Pantry: You may be in the habit of stocking up at the grocery store once or twice a week, but see how many free meals you can come up with by raiding your own freezer or cupboards for foods you bought months ago.
Cut Down on Commuting: Is it possible for you to carpool or ride a bike to work for a few days? You could save money, socialize with co-workers and maybe lose a few pounds.
Flush Out Those Toiletries: You may have travel-size bottles of shampoo, tubes of toothpaste or bars of soap from past hotel stays in a closet somewhere. Try to use them up before you buy more.
Free Family Fun Night: Break out the board games or a movie from your library rather than heading to the movies on weekends.
My plan is to NOT purchase anything with the exception of gasoline to get back and forth to work during the week. Otherwise, I will use what I have on hand. That includes what is lurking in my pantry and freezer. No stocking up before the fast starts either -- just using what has already been purchased. I am really thinking this is going to be a breeze but I just may be surprised. Wish me luck!! What are some of your best frugal tips?
Wash Stand Workover!
Monday, December 5, 2011
First, I have a bit of a confession (boy, I am always confessing something or another, lol) -- I am a little obsessed with chests of drawers of the vintage variety. I have a mini one in my kitchen for holding kitchen linens and a larger one in my dining room that I use as a sideboard and it holds dining room linens. I really thought I had all this old house could handle and had even passed by a couple in recent years -- that is until last September.
 Well, I should back up and tell you about my last visit to my Minnesota friend and her gorgeous home full of antiques. She had recently acquired a vintage washstand. It was positively gorgeous and I found myself in a state of coveting. I didn't have room for one but I WANTED one JUST LIKE HERS. After our visit, I pretty much put that lovely piece out of my mind -- had to -- I didn't have the room or the budget for one, so it wasn't to be -- until I walked into Goodwill and look what I found.
  I was in a state of panic -- someone was already interested in it...I got close enough to see that the asking price was $25.00 (a tiny fraction of what my friend's cost). I (im)patiently stood there while these 2 gals discussed the merits of the *Shabby Chic* look and then finally stepped away. I tried to calm myself but I am afraid I was a tad abrupt as I SNATCHED the ticket off of it and RAN to check out. My mind was racing -- there is no towel harp but I am okay with that -- I'll have to strip that stupid paint and refinish it but I welcomed that project -- WHO puts those modern pulls and knobs on an antique? -- I'll HAVE to find some vintage or reproduction hardware and WHERE am I going to put it -- I KNOW, I'll put sewing stuff in it. Better idea, the big cupboard that is now in my bathroom can go into my NEW sewing room when daughter vacates it and I'll put this sweetie into my bathroom. By the time I paid for it and drove around back to pick it up, I had it ALL planned out.
The stripping and refinishing took me a bit longer than I had planned but I didn't want to rush -- good things do not come from rushing. I took my sweet time and by the time I had it refinished, I had found the PERFECT hardware for it. Besides, daughter wasn't planning to move until January....until her apartment became available EARLY -- she moved last weekend. My nest is officially EMPTY and my sewing room is starting to come together.

Isn't my washstand lovely? I am just loving having it in my bathroom. Stay tuned and sometime soon I'll show you around my NEW sewing room and that big old cupboard I was telling you about earlier.
Posting to Susan's Metamorphosis Monday!
One Good Thing!
Monday, October 24, 2011
 I first saw this on Pintrest and thought -- no one's baking sheets look as bad as mine -- then I realized that maybe Jillie's from One Good Thing might come close, lol. I was very intrigued about her *Miracle Cleaner* and since it was my favorite kind -- made from household staples, I figured I'd give it a try and report back to you.
 These babies are truly workhorses in my kitchen and have been for many, many years. I am not sure when these were purchased but I do remember having them when we still lived in California, so before 1999. Another thing I wanted to add is that I never saw anything wrong with my baking sheets looking like this. I've been behind the scenes in more than one commercial bakery and that is what the baking sheets look like -- I always thought of it as kind of a badge of honor -- my baking sheets get USED.
 The results -- yep, this pan is certainly cleaner looking with all the carbonized stuff off of it -- but I am afraid the miracle cleaner had little to do with it - the cleaning machine was - good ole elbow grease and a stainless steel scrubber. I'm just going to let the rest of my stack of baking sheets keep their MUCH USED appearance.
 I use baking soda to clean a lot of different things around the kitchen and did find the combination of the peroxide and baking soda did take some hard water spots off some serving utensils but I think I am not going to be using peroxide in the kitchen on a regular basis.
 Note: I was asked why I wouldn't be using Peroxide in the kitchen regularly. The answer to that is it made me a bit uncomfortable. It has no smell or color and looks just like water. Not a safe chemical in the kitchen out of it's normal packaging. That is just my opinion, better to be safe than sorry.
Hooking up with Susan's Met Monday at Between Naps on the Porch.
Dishes, Dishes, Dishes!
Wednesday, October 19, 2011
Remember back at New Years when everyone in blogland was picking their word for the year? I didn't really find one that fit but I should have picked DETERMINED! I entered this year determined to NOT add to my lumbering collection of dishes. I've done pretty well. In January, I was off to a shaky start when I found these vintage Clover Blossom dishes to complete my everyday breakfast set.
 But I gave some dishes to Goodwill in my January organizing blitz. That round of purging was pretty painless. It was mostly, the *WHAT WAS I THINKING* dishes.
Then along came March -- FOREVER I had been coveting some Mikasa white dishes and found (at Goodwill again) a complete set for 8 of French Countryside (with completer pieces) for a fraction of their worth, in pristine condition and they came home with me too.
 I knew I'd use them and indeed I do. I replaced my old *everyday* dishes with them. AND I gave my old everyday dishes away to a friend. Although I liked my old white dishes, the parting was pretty painless.
Spring and summer found me pretty distracted and although I did do some thrifty shopping, I only breezed past the dishes. I completely stayed away from my old haunt, TJ Maxx....that is, until late summer. I went in there with daughter to *look at baby stuff*. I knew it would be hard for me and indeed it was. One stroll down the clearance aisle and away I came with ......
 Now let me clarify, the green square Mikasa's were already mine (yeah, I lugged them babies all over Mall of America last year -- I think my right arm is now permanently longer than my left). What gave me such temptation was the square rooster plates -- BUT in all reality, I NEEDED square rooster plates to go with those (never been used) square green plates. I was TOTALLY justified in my purchase! When I got home, I searched my dish collection for something to go from my collection -- hum, I was pretty sure I could part ways with some funky dessert plates I had picked up somewhere in my travels. Off to the GW with them. Whew, I have not *added* to my problem, I mean collection!
Then I ran into a REAL problem -- A stack of 8 of these babies at GW.
 Yeah, they are in my dish storage awaiting a holiday tablescape. NO MORE THOUGH -- NO MORE! Oh, and I didn't part with a thing -- my thought is I'll use them one season and then away they go! It isn't technically an addition if I'm not planning to keep them long term, is it?
A few weeks ago my daughters and I made our annual trip to Lincoln, NE to visit The Historic Haymarket (and this bad blogger totally went off without her camera -- it was sitting on the dining room table where I left it). This is a trip I look forward to every year. In the Haymarket is Burlington Antiques. My daughters ditched me there to run off and eat all sorts of foods that are forbidden for me to eat, lol. I was totally okay with that - you see, Burlington Antiques has more DISHES than your average antique mall. I knew I wouldn't be coming home with any of those dishes and enjoyed a long stroll through taking in ALL the wonderful antique and vintage dishes.
Even though I didn't buy a thing in that trip to the antique mall it STILL got me into trouble! You see, on Saturday, I was on the GW side of town and before I knew what was going on, I was pulling into the parking lot and heading right in the door. Let me say that this isn't my favorite time of year for thrifty shopping -- too many Halloween costume seekers are rummaging through my favorite thrifty source this time of year. That said, I made a pass around the whole store and then headed back to the dishes - spying a box on the ground, I take a peek inside and recognize what I see -- China -- made in England, bone china -- ROYAL WORCESTER CHINA -- TOPAZ BY ROYAL WORCESTER BONE CHINA. This was one of the chinas that I studied for quite some time during my trip to Burlington Antiques. I loved the fall like pattern, and the calming sandstone colored rim and the name -- my oldest daughters birthstone and now here I was holding a box full of it. The price ------ $3.00!! FOR ALL OF IT!! My GW has taken to putting sets of dishes in opened topped boxes and then using packing tape to make a see-thru but cannot handle thru top. You can see what is in the box but not really see anything under the first layer or so. Nothing was packed in paper so who knows what kind of condition these are actually in. Since the asking price was only $3.00, I took a chance on condition and exactly what was there. Once home, I inspected all the contents and basically pieced together 4 complete place settings (dinner plate, salad plate, bread & butter plate, dessert plate & cup & saucer). I am happy with that -- 4 diners is the most common at my dining table....anything more than that, and it will have to be a different set of dishes.
 According to Wikipedia, Royal Worcester is believed to be the oldest remaining English pottery brand still in existence today.
 Topaz was manufactured from 1958 through 1964.

 These beauties will be making many appearances on my table over the next few weeks.

 Linking to Susan's Tablescape Thursday!
 But I gave some dishes to Goodwill in my January organizing blitz. That round of purging was pretty painless. It was mostly, the *WHAT WAS I THINKING* dishes.
 Then along came March -- FOREVER I had been coveting some Mikasa white dishes and found (at Goodwill again) a complete set for 8 of French Countryside (with completer pieces) for a fraction of their worth, in pristine condition and they came home with me too.
 I knew I'd use them and indeed I do. I replaced my old *everyday* dishes with them. AND I gave my old everyday dishes away to a friend. Although I liked my old white dishes, the parting was pretty painless.
Spring and summer found me pretty distracted and although I did do some thrifty shopping, I only breezed past the dishes. I completely stayed away from my old haunt, TJ Maxx....that is, until late summer. I went in there with daughter to *look at baby stuff*. I knew it would be hard for me and indeed it was. One stroll down the clearance aisle and away I came with ......
 Now let me clarify, the green square Mikasa's were already mine (yeah, I lugged them babies all over Mall of America last year -- I think my right arm is now permanently longer than my left). What gave me such temptation was the square rooster plates -- BUT in all reality, I NEEDED square rooster plates to go with those (never been used) square green plates. I was TOTALLY justified in my purchase! When I got home, I searched my dish collection for something to go from my collection -- hum, I was pretty sure I could part ways with some funky dessert plates I had picked up somewhere in my travels. Off to the GW with them. Whew, I have not *added* to my problem, I mean collection!
Then I ran into a REAL problem -- A stack of 8 of these babies at GW.
 Yeah, they are in my dish storage awaiting a holiday tablescape. NO MORE THOUGH -- NO MORE! Oh, and I didn't part with a thing -- my thought is I'll use them one season and then away they go! It isn't technically an addition if I'm not planning to keep them long term, is it?
A few weeks ago my daughters and I made our annual trip to Lincoln, NE to visit The Historic Haymarket (and this bad blogger totally went off without her camera -- it was sitting on the dining room table where I left it). This is a trip I look forward to every year. In the Haymarket is Burlington Antiques. My daughters ditched me there to run off and eat all sorts of foods that are forbidden for me to eat, lol. I was totally okay with that - you see, Burlington Antiques has more DISHES than your average antique mall. I knew I wouldn't be coming home with any of those dishes and enjoyed a long stroll through taking in ALL the wonderful antique and vintage dishes.
Even though I didn't buy a thing in that trip to the antique mall it STILL got me into trouble! You see, on Saturday, I was on the GW side of town and before I knew what was going on, I was pulling into the parking lot and heading right in the door. Let me say that this isn't my favorite time of year for thrifty shopping -- too many Halloween costume seekers are rummaging through my favorite thrifty source this time of year. That said, I made a pass around the whole store and then headed back to the dishes - spying a box on the ground, I take a peek inside and recognize what I see -- China -- made in England, bone china -- ROYAL WORCESTER CHINA -- TOPAZ BY ROYAL WORCESTER BONE CHINA. This was one of the chinas that I studied for quite some time during my trip to Burlington Antiques. I loved the fall like pattern, and the calming sandstone colored rim and the name -- my oldest daughters birthstone and now here I was holding a box full of it. The price ------ $3.00!! FOR ALL OF IT!! My GW has taken to putting sets of dishes in opened topped boxes and then using packing tape to make a see-thru but cannot handle thru top. You can see what is in the box but not really see anything under the first layer or so. Nothing was packed in paper so who knows what kind of condition these are actually in. Since the asking price was only $3.00, I took a chance on condition and exactly what was there. Once home, I inspected all the contents and basically pieced together 4 complete place settings (dinner plate, salad plate, bread & butter plate, dessert plate & cup & saucer). I am happy with that -- 4 diners is the most common at my dining table....anything more than that, and it will have to be a different set of dishes.
 According to Wikipedia, Royal Worcester is believed to be the oldest remaining English pottery brand still in existence today.
 Topaz was manufactured from 1958 through 1964.
 These beauties will be making many appearances on my table over the next few weeks.
 Linking to Susan's Tablescape Thursday!
Don't It Make My Brown Eyes Blue
Saturday, August 20, 2011

This subject is a bit of a departure from my normal subject matters although it certainly falls into the catagory of FRUGAL or HOMEMADE which is always me. A few weeks ago I was reading Kim's Marmee's Pantry blog. Kim writes a lot about natural and homemade products. She is a wealth of knowledge on these subjects. Her post on eye make-up removal got my full attention -- expecially when I read *we should NOT use oily eye make-up removers b/c they leave a little bit of oil on your eyes w/every swipe. And, after a while, the only way to truly clean it off is w/eye surgery*. YIKES!! That hit home -- I've used baby oil to remove eye makeup FOREVAH. Well, that had to stop and stop that very day!! I set out to try the 3 listed homemade alternatives that Kim suggested. I didn't have the ingredients on hand for #1 or #2 so I skipped to #3 -- *Simply dip a cotton ball in a small saucer of milk (preferably raw) OR yogurt & LIGHTLY work around your closed eyes & eye lashes. ~GENTLY wipe off w/a tissue using your ring finger.* I found this method to be very refreshing and cooling and it did a great job of removing the makeup. Problem is we're not a huge milk family and I don't always have milk available.
On my next trip to the BIG BOX store, I had the ingredients for the other 2 suggestions on my list. After pricing the ingredients for both #1 and #2, I decided to skip straight to #2 and only attempt #1 if I was unhappy with the results of #2. Well, I will have to believe Kim that #1 is effective, I LOVE #2 and do not plan to look further or go back to any other method used over the years.

#2 Eye Make-Up Remover
1 part gentle, unscented baby shampoo
10 parts water
~Mix together in a clean bottle (a clean, used one is fine)
~Shake before using
~Using a cotton ball or cotton pad, LIGHTLY apply & LIGHTLY work around your closed eyes & eye lashes
~GENTLY wipe off w/a tissue
After this great success I plan to try Kim's formulas for Homemade Eye Serums & Gels . THANKS Kim -- from me and my BROWN eyes!!
Linking up to Susan's Metamorphosis Monday!
*Vintage* Tissue Paper Flowers
Wednesday, November 10, 2010
Have you ever made flowers from tissue or crepe paper? We did this all the time when I was a girl. I think of them as vintage or old-fashioned. I am co-hosting a double baby shower this weekend. My co-host is in charge of the games (blah, I hate doing the games, lol) and I am in charge of the food and decorations. We (read that *I*) set the theme VINTAGE Baby. We have a girl baby (Eliana Elise) and a boy baby (Silas James) so we're going to have lots of pastels...blue, pink, green, yellow and lavender. I've collected a lot of the vintage Napco baby planters and needed something to put in them. Our budget is limited and I'd rather spend it on food and such, not live plants or flowers. If it was summer, I'd be raiding peoples gardens but alas, the flowers are done for the year.

After some thought, I settled on making pastel colored paper flowers. I've told a few people of this plan and they look at me like I've sprouted another head. Never heard of paper flowers? Well, they are easy, fun and best of all very budget friendly. I got a multi-pack of pastel tissue paper at Dollar Tree. That is enough for 60 flowers. The only other supplies needed are floral wire, floral tape, scissors and a wire cutter (unless you buy precut wire).


I am sharing a video tutorial for making paper flowers and will be sharing lots more from the shower in the next week including recipes and tablescapes. My flowers differ only in that I use a wire instead of string and then floral tape the wire to form a stem.
Sharing at:
Suzanne's Vintage Thingie Thursday
Debra's Vintage Inspired Friday
Laurie's Favorite Things
Mt. Washmore & Homemade Laundry Soap
Friday, October 1, 2010
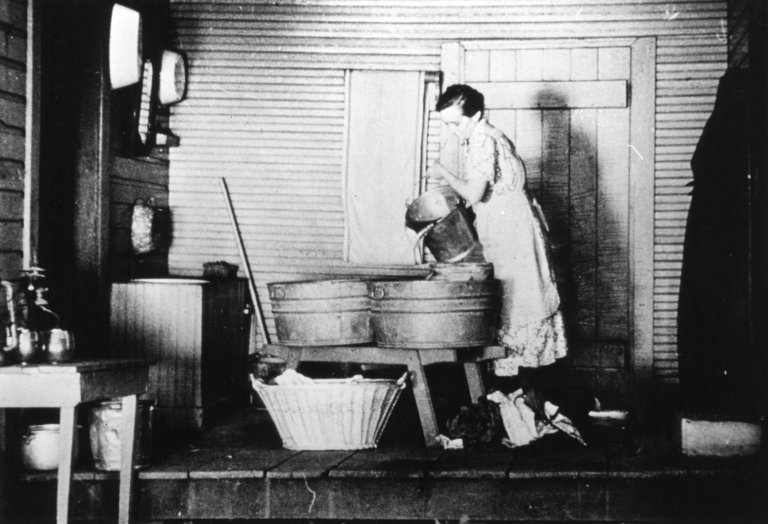
Laundry (yes, at my house it is called Mt. Washmore)! NOT my favorite chore. It has gotten easier over the years. No more cloth diapering, 2 kids on their own, teens who help with their own laundry. Still, I don't enjoy it. I do enjoy hanging out a wash, listening to the hens scratch and feeling a nice warm breeze thru the clean laundry BUT that is rarely my experience these days. I must confess I always feel a tad guilty complaining about laundry. Afterall, my own mother used a wringer style washing machine (no automatic dryer) until I was in Jr. High School and forget about what my foremothers did before her. No right to complain....but alas, I do! Give me a toilet (or a hundred) to scrub any day before the laundry.

I've tried many *systems* over the years to make the chore, well, less of a chore. I was thrilled when I saw that the author of my favorite homekeeping book (Cheryl Mendelson, Home Comforts) had written a book targeting this most dreaded of household tasks. I was eager to give it a look over. I knew I was in trouble when I read, "For Cheryl Mendelson laundering is the best part of housekeeping". Not my take on things and truthfully as much as I love Home Comforts, I found this newer book to be just redundant information already contained in the first book. If your library catalogs this book, please check it out and decide for yourself if you need to add it to your personal library. For me, the first book was all I needed to own.

All that out of the way, one thing that is a favorite when it comes to laundry is my homemade Laundry Soap. Years ago, I used the liquid (gel) version but switched to the dry version to make it more time efficient for me. My orginial reasons for using a homemade version were purely thrify ones. Now I realize, I am a better steward when I use this. Less money, less packaging and really a better product in my opinion. This recipe calls for Fels Naptha laundry soap. To me it is the key to this being a superior product. I use a bar of Fels Naptha as a stain remover (just moisten the bar and rub into the stain and wash as normal). It really is great stuff. Please do not substitute Ivory, Castile, Zote or even homemade soap. Your results will not be the same. When I have a load of especially soiled laundry, I fill the tub with water and allow the laundry to soak overnight.
Homemade Laundry Detergent Recipe
(Printable Version)
2 bars Fels-Naptha laundry soap
4 cups Arm and Hammer washing soda
4 cups Borax
2 cups Oxyclean
In a large bowl mix together the washing soda, Borax, and the Oxyclean. Grate the Fels-Naptha (a food processor makes this part much easier). Combine the grated soap into the dry mixture and combine thoroughly. Place in container with a lid for storage.
You can add between 5 to 10 drops of essential oil to your homemade laundry detergent if you prefer your laundry soap scented (essential oil ideas: lavender, rosemary, tea tree oil). I really enjoy the clean smell of the fels naptha.
To use:
Use 1 heaping 2-Tbsp scoop (a 2 Tbsp coffee scoop is perfect for this) per laundry load. Place in washer as water is filling and then add dirty laundry.
Skip commercial fabric softeners and use 1/2-1 cup distilled white vinegar in the rinse cycle.

Sharing at Laurie's ~ A Few of My Favorite Things
The Frugal Baker & Soft Oatmeal Sandwich Bread
Friday, August 27, 2010

From the very beginning, home cooks have held firmly to the values of economy and thrift. We as bakers can carry on with that tradition in our daily lives by watching for opportiunities that will saave us a few dimes here and there. Not that the savings will make or break us. it's more for our psychic balance sheet, the satisfaction that comes with knowing we're putting our resources to full use instead of squandering them. That said, here are some baking habits up for adoption.
* Use butter wrappers to butter pans with. The best ones come from soft sticks of butter because more of the butter clings to the wrapper.
* Don't throw away any egg washes you glaze yeast breads with (or yolks or whites that are not needed in a recipe). Use them in pancakes, waffles, for an omelet, or anywhere else you'd use an egg. Another option, if the bread recipe itself includes and egg, is to beat the egg before adding it to the dough and then reserve a teaspoon or so of it for the wash.
* Use potato cooking water in bread. It's a shame to throw out that good stuff.
* By the same token, incorporate leftover mashed potatoes or squash in your baked goods, particularly yeast breads.
* Make bread crumbs from stale bread. I just use a box grater for this and then toast them briefly in the oven on a baking sheet. Or just give your stale bread to your backyard poultry.
* Wash out empty honey and molasses jars with a small amount of hot water. Put the lid on, shake it up, and use ut as parat of the liquid in yeast breads. Or loosen it by putting the entire jar in a saucepan of water set over a low heat.
* Turn your pastry scraps into something yummy!
* If you have the storage space and the cash, and you bake often, buy in bulk. This way you always pay less for honey, flour, maple syrup, whatever. One other nice thing about buying in bulk: you aren't always running out of something.
What are your best frugal baking tips?

Sharing one of my favorite everyday bread recipes.

Soft Oatmeal Sandwich Bread
(Printable Version)
1 cup rolled oats (not instant)
2 cups hot milk
½ cup honey
¼ cup lukewarm water
1 pkg (or 2-1/4 tsp) active dry yeast
1/3 cup buttermilk
1-1/2 cups whole wheat flour
1 large egg
1 Tbsp salt
¼ cup unsalted butter, softened
3 to 3-1/2 cups unbleached flour
2 extra Tbsp of oats for sprinkling on top
Put the oats in a large mixing bowl and pour the hot milk over them. Stir in the honey and allow to cool to body temperature. Meanwhile, put the water in a small bowl and stir in the yeast. Set aside for 5 minutes to dissolve. Once the oats have cooled, stir in the dissolved yeast, the buttermilk and the whole wheat flour and beat vigorously for 1 minute with a wooden spoon. Cover this sponge with plastic wrap and set aside for 30 minutes in a warm, draft-free spot.
Using a wooden spoon, beat in the egg, salt and butter until well blended. Add the unbleached flour, ½ cup at a time, beating well after each addition. When the dough is too dense to stir, turn it out onto a lightly floured surface and knead for 10 minutes, periodically dusting your kneading surface with flour; knead gently at first to prevent the dough from sticking. Place dough in a lightly oiled bowl, turning it to coat the entire surface of the dough with oil. Cover the bowl with plastic wrap and set aside, in a warm draft-free post, until the dough is doubled in bulk. Butter 2 4-1/2X8-1/2-inch loaf pans and sprinkle the inside pf each with about 1 Tbsp of oats.
When the dough has doubled, punch it down, kneed briefly, and divide in half. Shape the halves into loaves and place them into the prepared pans. Cover loosely and let rise in a warm, draft-free spot until doubled in bulk, preheating the oven to 375°F when the loaves appear nearly doubled.
Bake the loaves for approximately 40 minutes, until nicely browned. When done, the bottom crusts should give a hollow sound when thumped with your finger. Cool the loaves on a rack before slicing. Store in sealed plastic bags. Makes 2 loaves.
Sharing at Michael Lee's Foodie Friday at Designs by Gollum! Happy Friday Everyone!!
Projects and getting them DONE!
Sunday, August 22, 2010
I have SEVERAL projects hanging over my head. I have a whole list of excuses and some of them actually hold pretty true. I have been very preoccupied with my folk's 50th party AND it has been so blasted hot and humid...but mostly, I have just been putting stuff off. I decided that this weekend I was going to get some stuff done. I picked 2 projects and determined they would get finished this weekend. I am 50% done!

Months ago, I picked this bench up at our local Goodwill store for $10.00. I LOVE the turned legs and the sturdy construction but HATED the dated coloring. My plan was that it would go in my entryway. I always wanted a bench for that spot. At first I left it sit in the garage...then I brought it in and lived with the unattractive color for a few weeks while I thought of what color to paint it. That was motivation to get busy!

I finally decided on Licorice Rope by KILZ. I had lots of opinions and few of them saw my vision of painting it black but I kept that vision.

TaDa!! Isn't it just lovely?! I have a pillow project for this bench that I gleened from one of my favorite blogs. Check back on that one....I may not get to the pillows until after vacation.
I did say I was 50% finished. My other project is this little chest. I have prepped it and painted it with primer but the finishing will have to wait until this afternoon. BTW, this little beauty goes in my kitchen!

Sharing today at Stephanie Lynn's Showcase Sunday and Susan's Met Monday events! Thanks ladies for the inspiration to get things DONE!! I am also going to hook up with Craft-O-Maniac..thanks Jen for the invite.
Pedelstal-ed Plates~Tutorial
Sunday, March 28, 2010

I am posting this to Susan's Metamorphsis Monday. Last week I posted on my collection of vintage cake plates. While many of my collection do not have pedelstals, some do and I enjoy using them very much. Got me to thinking about putting my own plates on petestals. I had done this project before and found it to be easy and pretty rewarding for little investment. So off I went to tour my favorite thrift stores. I found a set of 4 small dessert-sized plates that I really liked and 2 dinner sized. Now I needed *something* to use as a pedelstals. So I went around turning things upside-down to see just what would work. I found 2 vases right off the bat that would go great with the bigger plates and then scored 2 mismatched glass candlesticks and a small vase for the smaller plates. I also knew I had an old perfume bottle at home that had a large chip in the top that would also work nicely. So then I headed to Ace Hardware to purchase 2-Part Epoxy and some sandpaper.


Now all the glass needed a very good cleaning. Lots of nooks and cranies in these pressed glass pieces, so I used a toothbrush and toothpaste to scrub. Does a super job. Once the glass was perfectly cleaned and totally dried, I used the sandpaper to rough over the pieces that will be glued together. Just a little roughing to help the epoxy to do its job.
Mix your epoxy, careful to follow the directions on the package. Once you have the epoxy mixed, you need to work quickly. Spread the epoxy onto the pedestal piece, where it will attach to the plate.


Set the plate on the pedestal and apply slight pressure for a few moments. Set aside and allow the bond to complete (takes 5 minutes).

And the results....

I am also going to add this to Mary's Mosaic Monday. Thank you Susan and Mary!! Please visit each of these wonderful ladies and check out the other inspiring posts!
Be sure to enter in for my 100th post giveaway! The drawing will be on Friday!
Skillet Suppers~A Trio of Recipes!
Tuesday, January 19, 2010

The cast iron skillet is really such a versitle tool. The kitchen work horse. I know my grandmother wouldn't have known how to run her kitchen without hers and I feel the same way about mine. They are perfect for both stovetop and oven use. I use mine for baking cornbread and pineapple-upside down cakes in as well as the best deep-dish pizza. In my everyday cooking routine I make many SKILLET types of meals. Paired with salad, fruit or bread, they are a meal in themselves. These recipes are economical to make, call for basic pantry ingredients and are so very easy to prepare (no need to buy a box). I thought I'd share a few of those recipes with you today. I'll be posting these to my favorite Tuesday Foodie spots. Thanks to Jen, Lisa & Cole from Tempt Your Tummy Tuesday, Tasty Tuesday, and Tuesdays at the Table. Be sure to visit these great blogs and see all the great recipes posted.

Skillet Pasta Italiano
1 c uncooked dried rotini pasta
1 pound lean ground beef
½ c chopped green bell pepper
1 medium onion, chopped
1 (14.5-ounce) can stewed tomatoes
1 (8-ounce) can tomato sauce
1 (4-ounce) can mushrooms stems and pieces, drained
1 tsp dried basil leaves
1 tsp dried oregano leaves
½ tsp garlic salt
1-1/2 c shredded cheddar cheese
Cook rotini according to package directions. Drain. Meanwhile, combine ground beef, green pepper and onion in 10-inch skillet. Cook over medium heat, stirring occasionally, until ground beef is browned (5 to 8 minutes). Drain off fat. Stir in cooked rotini and all remaining ingredients except cheese. Cover; cook over low heat, stirring occasionally, until heated through (8 to 10 minutes). Stir in 1 cup cheese until melted (2 to 3 minutes). Sprinkle with remaining cheese.

Skillet Chicken & Potato Dinner
3 Tbsp butter
6 new red potatoes, cut into quarters
1 medium onion, cut into 6 wedges
1 tsp finally chopped garlic
6-bonesless, skinless chicken breast halves
1 10-ounce package frozen whole green beans
Salt
Pepper
Chopped fresh parsley
Melt butter in 10-inch skillet until sizzling; add potatoes, onion and garlic. Cook over medium-high heat, stirring occasionally, until potatoes are browned (12 to 14 minutes). Remove from skillet. Keep warm. Place chicken in same skillet. Cook over medium-high heat, turning once, until lightly browned and no longer pink (10 to 12 minutes). Remove chicken from skillet. Keep warm. Place potato mixture and green beans in same skillet. Cover; continue cooking, stirring occasionally, until beans are crisply tender (6 to 9 minutes). Return chicken to skillet. Continue cooking, stirring occasionally, until heated through (1 to 3 minutes). Season with salt and pepper, if desired. Sprinkle with parsley, if desired.

Veggie Skillet
2 cups uncooked, dried bowtie pasta
2 Tbsp butter
1 tsp minced garlic
2 medium zucchini, cut into ½-inch pieces
1 medium red onion, cut into thin wedges
1 Tbsp chopped fresh basil
2 cups cheddar cheese, cubed into ½-inch cubes
Cook pasta according to package directions. Drain. Meanwhile, melt butter in 10-inch skillet until sizzling; stir in garlic. Stir in all remaining ingredients except cheese. Cook over medium heat, stirring occasionally, until vegetables are crisply tender (4 to 6 minutes). Stir in pasta. Continue cooking, stirring occasionally, until heated through (2 to 3 minutes). Stir in cheese. Salt and pepper to taste.
* Substitute 1 teaspoon dried basil leaves.


Subscribe to:
Posts (Atom)


