Showing posts with label Gifts from the Kitchen. Show all posts

Low Carb Living ~ Lemon Chicken

Thursday, January 26, 2012

Busy helping my daughter this week with the new baby. I have managed to make some of my go-to, quick low-carb meals. This one is one of my favorites. Our local grocery had Meyer Lemons which are such a wonderful treat (and make me miss CA and the lovely little tree I had in my yard there). A delicious supper with some asparagus on the side!


Low-Carb Lemon Chicken
(Printable Version)

4 boneless skinless chicken breast fillets
1 Tbsp olive oil
2 tsp garlic powder
salt and pepper to taste
1/2 c white wine
2 Tbsp butter
2 small lemons sliced into rounds

Heat olive oil in a skillet over medium heat. Season chicken with garlic powder, salt and pepper. Saute chicken until golden brown, about 6 minutes each side. Remove from skillet and cover. Deglaze skillet with white wine, scrapping up all the bits remaining from the chicken on the skillet. Reduce to 1/2 the amount. Add lemon slices and butter. 1 Tbsp at a time, whisking until melted. add chicken and any juices back to the pan and turn to coat evenly with the sauce. Serves 4.

Sharing at Honey's Potpourri Party!

Spumoni Truffle Squares & Peppermint Oreo Truffles

Thursday, December 8, 2011

Okay, so here is my story. I work in a city about 30 miles from where I live. Yesterday I made these wonderful goodies for a weekend catering and planned to *shoot* their photos this afternoon - hoping to have some nice DAYLIGHT to work with, lol. Problem with that is we got much more snow than was predicted thru the work day today and I am stuck - well, I am going to daughter's home for the night (glad I have a bag packed in my car) and won't make it home until tomorrow (at least I hope I get home tomorrow, lol). So I am going to go ahead and share these wonderful goodies BUT I am going to use Pinetrest photos (with credits) and I'll swap them out for my own when I can get home. Whew!!

It isn't CHRISTmas if you haven't made CANDY -- well, I am not sure that this is exactly candymaking but as close as I am going to come this year. BTW, I sampled only tiny pieces of each of these I highly recommend BOTH of these yummy recipes -- BUT I gotta get them out of my freezer because they are CALLING MY NAME, lol!

Photo Credit: Associated Press

Spumoni Truffle Squares
(Printable Version)

Two 12-ounce bags white chocolate bits
14-ounce can sweetened condensed milk
1 teaspoon vanilla extract
1 cup lightly chopped pistachios
1 cup lightly chopped dried cherries
1/2 cup mini chocolate chips

1. Coat a 9-by-9-inch pan with cooking spray. Line with waxed or parchment paper, allowing excess to overhang the edges of the pan.
2. In a medium saucepan over medium-low, combine the white chocolate bits and sweetened condensed milk. Heat, stirring constantly, until the chocolate is melted and the mixture is smooth. Stir in the vanilla, pistachios and cherries. Transfer to the prepared pan. Sprinkle the mini chocolate chips over the top. Refrigerate until completely chilled, about 2 hours.
3. Using the overhanging edges of the waxed or parchment paper to help, lift the truffle square out of the pan. Trim any uneven edges, then cut into 1-inch squares. Store in an airtight container in the refrigerator. Makes 64 squares.

Photo Credit : KRAFT Foods

Peppermint Oreo Truffles
(Printable Version)

6 candy canes, finely chopped (about 1/3 cup), divided
1 pkg (8 oz.) cream cheese, softened
1 pkg (16.6 oz.) OREO Cookies, finely crushed
2 pkg (8 squares each) BAKER'S Semi-Sweet Chocolate, melted (I did 1 semi-sweet and 1 white chocolate)

Reserve 1 Tbsp chopped candy. Mix remaining candy with cream cheese and cookie crumbs until well blended. Shape into 48 (1-inch) balls. Freeze 10 min. Dip balls in melted chocolate; place in single layer in shallow waxed paper-lined pan. Sprinkle with reserved candy. Refrigerate 1 hour or until firm. Makes 48 Truffles.

Cast Iron Cooking ~ Pumpkin Doughnut Muffins

Monday, November 1, 2010

Last week I received my November 2010 issue of Everyday Food. I've shared before that our family tradition is to make (and eat) muffins for Sunday morning breakfast. It simply wouldn't be Sunday without muffins (well, occasionally I do get away with making scones or a coffeecake). When I flipped thru the magazine, I knew I would be making the Pumpkin Doughnut Muffins featured on page 112.

Years ago, my sweet family purchased for my birthday a lovely Griswold cast iron muffin pan. They knew I'd love it. Not just love it, but use it...OFTEN. It gets a workout most every Sunday morning. If you've never baked in cast iron, I have to share that it is simply the best....much better than other muffin tins.


A very nice sized muffin cup. Small, but not a mini-muffin. There is also only 11 cups...not a dozen or even a baker's dozen.


Pumpkin Doughnut Muffins
(Printable Version)
10 Tbsp butter, room temperature
3 c all-pupose flour
2-1/2 tsp baking powder
1/4 tsp baking soda
1 tsp salt
1/2 tsp nutmeg
1/4 tsp allspice
1/3 c buttermilk
1-1/4 c pure pumpkin puree
3/4 c light brown sugar
2 large eggs

sugar coating:
3/4 c granulated sugar
1-1/2 tsp cinnamon
1/4 c butter, melted

Preheat oven to 350°F. Butter and flour 12 standard muffin cups. Make batter: In medium bowl, whisk together flour, baking powder, baking soda, salt, nutmeg, and allspice. In a small bowl, whisk together buttermilk and pumkin puree. In a large mixing bowl, using an electric mixer, beat butter and brown sugar until light and fluffy. Beat in eggs, one at a time, scraping down bowl as needed. With mixer on low, add flour mixture in three additions, alternating with two additions pumpkin mixture; and beat to combine.

Spoon 1/3 cup batter into each muffin cup and bake until a toothpick inserted into center of muffin comes out clean, about 30 minutes. Meanwhile, in a medium bowl, combine granulated sugar and cinnamon. Let muffins cool 10 minutes in pan on wire rack. Working with one at a time, remove muffins from pan, brush all over with melted butter, then toss to coat in sugar mixture. Let muffins cool completely on a wire rack. Makes 12 muffins.


Sunday's breakfast was these WONDERFUL muffins and some lovely Orange-Spiced Tea. I bought some while visiting the Mennonite store in Wisconsin back in September. So yummy but I quickly went thru the small bag I brought home. I have made some of my own and it is just about as good as the one I bought. I plan to use some of this for holiday gift giving. It will make great hostess gifts.

The tea was the perfect compliment to the muffins. Oh, and the muffins have a dense texture very similar to an old-fashioned cake donut....I understand the name!


Orange Spiced Tea
(Printable Version)

3 large navel oranges
1 (8 oz.) pkg. loose black tea leaves
1-2 stick cinnamon sticks
2 tsp. whole cloves

Remove thin bright colored rind from each orange with sharp knife (no white); cut into thin strips. Spread out on cookie sheet. Heat in very slow oven, 250°F for 10 minutes or just until rind is dry. Toss loose tea with orange rind. Break up cinnamon stick and whole cloves and add to tea mixture. Place in a jar and allow to sit for a couple of weeks for flavor development.


Posting to:
Kristin's THIS WEEK'S CRAVINGS - Pumpkin Party
Lisa's Tempt My Tummy Tuesday
Lady Kathrine's Tea Time Tuesday
Michael Lee's Foodie Friday

Cast Iron Cooking~Nutty Skillet Granola

Wednesday, September 22, 2010


Something NEW...take a look at my page tabs. There is now a Recipe Index tab. I am working at getting all my posted recipes in there so you can search and find more easily.

Breakfast and cast iron skillets just go together. When I think of the two, I see images of crisp bacon, fat sausages and fluffy scrambled eggs. Maybe even pancakes but have you ever considered making granola in a cast iron skillet? I hadn't either until recently. What a wonderful granola this is!! Please note that the nuts and dried fruits can be changed around according to your tastes. I made 2 batches this last weekend. One with golden raisins and one with dried apples.


Nutty Skillet Granola
(Printable Version)

1 cup quick rolled oats
1 cup old-fashioned rolled oats
1 cup sliced almonds
1/2 cup chopped walnuts
1/2 cup chopped pecans
1/2 cup wheat germ
1/4 cup vegetable oil
1/2 cup real maple syrup
3/4 cup light-brown sugar, lightly packed
1 cup raisins

In a large bowl, combine both types of oats, almonds, walnuts, pecans and the wheat germ. Set aside. In a 12-inch skillet, place oil, maple syrup and brown sugar. Place pan over medium heat and stir constantly until the sugar is melted and the mixture just begins to bubble, about 3 minutes. Add the oat mixture and stir well to completely coat with the syrup mixture. Reduce the heat to medium-low. Continue to cook, stirring occasionally, until granola begins to sizzle and toast, about 3 to 4 minutes. Be careful not to burn it. Remove the skillet from the heat and stir in the raisins. Allow to cool for 10 minutes. Transfer the granola into a sturdy container with a tight-fitting lid. Serve immediately or let rest until cool enough to cover and store. Will keep for up to 2 weeks. Makes about 7 cups.

Posting this to Rednesday @ Sue's It's A VERY Cherry World. I LOVE red and it does dominate my world. I hope to post to this event more often! I will also be linking up to Michael Lee's Foodie Friday!

Blue Ribbon Recipes ~ Country Chili Sauce

Friday, August 20, 2010


This recipe is adapted from one of my favorite cookbooks, Cooking from Quilt Country by Marcia Adams. Actually, I am a HUGE Marcia Adams fan and love all her cookbooks. I use chili sauce in many recipes that call for ketchup...especially 1000 Island Dressings and my meatloaf topping. It is more flavorful and a great substitution. This is a BLUE RIBBON recipe for sure!!


Country Chili Sauce
(Printable Version)

26 large tomatoes
2 large green bell peppers
2 large onions
1 1/2 cups of cider vinegar
1 1/2 cups of sugar
3 T of salt
1 T celery seed
1 T ground cinnamon
1 T ground cloves
1 t black pepper
1 t ground ginger
1 t ground allspice

Peel, core and chop the tomatoes, and place in a large, heavy saucepan. Wash, peel and chop the peppers, and onions and add to the tomatoes. Add the rest of the ingredients and mix well. Bring to a boil and simmer over low heat, uncovered, for about 2 hours, or until mixture is as thick as you want. The amount of time will vary, depending on the amount of moisture in the tomatoes, which depends on the amount of rain the tomatoes received that particular summer. (It's this kind of unscientific stuff that drives cooks mad!) Stir frequently. Pour boiling hot, into 6 hot pint jars, leaving 1/4 -inch heading space. Process in a hot- water bath for 15 minutes, counting the time after the water comes to a full boil again.


Posting to Michael Lee's Foodie Friday at Designs by Gollum!

Pedelstal-ed Plates~Tutorial

Sunday, March 28, 2010


I am posting this to Susan's Metamorphsis Monday. Last week I posted on my collection of vintage cake plates. While many of my collection do not have pedelstals, some do and I enjoy using them very much. Got me to thinking about putting my own plates on petestals. I had done this project before and found it to be easy and pretty rewarding for little investment. So off I went to tour my favorite thrift stores. I found a set of 4 small dessert-sized plates that I really liked and 2 dinner sized. Now I needed *something* to use as a pedelstals. So I went around turning things upside-down to see just what would work. I found 2 vases right off the bat that would go great with the bigger plates and then scored 2 mismatched glass candlesticks and a small vase for the smaller plates. I also knew I had an old perfume bottle at home that had a large chip in the top that would also work nicely. So then I headed to Ace Hardware to purchase 2-Part Epoxy and some sandpaper.


Now all the glass needed a very good cleaning. Lots of nooks and cranies in these pressed glass pieces, so I used a toothbrush and toothpaste to scrub. Does a super job. Once the glass was perfectly cleaned and totally dried, I used the sandpaper to rough over the pieces that will be glued together. Just a little roughing to help the epoxy to do its job.

Mix your epoxy, careful to follow the directions on the package. Once you have the epoxy mixed, you need to work quickly. Spread the epoxy onto the pedestal piece, where it will attach to the plate.


Set the plate on the pedestal and apply slight pressure for a few moments. Set aside and allow the bond to complete (takes 5 minutes).


And the results....


I am also going to add this to Mary's Mosaic Monday. Thank you Susan and Mary!! Please visit each of these wonderful ladies and check out the other inspiring posts!

Be sure to enter in for my 100th post giveaway! The drawing will be on Friday!

Christmas Goodies Part 2

Friday, December 4, 2009
Tomorrow morning I'm attending a candy making party at a friends home. I've never been to a candy making party but am excited to attend and see what others ladies make. I've always enjoyed making candies and give lots of it away as gifts. I'm linking this post to Michael's Foodie Friday at Designs by Gollum. Be sure to check out the others posts there. Many inspiring cooks!


English Toffee Candy
(Printable Version)

1 c. sugar
1 c. butter
3 tbsp. water
1 tsp. vanilla
4 or 5 Hershey chocolate bars
Toasted and chopped almonds

Combine sugar, butter and water in heavy saucepan. Cook to 300°F (hard crack stage) stirring constantly to prevent burning. Add vanilla and pour into a buttered 9 x 9 inch pan. Lay the chocolate bars on top and spread them evenly as they melt. While still warm, sprinkle chopped nuts over the top. Cool thoroughly and break into pieces.


Homemade Marshmallows
(Printable Version)

.75-oz unflavored gelatin (3 envelopes of Knox gelatin)
1/2 cup cold water
2 cups granulated sugar
2/3 cups light corn syrup
1/4 cup water
1/4 teaspoon salt
1 tablespoon vanilla extract

Line 9 x 9-inch pan with plastic wrap and lightly oil it. Set aside. In the bowl of an electric mixer, sprinkle gelatin over 1/2 cup cold water. Soak for about 10 minutes. Meanwhile, combine sugar, corn syrup and 1/4 cup water in a small saucepan. Bring the mixture to a rapid boil and boil hard for 1 minute. Pour the boiling syrup into soaked gelatin and turn on the mixer, using the whisk attachment, to high speed. Add the salt and beat for 12 minutes. After 12 minutes, add in the vanilla extract beat to incorporate. Scrape marshmallow into the prepared pan and spread evenly (Lightly greasing your hands and the spatula helps a lot here). Take another piece of lightly oiled plastic wrap and press lightly on top of the marshmallow, creating a seal. Let mixture sit for a few hours, or overnight, until cooled and firmly set. In a shallow dish, combine equal parts cornstarch and confectioners’ sugar. Remove marshmallow from pan and cut into equal pieces with scissors (the best tool for the job) or a chef’s knife. Dredge each piece of marshmallow in confectioners’ sugar mixture. Store in an airtight container.


I tint some of my marshmallow mixture with a couple drops of red coloring (to make a light pink color) and add peppermint extract. These are great on their own BUT are wonderful when dipped in chocolate. YUM! Be adventursome, add flavorings and colors to suit your tastes. Have fun!


Macadamia Brittle
(Printable Version)

2 cups sugar
1/2 cup water, to dissolve
2 tablespoons butter
1 cup macadamia nuts, toasted and cooled

In a saucepan boil the sugar and water together to make a caramel. Test the color of the caramel on a white plate. It should be amber-brown. Stir in the butter with a wooden spoon then stir in the nuts. Pour onto a cookie sheet and let cool. Break up into chunks (for brittle, just chop or crush with the bottom of a bottle). Store in an airtight container.


Buckeyes
(Printable Version)

16-oz. jar creamy peanut butter
1 c. butter, softened
6 c. powdered sugar
12-oz. pkg. semi-sweet chocolate chips
1/3 bar paraffin

Blend together peanut butter, butter and powdered sugar, mixing with your hands. Shape into one-inch balls; chill for at least an hour. Melt together chocolate chips and paraffin over hot water in a double boiler. Use a toothpick to dip each ball in chocolate, leaving a small spot uncovered. Arrange on wax paper-lined baking sheet. Using the tip of a small knife, smooth over hole left by toothpick. Place in cool area or freezer to set. Makes about 5 to 6 dozen.


The Smells of Christmas

Tuesday, December 1, 2009


The Smells of Christmas

For me, one of the most delicious smells of Christmas is the mix of orange, clove and cinnamon. Make colorful and aromatic groups of orange pomanders and bundled cinnamon sticks and place them in pretty bowls or platters. They are as nice to look at as they are to smell. This is a craft that can easily be done by children and one year my kids and I took the supplies to a nearby Assisted Living Facility and did these with the elders there. What a nice time we all had.

You can use oranges, mandarins, clementines or even lemons or limes for this project. Personally I think the oranges smell the best, but smaller fruits add a very attractive element to your groupings. If you have difficulty inserting the cloves into your fruit, you can use an awl, a darning needle or even a toothpick to make pilot hole before inserting the cloves. Just be careful not to make the holes too big, or the cloves may fall out.

Supplies needed:

Oranges, mandarins, or clementines
Whole cloves
Cinnamon sticks
Ribbon of your choice

What to do:

1. Press the cloves into the oranges, mandarins, or clementines, making a simple pattern.

2. Gather together some nice-looking cinnamon sticks and tie them together with a pretty ribbon.

3. Place the fruit and the cinnamon bunches in/on a glass dish or other suitable container.

Christmas Goodies Part 1

I thought I would share a few quick recipes I plan to use this Christmas season courtesy of HyVee's Seasons magazine. Posting to Tasty Tuesday , Tempt Your Tummy Tuesday and Tuesdays at the Table. Thank you Jen, Lisa and Cole for hosting these lovely events each week. Check out ALL the great recipes posted.


Snowy Trail Mix
(Printable Version)

1/2 c. miniature marshmallows
1 c. mini twist pretzels
1/2 c. peanuts
1/2 c. dried cranberries
2 c. popped white popcorn
Combine all ingredients in large bowl. Store in an airtight container up to 3 days. Serves 9 (1/2 cup each).


Holiday Spiced Nuts
(Printable Version)

3 tbsp unsalted butter
1 1/2 c. walnut halves
1 1/2 c. pecan halves
1 c. natural almonds
2 tbsp Worcestershire sauce
1 tbsp soy sauce
1/2 tsp salt
1/2 tsp ground cinnamon
1/2 tsp ground allspice
1/2 tsp ground cloves

Preheat oven to 250°F. In a 2-quart sauce pan, melt butter over medium-high heat. Stir in nuts. Add Worcestershire sauce, soy sauce, salt, cinnamon, allspice and cloves; stir well to coat. Pour onto a baking sheet and bake 30 minutes stirring halfway through. Serves 16 (1/4 cup each).


Marshmallow Snowmen
(Printable Version)

6 ounces white chocolate candy coating, chopped
3 large marshmallows
1 c. flaked coconut
1 orange gumdrop
1 mini Oreo™
Mini candy sequins
1 chewy fruit snack roll
Black rope licorice

In a heavy saucepan, melt candy coating over low heat, stirring constantly until smooth. Cut one of the marshmallows in half. Attach one of the halves to a whole marshmallow to form the base. Press the marshmallows together to form a ball. Dip in candy coating, then roll in coconut to coat. Place on baking sheet lined with waxed paper. Dip remaining whole marshmallow in candy coating and coconut. Place on top of marshmallow base. Repeat process with remaining marshmallow half and place on top of second ball. (Turn the marshmallow half so the round side faces the front. For the nose, cut a sliver slice from the gumdrop. Using candy coating as glue, attach nose to snowman’s face. Repeat process using candy sequins for eyes and mouth. For the scarf, cut a strip from the fruit snack roll and wrap around snowman’s neck. For the hat, cut a piece of black rope licorice to fit around the bottom edge of mini Oreo™ cookie. Use candy coating to attach licorice to bottom edge of cookie; allow to dry before placing on snowman’s head. For arms, cut pieces of string licorice and attach to sides of snowman.


Holiday Hostess Gifts

Thursday, November 5, 2009
Now is when I start thinking about all the holiday get-togethers that will be upon us before too long. This year we are invited to our Pastor’s for Thanksgiving as well as a few other dinner parties and such that I would like to bring a small token gift to the gracious hostess. Typically, gift giving for me consists of something I’ve made. An apron, tee towel and/or some sort of goodie from the kitchen. This year, I’ve collected some old bottles and jars as I’ve antiqued and junked and plan to make Homemade Vanilla, Vanilla Sugar, Cranberry Vinegar and Cranberry-Mustard. These are all very easy to make but some require time to develop their flavor so the time is right to get started.


Homemade Vanilla

1/2-pint Vodka
4 whole vanilla beans
Seal tight bottle or container
Decorative bottle or jar

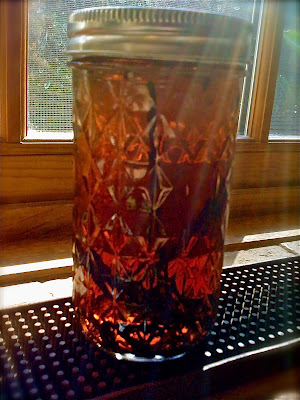
Using a sharp kitchen knife, cut a lengthwise slit down the middle of each vanilla bean. Cut vanilla beans into 1/2-3/4 inch pieces. Pour vodka into your container. Add vanilla beans to container and shake. Wait and shake. It will take 30-days for the vanilla extract to mature. Once each day, vigorously shake the container for 30-seconds. Once the 30-day cycle has finished, strain the liquid through a colander or coffee filter and place in decorative bottle. Makes 8-ounces. Bourbon vanilla can be made by switching out the vodka for bourbon.


Vanilla Sugar

1 vanilla bean, whole or scraped
2 cups granulated sugar

If vanilla bean is whole, slice down side of bean with back of knife and scrape seeds into airtight container with the sugar. Bury bean in sugar and seal tightly with lid. Let sit for 1 to 2 weeks. Use as you would regular, granulated sugar.


Cranberry Vinegar

2 cups good red wine vinegar
½ cup fresh cranberries
1 Tbsp sugar

Place vinegar, cranberries and sugar in saucepan. Bring to boil; immediately lower flame. Simmer 3 to 5 minutes, until fruit is tender. Cool. Pour into sterilized jar. Store in cool, dark place for at least 4 days.
Pour vinegar through strainer, removing cranberries. Pour gently into decorative glass jar or vinegar cruet for serving. Makes about 2 cups.

Horseradish-Cranberry Mustard

2 16-ounce cans whole cranberry sauce
1/2 16-ounce can jellied cranberry sauce (or more, to taste)
1 5-ounce jar cream style horseradish
1 2-ounce can Colman’s Mustard
1 Tbsp freshly ground pepper

Combine all of the ingredients in the bowl of a food processor. (If you prefer a slightly sweeter mixture, use more of the jellied cranberry sauce.) Pulse until thoroughly combined and whole cranberries are slightly crushed. Use as a condiment with turkey or ham. The flavors improve over time, so make this at least one week in advance. There will be plenty to share with friends and family. Keeps in the refrigerator for at least one month.


Cranberry Chutney

1 3/4 pounds tart apples, chopped
2 1/4 pounds cranberries
2 cups light brown sugar
1 1/4 cups cider vinegar
1/2 tablespoon cinnamon
1/2 tablespoon salt
1/2 tablespoon ground ginger
3/4 teaspoon ground cloves
3/4 teaspoon pepper flakes
1/2 pound dark raisins

Place all ingredients in saucepan and cook 25 to 30 minutes.


Posting to Foodie Friday at Michael's Designs by Gollum. Thanks for hosting, Michael!