Old-Fashioned Bake Sale ~ Salted Caramel Butter Bars

Friday, September 30, 2011

If you haven't already, enter to win TINY TIPS from Gooseberry Patch -- ends Monday 10/3.

I was determined that this week's baking feature would be a recipe from my Pintrest to-try list. After looking over all that was PINNED my daughter declared she wanted to take goodies to the girls at work on Friday -- How about bars? Yeah, I have an occasion to try Salted Caramel Butter Bars from www.cookiesandcups.com. One thing I want to say is that I *think* I may have invented the salted caramel craze many years ago. I figured why make caramel apples (my oldest daughter's favorite treat) when I could just make homemade caramels and eat them with a cut up apple sprinkled with SALT -- YUM!! Okay, so not my invention but I will say that there is *something* about caramel combined with salt.


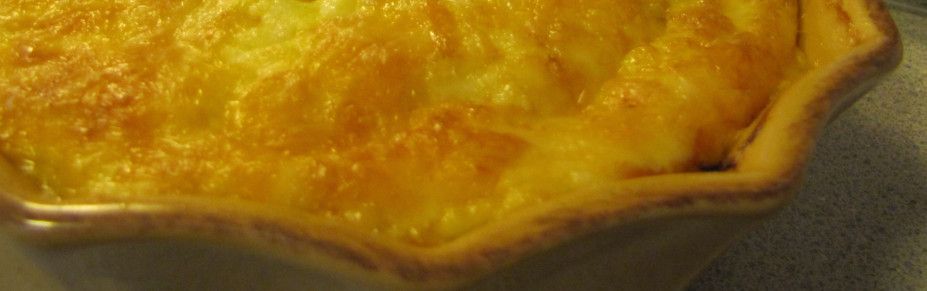
My sampling of these bars made me VERY glad they had a place to go -- too good to be trusted around. This also makes A LOT -- you might want to plan on baking them when you have plenty around to share with. Happy Baking (and Pinning too)!!


Salted Caramel Butter Bars
(Printable Version)

For the Crust:
1 lb. salted butter room temp (I used unsalted - it is what I buy)
1 cup sugar
1½ cups powdered sugar
2 Tbs vanilla
4 cups flour
For the Filling:
1 bag (14 oz.) caramel candies (about 50 individual caramels), unwrapped
1/3 cup milk or cream (I used cream)
½ teaspoon vanilla
1 Tbsp coarse sea salt (optional)

In a large bowl, combine the butter and sugars. Using mixer on medium speed, beat together until creamy. Add the vanilla and beat until combined. Sift the flour into the butter mixture and beat on low speed until a smooth soft dough forms. Spray a 9×13 inch baking pan lightly with non-stick cooking spray. Press one-third of the dough evenly into the pan to form a bottom crust. Preheat to 325°F. Bake until firm and the edges are a pale golden brown approx 20 minutes. Transfer pan to a wire rack and let cool about 15 minutes. While the bottom crust is baking and the remaining dough is chilling, make the caramel filling. Place the unwrapped caramels in a microwave-safe bowl. Add the cream. Microwave on high for 1 minute. Remove from the microwave and stir until smooth. If caramels are not completely melted, microwave on high for 30-second intervals, stirring after each interval, until smooth (I did the melting in a saucepan stovetop since I don't microwave). Pour the caramel filling over the crust. If you are going to salt the caramel sprinkle it on caramel layer now. Remove the remaining chilled dough from the refrigerator and crumble it evenly over the caramel. Return the pan to the oven and bake until the filling is bubbly and the crumbled shortbread topping is firm and lightly golden, about 25 – 30 minutes. Let cool before cutting into squares.

Sharing at Michael Lee's Foodie Friday and Kim's Sweet Indulgence Sunday AND Yvonne's On The Menu Monday!

Tiny Tips!

Wednesday, September 28, 2011

Happy GOOD NEIGHBOR DAY!! Well, my sweet Goosey friends at Gooseberry Patch are at it again. They have introduced 4 NEW books in the NEW book series – TINY TIPS. Don’t these titles sounds FABULOUS?!! – Tiny Tips for a Cozy Home, Tiny Tips for Gifts to Make & Give, Tiny Tips for Get-Togethers AND Tiny Tips for the Kitchen.

Take a listen to what they have to say about these tiny treasures! (Don't forget to go to the bottom of the page and turn off the blog music).


Lucky me, they sent me 2 of those titles to preview - Tiny Tips for Gifts to Make & Give and Tiny Tips for Get-Togethers. Lucky YOU, you can have a chance to win them!

These tiny books are chocked FULL of great tips that had me thumping my forehead and saying *why didn't I think of that*!! The kinds of tips that take an ordinary get-together and elevate it to the extraordinary and sweet little details that make a small gift something very special.


This tip motivated me to sneek a little something on the front porch of Miss Betty -- my nextdoor neighbor. So simple and I hope it makes her day -- I KNOW it made mine!

Okay 2 giveaways to tell you about!! You can WIN the 2 Tiny Tips books I previewed AND a set of Faithfulness Farm Embleshed Flour Sack Tea Towels just by posting your best Tiny Tip as a comment (please make sure your email is included if it isn't on your blog). Hurry because this giveaway closes on Monday, October 3rd with the winner announced on Tuesday October 4th. The second giveaway is hosted by Gooseberry Patch and the details follow -- if you're thinking of giving a Gooseberry Patch Cookbook as a gift in the upcoming holiday season, this is a GREAT time to make that purchase and be entered in for this generous giveaway -- you have until October 28, 2011 to enter in - JUST SAYIN!!!


How does it work?

Buy any Gooseberry Patch book or calendar wherever you like.

Send GOOSEBERRY PATCH your receipt – the original or a copy – and be sure to
include your email or mailing address. (That way they can get in touch with you if you win!)

Mail to:
Gooseberry Patch • Attn: Receipt Contest
2500 Farmers Drive, #110 • Columbus, OH 43235
OR
Scan or snap a photo of your receipt and email it to us at:
gooseberrypatch@gooseberrypatch.com

That's it...you'll be entered to win! It's just GOOSEBERRY PATCH'S way of saying thanks to all of YOU for collecting our books over the years...we're honored to be part of your family's meals.

Send YOUR receipts by Oct. 28, 2011!

Fallen Tabletops

Tuesday, September 27, 2011

This last weekend I dug in and got all my fall decorating done -- well, early fall that is. The turkeys will have to wait a few weeks before coming out of hiding.


Most of the decorating is in the dining room. I tried to keep things simple this year. I love this olden sewing machine cabinet drawer and I use it a lot in table tops -- I thought it perfect for holding my favorite little boo pumpkins and a candle of course.

My sideboard got a fallen makeover too. I used a recent GW find -- a vintage leather Samsonite suitcase, lined with some fall fabric and loaded up with sideboard goodies -- chargers, a basket of fall napkins, some leafy napkin rings atop a stack of leafy plates, a stack of fall colored individual-sized wavy bakers just ready for warming gratins and casseroles, and an extra candle. I am just loving the colors there!


My hutch has fallen too -- quilted pumpkins adorn the extra chairs. I learned a valuable lesson a long time ago about putting real pumpkins on the furniture -- one day they can look fine and the next when you are not home explode and leave a goo all over your furniture that works better than any commercial stripper! I now keep to the faux variety on furniture.

And a thought to leave you with this lovely autumn day .......


Sharing at Marty's Tabletop Tuesday AND Honey's Potpourri Party !

Nebraska Junk Jaunt

Sunday, September 25, 2011

Since moving to Nebraska, I have wanted to *do* the annual Nebraska Junk Jaunt. Mostly because my sweet friend helps her Mom each year with manning her booth and always tells me all about it (she knows of my love of junk and all things olden). Every year SOMETHING comes up that keeps me from jaunting. This year was no different. I long ago made plans with my daughters that will take us out of town. I was totally bummed but that is how it works sometimes. There is a little consignment shop near my work that is rarely opened BUT I noticed a sign on their door last week that said they would be opening for the Jaunt....AND they would be opened BOTH Thursday and Friday before the weekend. I was too busy on Thursday but decided that I'd scoot over there on my lunch hour on Friday.

I don't know about you but sometimes I just see something that I FEEL is supposed to be mine. I saw lots of wonderful antiques and decor items that caught my attention but nothing had THAT feeling -- UNTIL I wandered out to the back of the building and there IT was -- a 3 piece set of vintage wicker furniture. Now I have been searching for the right set -- suffienctly olden and aged enough that I wouldn't feel badly about painting it BLACK. I wanted a sofa AND a rocker...this set has both and another chair besides AND it has already been painted black (although needs some sprucing up). It was priced too high and I was walking away when I was asked how much would I be willing to pay -- I stated 1/2 of the asking price, SURE they would have NO willingness to go that low, but knowing that was what my budget could bear -- the gal asked me if I would LOVE the set -- YES, I WOULD -- she explained that she didn't want to get rid of it but had to downsize her home and no longer had a place for it. With the agreement that I would ♥ LOVE ♥ it, the deal was struck. Now, how do I get it into the back of a Honda Odyssey? Remember, I am on my lunch hour and about 30 miles from home so no multiple trips to get it home. Anyway, there was a VERY nice young man there purchasing another piece of furniture who took it upon himself to help this daffy damsel -- he spoke NO ENGLISH but we communicated thru gestures and he very carefully got it all into my car and it made it home. I pray God heaps special blessings on that young man :)

New paint and the original cushions will get a new coverings. I cannot wait to find the perfect, vintage looking fabric.

Last spring I *found* a wicker swing curbside (as in waiting for the trash pick up). Dear son and his girlfriend went and picked it up for me.

Now I'll finally get it painted black too and hung.

I'll be keeping my eyes peeled for another chair and a couple tables -- in the meantime I have an old GW find tray table that I'll paint black to serve as a coffee table in front of the sofa.

I cannot wait to serve tea on the porch!

AND I can just imagine reading to my little grandson (we've found out our little baby due in January is a BOY) on this rocker next summer! Life is GRAND!!

Adding this post to Susan's Met Monday!

Old-Fashioned Bake Sale ~ Pumpkin Doughnut Muffins

Friday, September 23, 2011

I never repeat posts or recipes -- well, until today that is. Last fall, I discovered this wonderful recipe in Martha Stewart's Everyday Food. My family was hooked. I've made them many. many times since then and made them to bring to work today to celebrate the arrival of Fall.


Pumpkin Doughnut Muffins
(Printable Version)

10 Tbsp butter, room temperature
3 c all-pupose flour
2-1/2 tsp baking powder
1/4 tsp baking soda
1 tsp salt
1/2 tsp nutmeg
1/4 tsp allspice
1/3 c buttermilk
1-1/4 c pure pumpkin puree
3/4 c light brown sugar
2 large eggs

sugar coating:
3/4 c granulated sugar
1-1/2 tsp cinnamon
1/4 c butter, melted

Preheat oven to 350°F. Butter and flour 12 standard muffin cups. Make batter: In medium bowl, whisk together flour, baking powder, baking soda, salt, nutmeg, and allspice. In a small bowl, whisk together buttermilk and pumkin puree. In a large mixing bowl, using an electric mixer, beat butter and brown sugar until light and fluffy. Beat in eggs, one at a time, scraping down bowl as needed. With mixer on low, add flour mixture in three additions, alternating with two additions pumpkin mixture; and beat to combine.

Spoon 1/3 cup batter into each muffin cup and bake until a toothpick inserted into center of muffin comes out clean, about 30 minutes. Meanwhile, in a medium bowl, combine granulated sugar and cinnamon. Let muffins cool 10 minutes in pan on wire rack. Working with one at a time, remove muffins from pan, brush all over with melted butter, then toss to coat in sugar mixture. Let muffins cool completely on a wire rack. Makes 12 muffins.

Posting to Honey's Potpourri Friday & Michael Lee's Foodie Friday!

On this date.....

Tuesday, September 20, 2011


On this date in 1960 there was a partial eclipse of the sun. I know that because I was also born on that date. My daughter said the eclipse thing must be why I am so *special* (said with THAT tone, lol). The year I was born was a leap year. I was born on a Tuesday -- *Tuesdays child is full of grace* -- since I was born in leap year, this is only one of a handful of times my birthday makes it to Tuesday in my lifetime. My son said that makes this day *special* (he was using that same tone his sister used, lol). I was born on the verge of an equinox......well, those kids aren't going to let me get too full of myself, lol. My favorite part of my birthday is that it ushers in my favorite season of the year -- Let me be the first to wish you Happy Fall Ya'll (yeah, I know it is a tad early, but better early than late)!!

Old-Fashioned Bake Sale ~ Banana Bundt w/Caramel Glaze & Candied Walnuts

Friday, September 16, 2011
One of my favorite kitchen collections is my Nordicware Bundt pans. I try to use them as much as possible. Bundt cakes are fun and so easy -- no frosting and decorating necessary. Perfect for something quick for company or to go with a steamy cup of coffee. This recipe fits that bill perfectly!


Banana Bundt Cake w/Caramel Glaze & Candied Walnuts
(Printable Version)

Cake:
1-1/2 cup sugar
1 cup sour cream
2 eggs
4 Tbsp butter, softened
4 mashed super ripe bananas (about 1-1/2 cups)
1 tsp pure vanilla extract
2 cups flour
1/2 tsp salt
1 tsp baking soda

Caramel Glaze
Candied Walnuts (commercially prepared ones can be used)

Prepare candied walnuts. Position rack in center of oven. Preheat oven to 350°F. Prepare a 10-1/2-cup Bundt pan by using a pastry brush to brush the inside surface with solid shortening then dust with flour. Set aside. With a mixer, cream together sugar and softened butter. Add eggs one at a time and beat until well incorporated. In a medium mixing bowl, mash bananas. Add vanilla and sour cream. Combine flour, salt and baking soda. Add flour mixture to creamed mixture alternating with banana mixture (beginning and ending with dry ingredients) until well combined. Do not over mix. Pour into prepared Bundt pan. Bake for 45-50 minutes, until a skewer inserted into the center comes out clean. Cool on rack for 5-10 minutes, then turn cake out onto serving plate. Cool completely. When cooled, prepare glaze and pour over cake. Sprinkle glaze with chopped candied walnuts. Serves 12.

Caramel Glaze:
4 Tbsp butter
1 cup brown sugar, packed
1/4 cup evaporated milk
1 tsp vanilla

Bring brown sugar, butter, and milk to a boil in a 2-qt. saucepan over medium heat, whisking constantly; boil 1 minute, whisking constantly. Remove from heat; stir in vanilla. Whisk for 3 to 5 minutes or until mixture begins to cool and thickens slightly. Pour immediately over cooled cake.

Candied Walnuts:
½ lb walnuts halves
½ c granulated sugar
1/8 tsp salt
1 tsp ground cinnamon
3 Tbsp evaporated milk
1/2 tsp vanilla

Preheat oven to 350°F. Spread nuts in a single layer over parchment-lined baking sheet. Roast for approximately 8 to 10 minutes, or until the nuts start to turn brown and the smell of roasting nuts fills the kitchen. Stir together sugar, cinnamon, salt, and milk in a medium saucepan. Cook over medium-high heat for 6-8 minutes, or until the mixture reaches the soft ball stage of 236°F. Remove from heat, and stir in vanilla immediately. Add walnuts to syrup mixture, and stir to coat well. Spoon nuts back onto parchment-lined baking sheet, and immediately separate nuts with a fork. Cool, and store in airtight container.

Posting to Honey's Potpourri Friday & Michael Lee's Foodie Friday!

Sew What?!

Monday, September 12, 2011
photo credit: Cath Kidston

Well, September is crusing along -- what have you been sewing?

I thought I'd share some projects that my bloggy friends have posted on their blogs. All of these are simple tutorials for WONDERFUL projects. Hope you are inspired!

Yvonne's Making Napkins with Mitered Corners

Yvonne's Apron Strings - Making a Simple Apron

Ellen's Lunch Bag

Ellen's Pintuck Pillows

Crystal's Reversable Half Apron

Liz's Reversable Baby Sling

Shannon's Baby Swaddler

Amamda's Pleated Tablerunner

Tara's Flannel Baby Blankets

Please post a comment with any sewing projects you've blogged about. Happy Stitching!!

Football Snacking

Saturday, September 10, 2011

I've lived in Nebraska since 2006. Most of the native Nebraskans can be described as a pretty even-tempered lot -- except when you are talking Husker Football! It took me a few years to catch the fever but now I bleed RED just like a native. Now that Nebraska is playing in the BIG 10, we can catch every game on BTN (Big Ten Network) -- YIPPEE!!

This afternoon I'm having a friend over to view the game and have been searching out game grub all week. I finally settled in my version of a dish I spyed on Pintrest (oh, how addicted I am to Pintrest, lol). First, let me tell you as a low carb eater, pizza is something I don't indulge in often. Occasionally, I do this thing where I peel off all the cheese and toppings and leave behind the crust -- not pretty and only at home, lol. So, when I saw there was such a thing as Pizza Dip, I thought I'd died and gone to heaven. GO BIG RED!!!


Skillet Pizza Dip
(Printable Version)

2 8oz pkg cream cheese
1 tsp garlic powder
1 cup prepared pizza sauce
2 cups shredded mozzarella cheese
1 cup grated Parmesan cheese
1/2 lb Italian sausage, cooked and drained
4 oz pepperoni
1 small can sliced black olives
fresh basil leaves, chopped
red pepper flakes (optional)

Preheat oven to 375°F. Place 10-inch cast iron skillet on low heat. Place cream cheese and garlic powder in skillet and stir to melt cream cheese. Once melted, remove from heat and smooth out evenly in bottom of skillet. Sprinkle 1/2 of the Parmesan cheese over cream cheese mixture. Carefully cover with pizza sauce. Reserve 1/2 cup of the remaining cheese and sprinkle the rest over pizza sauce. Arrange sausage and pepperoni over cheese. Sprinkle with olives and reserved cheese. Bake in preheated oven for about 20 minutes until the cheese is melted, bubbling and golden brown. Sprinkle with chopped basil and red pepper flakes. Serve with toasted french bread slices. Serves 10-12.

Served with french bread -- the only thing I dip in is a fork, lol. Oh, so good!!

Linking up with Yvonne's On The Menu Monday!

Old-Fashioned Bake Sale ~ Gingerbread Pumpkin Bars

Thursday, September 8, 2011

It is September -- no more holding back -- Fall is so close I can smell it (and it smells like pumpkins and spices)-- BRING ON THE PUMPKIN RECIPES :)


Gingerbread Pumpkin Bars
(Printable Version)

Bars:
2-1/4 cups flour
1-1/2 tsp baking soda
1/2 tsp salt
1-1/2 tsp pumpkin pie spice
16 Tbsp unsalted butter, softened
1-1/2 cups granulated sugar
1/4 cup molasses
1/3 cup rolled quick oats

Filling:
6 ounces cream cheese, softened
1-3/4 cups pumpkin puree
1/2 cup granulated sugar
1 teaspoon vanilla
1-1/2 tsp pumpkin pie spice
2 large eggs

Glaze drizzle:
1 cup confectioners' sugar
1 tablespoon butter, softened
1/4 teaspoon vanilla
1 to 2 tablespoons milk

Preheat oven to 350°F. In a medium bowl, whisk together flour, baking soda, salt, pumpkin pie spice. In a large mixing bowl, beat together butter, sugar and molasses until creamy. Add dry ingredients and mix just until combined. Reserve 3/4 cup of this mixture and place in a small bowl. Scoop the remaining mixture into a 10" x 15" baking pan lightly coated with nonstick spray. Add the oats to the reserved mixture and mix until combined - set aside. For the filling, in a large mixing bowl, beat cream cheese until smooth. Add pumpkin, sugar, vanilla, pumpkin pie spice and mix until well combined. Add the eggs, one at a time, mixing just until combined. Scoop the mixture over the uncooked base and use an off-set spatula to evenly spread the mixture over the top. Crumble reserved oat mixture over filling. Bake until the topping is a golden brown, about 25-30 minutes. Remove and place on a wire rack to cool completely. For glaze drizzle, in a small bowl, mix together confectioners' sugar, butter and vanilla. Mix in just enough milk until the mixture will easily flow from a spoon - drizzle over cooled bars.

Sewing -- In the JAR!!

Wednesday, September 7, 2011
Last week I shared that September is National Sewing Month. That got me to thinking -- whether you are a seasoned seamstress or not, we all need to be prepared to do SOME sewing -- you know, replacing a button, fixing a hem, stitching up a busting seam. Nothing that requires a lot of talent BUT you have to have the supplies to do these jobs. I have a young woman at work who asks me to help her with these little chores. Last week I stitched on a wayward sequined star on her daughter's jeans. I don't mind helping but she doesn't do it herself because she isn't prepared to do so. My grown daughter is in the same boat (she just brings what she needs fixed to Mom's).

While browsing the internet I came accross the perfect solution to this......


Isn't this sweet? This one is sold by ANTHROPOLOGIE and I have to admit that I about choked on my coffee when I saw that it sells for $48.00 (GULP).

Anyone could make one -- including me. My plan was to make several to hand out as gifts for my co-worker, my daughters, and to have a few on hand.

So I made a list of what was in the Anthropologie Jar --
thread (just 2 spools), thimble, safety pins, needle threader, straight pins, measuring tape, needles and scissors. Then I thought, what else would be handy....an assortment of buttons, more of an assortment of threads and a seam ripper.

Off I went to the BIG BOX store to price and purchase all the items to stuff the jars with. YIKES -- these were going to be a bit spendy to stuff with style. Then I spyed a ready made kit by Dritz with all the components I had on my list -- selling for under $5.00. Perfect!! It also came in a variety of great colors - hot pink, purple, lime green.


What else was I going to need --

1 Large Canning Jar (with two-piece lid and ring) - I have a pantry full of these

1 small piece of fabric (1" larger than the circumference of lid) - from my scrap bag

small handful of batting - I have a bag of this in my sewing supplies but if you don't have some already, you could use a few cotton balls instead

Hot Glue Gun

Plug in glue gun to warm up. Lay fabric face down on work surface. Place a small amount of batting in the center. Place lid, top down on the batting and pull around. Slide the ring portion of the lid over the batting/fabric, and pull fabric taut. Trim any excess fabric. Glue the fabric to the underside of the lid, making sure to maintain a bulge on top. I embleshed the lid ring with some rickrack scraps but you could use ribbon, twine like the Anthropologie jar or no embleshing at all. Since I have a large supply of canning jars and used scraps, my total cost was the approximately $5.00 for the Dritz sewing kits to stuff the jars with. A handy and economical gift!


Joining Honey @ 2805 for ---


Drum Roll Please ..........................

Tuesday, September 6, 2011
Hoping EVERYONE had a safe and happy Labor Day weekend. We had the most perfect weather possible. Lots of food and fellowship....the best kind of holiday!

I want to THANK everyone who left such sweet comments and extend WELCOME to the new followers. I wish I had a prize for each of you.

Since I don't I asked my daughter to oversee the giveaway as she has done in the past. She took great care in counting every entry and determined the winner to be --

Sue from Country Pleasures!!

Please get over and congratulate Miss Sue -- she is a Apron Diva for sure!!

And, I have something *cooking* with the great folks at Gooseberry Patch, so stay tuned for another giveaway SOON!!

From The Hymnal ~ When The Roll Is Called Up Yonder

Sunday, September 4, 2011

This is one of those old-timey hymns that I just love. Since it is Labor Day weekend, I couldn't help but think on the line that says *Let us labor for the Master from the dawn till setting sun, Let us talk of all His wondrous love and care; Then when all of life is over, and our work on earth is done, And the roll is called up yonder, I’ll be there.* HAPPY LABOR DAY!!

When The Roll Is Called Up Yonder

When the trumpet of the Lord shall sound, and time shall be no more,
And the morning breaks, eternal, bright and fair;
When the saved of earth shall gather over on the other shore,
And the roll is called up yonder, I’ll be there.

Refrain

When the roll, is called up yonder,
When the roll is called up yonder I’ll be there.

On that bright and cloudless morning when the dead in Christ shall rise,
And the glory of His resurrection share;
When His chosen ones shall gather to their home beyond the skies,
And the roll is called up yonder, I’ll be there.

Refrain

Let us labor for the Master from the dawn till setting sun,
Let us talk of all His wondrous love and care;
Then when all of life is over, and our work on earth is done,
And the roll is called up yonder, I’ll be there.

Refrain

Reminder: Please go to the bottom of the page and switch off the blog music -- listen to Miss Twila sing and be blessed!!


Old-Fashioned Bake Sale ~ Honey-Bun Cake

Friday, September 2, 2011

Quick reminder - We will be doing the Old-Fashioned Bake Sale GIVEAWAY drawing on Monday -- if you haven't entered in, RUN, don't walk and enter HERE!!

If you haven't guessed, I am a sharer -- you know, one who shares, lol. That includes my recipes -- in fact, I love sharing a new recipe with a friend. I think most cooks are the same way. I have only had 2 people refuse to share a recipe I've asked them for -- one was my friend Cathy and her wonderful Streuseled Topped Sweet Potatoes, which is a favorite of my kids. I understand her reasoning -- we attended a small church and that dish was her speciality -- she didn't want it showing up at potlucks made by someone other than her. Once we moved to Nebraska, she happily shared the recipe (my kids were THRILLED). The other recipe is for something called Honey Bun Cake -- my current Pastor's Wife's specialty. I don't plan to move anytime soon, so I knew if I wanted that recipe, I was going to have to get it from Google. I looked at several versions and tweeked the one I choose (I decided it would have a richer flavor made with butter instead of oil - don't I sound like Miss Paula, lol - and the addition of a little nutmeg sounded perfect) and came up with one my family (and the folks I work with) were thrilled with. Try it -- it will be a potluck hit for sure!


Honey Bun Cake
(Printable Version)

1 pkg yellow or butter cake mix
2 sticks (1 cup) butter, softened
4 eggs
1-8 oz container sour cream
1/2 cup brown sugar
2 tsp ground cinnamon
1/2 tsp nutmeg
1 cup powdered sugar
1 Tbsp milk
1 tsp vanilla

Heat oven to 350°F. Generously grease the bottom of a 9 x 13 pan. Remove 1/2 cup dry cake mix, reserve. Beat remaining dry cake mix, butter, eggs and sour cream in large bowl on medium speed 2 minutes, scraping bowl occasionally. Spread half of the batter in pan. Stir together reserved dry cake mix, brown sugar, cinnamon and nutmeg; sprinkle over batter in pan. Carefully spread remaining batter evenly over cinnamon mixture. (To make spreading easier, drop batter by dollops over cinnamon mixture, then spread carefully with an offset spatula.) Bake 40-45 minutes or until deep golden brown and cake springs back when lightly touched in center. Stir powdered sugar, milk and vanilla until thin enough to drizzle, stirring in additional milk , 1 tsp. at a time if necessary. Poke top of warm cake several times with fork; spread over top of cake. Cool completely, about 1 hour. Store covered. Serves 12 (or 6 if everyone likes this as much as my bunch does, lol).


Did you know?

Thursday, September 1, 2011

September is National Sewing Month!! Do you sew? My start was a rocky one. First I have to say that my Mom wasn't a seamstress but she did go thru a stage where she attempted to make some garments for my sisters and I. Somewhere there is photographic evidence of her attempts -- my 2 sisters and I in MATCHING outfits -- I am the oldest -- pure TORTURE when you are on the verge of being a teenager, lol. Then I was in Miss Swisher's 7th grade Cooking/Sewing class at Woodrow Wilson Jr. High. I aced the cooking semester but hated the sewing semester. We made a gym bag and an apron -- I remember it like it was yesterday (instead of 1972, lol).


My apron was red gingham and I had to take a seam ripper to it (had issues with pleats and gathers) so many times that I am surprised I didn't have holes worn in it. I survived Miss Swisher's class and even got a decent grade. Somehow, I ended up in a more advanced sewing class in 8th grade -- very bad experience that involved a brown plaid jumper and sneaking it home in the above-mentioned gym bag so my Mom could help me set the zipper. I bid good-riddance to sewing after that....I thought forever. I figured sewing just wasn't for me.

Years later, I was a young homemaker on a very slim budget and I wanted new curtains for my little cottage-style home. I decided I'd give sewing another try. I found making curtains and pillows and such a lot of fun and I could do it for a fraction of the cost of ready or custom made. I even made some simple garments for my children. Then I discovered QUILTS!! I was hooked. My skills improved with each new project and it is now something I love to do. I still mostly stick to quilts and home decorating although I now make aprons again -- lots of aprons!

Since this is the official month to promote sewing, I thought I'd do a series of posts on just that -- sewing!! I wish that I had ignited a love of sewing in my daughters but alas, they seem to have no interest -- but I have to remind myself that I didn't have an interest at their ages either -- maybe there is still hope. Through the month of September, I will be posting some simple tutorials and sewing inspired posts and introduce you to a special friend :)