


I thought this was WAY too cute not to share. These young men are Kansas farm boys which are not too different from Nebraska farm boys! Love seeing young people with a passion for farming!
Fern(s)
Tuesday, June 26, 2012


All that to say that I have ALWAYS wanted a big old porch fern -- such an old-fashioned thing in my mind....big old Victorian porches adorned in ferns. Well, there are a few things were needed to fulfill that. ONE is a big old porch - got that - and the other was getting over the fear that I'd kill it, lol.


Last summer I said that *next year* would be the year I'd finally get one. Next year came around. I did do some research and decided on what kind I wanted and I even shopped (a little bit anyway) and didn't find what I wanted. Then my friend Rose (yes, the same one who doesn't like spiders -- and that is a gross understatment), came in to the office and told me our favorite little plant source for the season was selling everything 50% off. I had given up on a fern for this year but still wanted a hanging basket for my back deck. I scurried on over there. I found a perfect basket -- planted in my red, white & blue theme and scooped it right up.

I am sharing at Yvonne's Tutorials, Tips, & Tidbits Party! And Sweet Honey is back to blogging and posting to her Potpourri Friday.
How to care for your fern:
Placement - Put your fern in a location with a lot of light but little direct sun. Early morning and late afternoon direct light is enough, with shade during the rest of the day. An area of high humidity is helpful, but with proper watering (see below), a fern will be fine in a drier area.
Because ferns are so fragile, it is important to place them where tBecause ferns are so fragile, it is important to place them where they will not be crowded or brushed up against. Be sure to allow them to have plenty of "personal space" so that they can spread out and expand. When a fern is crowded into a small space, it tends to do poorly.
The Pot - Use a clay pot or a hanging basket lined with sphagnum moss togrow your fern. Plastic pots aren’t good for drainage, and adequate draining is crucial for a healthy fern.
Because a fern’s roots are near the surface, they should only be grown in shallow pots (about 6 inches deep).
Soil and Mixes - Many horticulturists recommend planting ferns with a special fern potting mixture, which can be found at a nursery. Ferns require loose, quick-draining mix. It is also acceptable to use regular potting mix and add about 20% peat moss.
Watering - Over-watering kills more plants than anything else. Only give your fern water when the soil is starts to look dry. Don’t use a plant mister on your fern. It can cause the fronds (leaves) to brown and wilt.
The soil of your fern should be moist, but never wet. Over-watering a fern is a common mistake. Over-watering can damage a plant’s roots, and once the roots are damaged the plant may not survive.
Because ferns like humidity, fill a tray with pebbles and water (enough water to cover all the pebbles) and place the potted fern on the tray.
Fertilizers - Use a high-nitrogen fertilizer once a month, during the growing season. Only use one-quarter to one-half of the recommendations on the fertilizer package.
Pruning - New ferns will not grow from cuttings.
If you notice brown around the edge of a leaf, and the fern’s condition doesn’t improve after a couple waterings, cut off the sick leaf. Also cut off any dead leaves at the base of the fern.
If the whole fern looks bad, or pests have invaded, just cut the whole plant right above the soil and let it grown again.
Re-potting - Ferns should be re-potted at least once a year, and can be divided easily in more potted plants. Just remove the plant from the pot, divide the roots with a sharp knife, untangle the leaves, and place the ferns into new pots.
But how do you know when to re-pot a fern? The basic rule is this: if the roots have reached the sides and bottom of the pot, it's time to re-pot it.
Growing Outdoors - In favorable climates, ferns can also be grown in a shady garden spot protected from wind and heavy rains. Keep the fern out of direct midday sun and make sure it gets enough water to keep the soil damp. A couple inches of organic mulch (for example, chopped leaves) will help keep an outdoor fern healthy. And again, give the fern enough room – it shouldn’t come close to touching other plants.
Welcome!
Sunday, June 24, 2012

Joining Sunny for her Simple Sunday's.
Low-Carb Living ~ Philly Cheesesteak Stuffed Peppers
Friday, June 22, 2012

Recently, while Pinteresting (yeah, that MUST be a word, lol), I ran into this recipe -- SOOOOOO glad I did because it introduced me to Kyndra Holley's blog Peace, Love and Low Carb. This girl can cook and has some super recipes on her blog -- I could hardly wait to make these wonderful peppers -- they are my new FAV low carb recipe. THANK YOU Kyndra!! Of course, I had to diddle with the recipe a bit -- I LOVE red peppers, so that is how I made mine -- red and green peppers - so yummy!

Philly Cheesesteak Stuffed Peppers
(Printable Version)

(Printable Version)
8 oz. Thinly Sliced Deli Roast Beef
8 Slices Provolone Cheese
2 Large Green, Red or Yellow Bell Peppers
1 Medium Sweet Onion
6 oz. Baby Bella Mushrooms
2 Tbsp Butter
2 Tbsp Olive Oil
1 Tbsp Garlic - Minced
Salt and Pepper - to taste
Slice peppers in half lengthwise, remove ribs and seeds. Slice onions and mushrooms. Saute over medium heat with butter, olive oil, minced garlic and a little salt and pepper. Saute until onions and mushroom are nice and caramelized. About 25-30 minutes. Preheat oven to 400°F. Slice roast beef into thin strips and add to the onion and mushroom mixture. Allow to cook 5-10 minutes. Line the inside of each pepper with a slice of provolone cheese. Fill each pepper with meat mixture until they are nearly overflowing. Top each pepper with another slice of provolone cheese. Bake for 15-20 minutes until the cheese on top is golden brown. Serve and Enjoy!!
Makes 4 servings - 6 net carbs per serving
Posting to Foodie Friday at Rattlebridge Farm. So many wonderful cooks and recipes there every week!
Posting to Foodie Friday at Rattlebridge Farm. So many wonderful cooks and recipes there every week!
Goodbye Old Friend!
Thursday, June 21, 2012
I have been doing some down-sizing. Actually a lot of down-sizing. The divorce meant a smaller house and still lots of BIG furnishings....and a garage FULL of STUFF. I've done a great job of reducing the stuff. It feels great to have a lighter load - in every way possible. Honestly, some things were easy to part with and some things a little harder.
The LAST of the BIG things I wanted to have gone was my antique upright grand piano.
 I do want to say that I love this piano - it is beautiful and I have enjoyed having in my home all this time BUT it isn't too practical in a small home and I don't play and daughter had no interest in taking it with her - that meant finding it a new home. No easy feat. Actually, I was recently told it would be impossible -- "no one wants those old things" was what I was told. I talked to a guy who had come to pick up an old wood burning stove from the garage for scrap and he said he'd take the piano. I couldn't do it. I told him I'd call if I changed my mind but there had to be someone who would want and love this old beauty as much as I have. Maybe they would have little girls who wanted to take lessons. I have no issue with little boys playing piano but this one was bought for my daughter to play and it came from a home where the daughter played -- just seemed like it needed to go to a little girl. I began praying......then I listed it on Craigslist.
 I got lots of groovy spam-like responses and then the one I had been waiting for. A young woman was looking for a piano for her daughters (3 of them). She came over the next week-end and loved the piano. Her eyes lit up when she saw it and told me she was excited to decorate it for CHRISTmas...... I knew it was a perfect fit - THANK-YOU LORD!
 Today is the day it gets moved from my home to hers. I am sad to see the piano go but will smile each time I think of those sweet little girls playing it. I feel blessed in every way....and I think the new owner feels the same way!


The LAST of the BIG things I wanted to have gone was my antique upright grand piano.


The movers showed up at 7AM and made short work of what seemed like a monumental task.

Goodbye old friend ... I will miss you but am so very thrilled for you too. Enjoy your new little girlies!
A DIY Weekend :)
Monday, June 18, 2012
 |
| Photo Creidt: Curbly |
Although I did get to a few projects, we are still *in process* on most so basically I am going to *tell* you about them and then will share some photos -- BIG-reveal-style -- SOON.

Once the porch paint is dried and cured a bit, I can put my vintage wicker furniture back out. Do you
 |
| Faithfulness Farm: Nebraska Junk Jaunt |
Now that my yard has so many more sunny spots sans the trees, I've been looking for gardening inspiration like CRAZY! I ran across this image on Pinterest.....
 |
| Samplers and Santas |
ALL those projects and I also rearranged the living room -- I'll share WHY I did that later this week.
Isn't it great to have company come (my Mom & Dad from Arizona and #1 Son from Minnesota) to light a fire under the hiney and get some of the STUFF crossed off the list!
Wishing a WONDERFUL week -- I'll be putting finishing touches on THINGS -- can't wait to show YOU! What is on YOUR DIY list?
Adding this post to Yvonne of StoneGable's new Linky party -- TUTORIALS TIPS AND TIDBITS - oh, what FUN!!
Low-Carb Living ~ Layered Summer Chicken Salad
Friday, June 15, 2012

One of my favorite summer delights is fresh berries -- and lucky for me, they can be part of a low carb lifestyle. I grow some strawberry pots but seem to have to fight the squirrels for those -- thankfully, I can always get them at Farmer's Market (our market opened last weekend -- looking forward to going tomorrow) during our season. Oh, and this salad is a GREAT fly-under-the-radar low carb recipe -- I served to a friend who was without a clue that it was low-carb -- love that! I plan to try it with blueberries and feta cheese in place of the strawberries and gorganzola....a combination of blueberries, strawberries and feta would make a GREAT red, white & blue salad for the 4th :)
Layered Summer Chicken Salad
(Printable Version)
7 cups torn romaine lettuce
4 cups cooked chicken breast, cubed
1 cup (4 ounces) crumbled gorgonzola cheese
1 cup pecan halves
1 quart (3 cups) fresh strawberries, quartered
Dressing:
1/3 cup olive oil
2 Tbsp splenda
1/2 tsp salt
3 Tbsp red wine vinegar
1 tsp Dijon mustard
1 clove garlic, finely minced
In deep 3-quart salad bowl, place half of the lettuce. Layer with chicken, cheese, pecan halves, remaining lettuce and strawberries. Put all the dressing ingredients into a mason jar and shake until well blended. Just before serving, pour dressing over salad. Serves 6.
Calories per serving: 478
Net carbs per serving: 8
Happy Flag Day!
Thursday, June 14, 2012

Every year I plant my annual pots in some sort of *theme* -- this year is red, white & blues! I simply love these blue petunias and their white *stars* -- they seemed made just for my theme. I'll show more of my annuals in the next couple weeks.
Have I mentioned that in the summer months I only work a 4 day week? I take Thursday's off. It is my fluff my nest day and I simply love it. My current fluffing includes painting my front porch. It has been quite a job and I am really looking forward to having it completed. My antique wicker is all refreshed with a new coat of paint and cushion covers and I am looking forward to hanging my buntings and having my porch all *decked* out for 4th of July -- I'm having company. Mom and Dad are coming from Arizona and my oldest son will be here from Minnesota -- oldest son was born on 4th of July! :)
TIMBER!!
Monday, June 11, 2012
Do you remember me saying last winter that my favorite tree had been damaged in our last snow storm? As a rule, trees don't fair well on the prairie.

That prompted a visit from the *tree guy*. He said he would be able to trim and save this tree.


AND I've planted SUNFLOWERS because now the sun can reach them.
Things change -- change can be good!
Posting to Sunny Simple Sunday's!
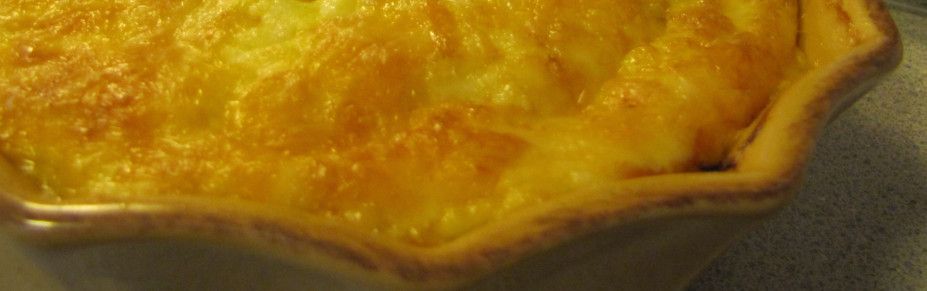
Low-Carb Living ~ Melt In Your Mouth Chicken
Friday, June 8, 2012


Melt in your Mouth Chicken
(Printable Version)
4 boneless chicken breast halves
2/3 cup mayonnaise
1/2 cup freshly grated Parmesan cheese
1/2 teaspoon salt
1/2 teaspoon ground black pepper
1 teaspoon garlic powder
Mix mayo, cheese, and seasonings. Place chicken pieces in a 9x13 baking dish. Spoon mayo mixture onto tops and sides of chicken. Bake uncovered at 375°F for about 30-40 minutes, or until cooked through.
The carb count of your final recipe will depend on the mayo and cheese you use. Mine had ZERO net carbs.

Happy Weekend! I have a long list of projects that I will be working on....how about you? What is on your weekend list?
We Have Gooseberry Patch WINNERS!!
Friday, June 1, 2012

First the THANK-YOU's! Thank-you to Gooseberry Patch for providing the cookbook for giveaway. Your cookbook are the BEST. And thank-you to all the contributors that make their books possible -- the BEST of the BEST!
Thank-you to bloggy friends, old and new for leaving such sweet comments. I have some fun things planned for the blog this summer and hope you continue to follow along!
AND my BIGGEST thank-you to my sweet daughter who always does all the work to determine who the winner (in this case WINNERS) is!! AND what a treat the winners are in for -- this book has quickly become my FAVORITE!! IF you did not win a copy and would like to order one for yourself, use the link below the book photo.
 |
| Gooseberry Patch's The Harvest Table |
Okay -- now for the winners!!
Denise of Ladybug Loves Lilacs
AND
Heather of Heather's Blog-O-Rama
CONGRATULATIONS!! You each will get your own copy of The Harvest Table and the Faithfulness Farm Apron & Tee Towel Set.

Subscribe to:
Posts (Atom)


